Showing posts with label Kitchen Tips. Show all posts

Thursday, November 2, 2023

Use up the batter


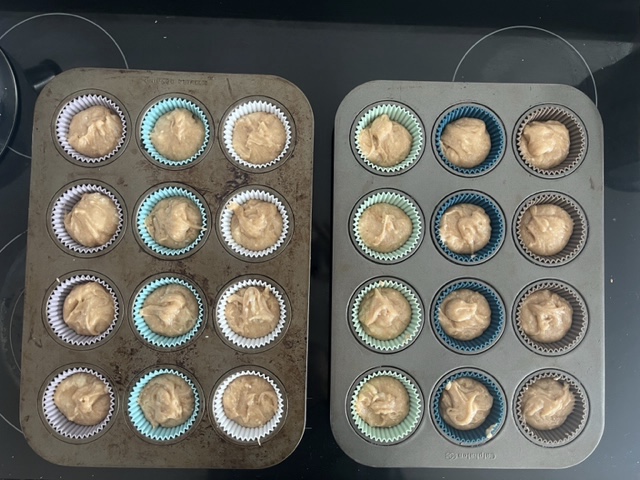
Ok this one seems pretty simple, but really, think about it.  How many times do you use all the batter?  If you follow most muffin recipes, you end up with a little extra at the end.  Don't forget that spatula! It can scrap the batter to give you a whole extra muffin or cupcake! Sometimes I've even gotten two extra muffins!  

Too often we throw things out because it doesn't seem like there's much.  But, those small things add up.  Every time I make muffins, if I were to throw out the little bit that I could scrap  to make one more muffin, after 12 times of making muffins or cupcakes, I'd have another whole set of muffins!

Really, I know it doesn't seem like a lot, but those little things add up and thats where you start saving money.  

Enjoy today's little quick tip

Blessings 


Thursday, October 12, 2023

Weekly schedule after grocery shopping


So, I've shared a lot of things I do to save on groceries.  A lot are things that take some prep work when you get home and that can be a little daunting to get started. So I wanted to share my tips and tricks for how I go about it. 

There are 3-4 big things that I need to get done for prep when I get back from the grocery store.  If you've been following my blog these last few months you'll notice a few I've talked about.  They are as follows: 

1. Fruits & veggies following Amy Cross from A Cross legacy 

2. Dividing up the eggs 

3.  Making the cheese sticks

4. Dividing up the meat

When we are talking 2 weeks of fruits and veggies + 5-10 lbs of hamburger meat + 7-8 chicken breasts + 60 eggs + making your own cheese sticks, that can add up fast.  Let's be honest after a long shopping trip the last thing I want is extra work to put it all away.  So, I've started dividing up the chores.  

On the day I get home from the store: 

First, I divide up the eggs.  I have 4-5 18 egg cartons that I divide up the 60 eggs into.  That doesn't take that long and it's done. 

Second, I wash and prepare all my fruits and veggies.  You can check out Amy Cross' blog for her how-tos for the different fruits and veggies.  But, I usually can work on that as I unload a few groceries here and there.  

Then, I get the meat and cheese in the fridge as I bought it.  I don't worry about dividing it up right at that moment.  

Later that week: 

In the next few days, I take time to cut up the cheese into cheese sticks.  This isn't something that takes a lot of time, but to have to plan on cutting it up right after I get home can seem overwhelming, I mean I'm ready to sit for a bit, so I wait and do that within a day or two of the shopping trip.  Any more time and then I won't get it done either.  Make it a "chore" on your to-do list if you need to.  

Finally, I divide up the meat as I use it that week.  Usually, the hamburger meat and chicken are good in their packages for a few days.  The first night we have something with chicken, I divide the rest of it up as I'm cooking.  Same goes for the hamburger meat.  This also saves me from freezing it all and having to thaw something right after I bought it.  

And that's it! Rather than get everything done as I get home, it's nice to divide and conquer.  I hope it helps you if you are beginning to buy more in bulk or make your own items.  


What are some things you do that help you unload groceries? 

Friday, September 29, 2023

Breadcrumbs Re-visited


Way back I wrote about how I use breadcrumbs.  If you didn't see it you can check out that post here: Bread Crumbs. A pretty simple concept, but a process that can save you money over time.  If you've already started saving those bread crumbs from your toaster drawer, then this won't be a huge change as well. 

If you're like our house your kiddos don't eat their crust very often.  Most days, I will eat their crust, but there are days I just don't want to.  I started adding the crust pieces to my bread crumb jar.  I keep my bread crumb jar in the freezer so after a few days the crust pieces are easy to break down and crumble.  


This is just one more way you can get bread crumbs.  This has been really helpful with our family's recent shift in being more gluten free.  We don't all need to be gluten free, but my youngest has done better when she's not eating gluten.  With that, she also doesn't like the crust.  We now have a bread crumb jar and a GF bread crumb jar in our freezer.  Instead of having to buy GF bread crumbs, we were able to make our own without spending any extra money.  That is huge when GF food is just so much more pricey. 

Hope this helps you save a little 

Blessings, 


Thursday, September 21, 2023

Potato Soup with Sausage

    As I said in my previous soup post, it's soup season!  Being one who really likes soup, IF I had my way, we'd have soup 2-3 times a week during this time.  But, alas I have children and so we have soup twice a month at most. If you missed my last post on how to make your garden produce go farther by making soup you can check it out here: Soup.  Potato soup is my favorite soup.  I have different versions of potato soup that I make, but one way the whole family enjoys is adding sausage. 

We have made potato soup based on recipe I found years ago that added andouille sausage.  It's really good.  But, I wanted to make it cheaper.  So one day I bought a summer sausage.  Now, summer sausage is a little more, but I halved it and only added half the sausage in the potato soup and then froze the other half for another time.  You can do this with the andouille sausage as well, but there's just a little more sausage to the summer sausage roll so I found it works a little better.  Also, if you have a SAMS' CLUB or COSTCO membership, you usually can get them even cheaper in bulk. 

Another way, I've cut back on the expense of sausage in our potato soup is by using pork sausage.  Pork sausage is even less expensive than summer or andouille sausage.  If you can handle the more ground beef texture in your potato soup then this would work great. I accidentally stumbled upon this one time when I was cleaning out the fridge.  We had a little pork sausage and potato soup leftover, I decided to just combine them and see.  I actually really like it this way; however my family does not agree, so we stick to the summer sausage, but only use half the roll each time.  

Andouille sausage: $4.69/lb

Summer sausage: $4.74/lb

pork sausage: $2.32/lb 


Thursday, September 14, 2023

Soup


As we near Fall, we near soup season.  Although, I'm one that can eat soup all year long, but that's not the case with everyone else in my family.  So, I save soup for the Fall and Winter seasons.  I really enjoy making homemade soup and one thing that works great is to use up all those vegetables that you haven't used from your garden to make your soup.  Then you can store the soup in smaller containers and freeze for when you need them.  

This is great for those busy school nights, just pop a container or two out of the freezer and put in your fridge in the morning.  Then around supper, all you need to do is reheat it.  Quick, easy and you saved money by using produce from your garden.  

Garden Produce

Here are some garden produce that are great to add to soups:  

  • squash
  • peppers - ours had a woody taste this year,  (that's the best way to describe it) but cooked in a soup, you can't tell. 
  • tomatoes - all tomatoes work well in soup.  I accidentally planted multiple cherry tomatoes this year and we don't like tomatoes.  I usually use them to make sauce.  So I found myself with a lot of cherry tomatoes to use up.  I gave away a bunch and then added the rest to my soup. Also froze them before hand so I could wait to make my soup when I had the time. 
  • cabbage 
  • sweet potato 
  • carrots 

Those are just a few, there's so many more veggies from the grand that are great to use in soups! 

My favorite soups

Potato Soup  

This recipe is one that I start with, but have changed a few things.  Instead of bacon, I use sausage.  Instead of the green onions, I use our onions & peppers from the garden, you could keep the green onions too. 

Cabbage Soup

This one is a great recipe to use up that cabbage, it uses 1/2 a cabbage head!  It also uses up carrots &  potatoes.  Plus, you could cut the sausage in half you used for the potato soup and add the other half to this soup.  We tried this one this late summer and I froze it.  It froze and thawed well (I only had it from for about a month).  Also a great add in after you thaw it, make some white rice and toss it in.   

Autumn Squash & Sweet Potato Soup 

This soup uses squash, sweet potatoes and tomatoes. 


Thursday, August 3, 2023

Great Reads


I've shared a few books over the years and I wanted to make a spot for all of them.  I'm sure I'll add to them, but for now here is a great list of books to help you not only save money, but also do better for the planet as well.  

This post includes affiliate links, which means if you click on the link I get a portion of any sales at NO COST to you.  See my disclosure page for more details. 


1. Naturally Bug Free

This book has many recipes for ways to deter or kill bugs, rodents from your home, pets, self and more. She breaks down the recipes along with the supplies you will need.  She also does a great job of giving you guidelines for what essential oils to use based on age or pets.  At the end of her book she has a great list of resources for where she purchases and more! If you are looking to try and swap your chemically based bug/rodent deterrents this is a great start! I liked this book so much and was trying to use so many recipes I ended up buying my own copy.  I would recommend buying this one instead of just checking it out, but in my opinion always check it out first then buy if you are finding you are using it a lot. 

 2. Just the Essentials 

This is another book that I would recommend owning, just because there are so many different recipes to use and try.  In this book Adrina helps break down essential oils, their potencies and how to use them.  I really like how she helps guide what oils are save for kids and what ones are not.  She has a great collection of homemade recipes for things as simple as perfume all the way up to homemade toothpaste ad deodorant.  If you are looking for ways to switch a lot of your household and beauty/self care products to more natural and homemade, this is a great book option! 

3. Vegetables Love Flowers 

I recently shared this one in my post: Grow Your Own Flower Garden Thanks to this book, I was able to successfully plants flowers in my garden, harvest them for inside enjoyment and help my vegetables grow by having flowers for the pollinators in my garden.  A great resource to have for beginning flower gardening that you want to make work for your garden and inside.  She shows how to cut, when to cut, what to plant and more.  Buy your own copy or check out your local library! 


Thursday, May 11, 2023

Homemade Compost


So I've been working on composting the last few years.  When I first started composting, I used a small ceramic compost container that I got from World Market.  When it was full or about 1/week, I'd run it out to my garden and put it in the posts.  However, I wanted to have a bigger compost so that I could do throw even less away. 

A couple years ago I found this sweet galvanized trash can at Walmart on sale...only $11.00!  It was perfect, I was so excited! 


Then my husband drilled some holes all around the sides. 


It was so simple to make!  We added a couple cinder blocks for it to sit on in our backyard.  That's it! 

Now, I am able to dump my under the sink compost right out my back door into this larger compost, along with clippings from our yard and I can make my own compost! 


Last Fall was the first time I added the compost from this bin to my garden.  We recently planted some vegetables and the soil was so soft and easy to till.  I did give my larger compost in the can two years before I used it on my garden.  BUT, it is large enough that I didn't have to empty it in-between and was able to add all our food scraps throughout the year. 


So if you are looking to make your own compost, grab an old trashcan, plastic works too, and get started.  It really is easy to do!  Just make sure to layer brown items too; egg cartons, toilet paper rolls, leaves, that will help it to not be too wet.  


Thursday, April 13, 2023

Newspaper Trashbags


A couple weeks ago I posted some life hacks.  One of the life hacks I talked about was making trash bags out of newspapers, from the blog Improvised Life.  If you missed it you can check it out here.  I wanted to take it a step further and try what Improvised Life does, only make it for my larger trash can in my girls' bathroom.   

These trash can liners are easy to make and are a great way to help out the environment. Instead of buying more plastic, you are reusing what you have.  So I figured if I can make it work for a small can, why not try a larger one?  

In order to do this, you will need 4 sheets of newspaper instead of just the 1 sheet. After that the process is merely the same, you just need to connect the 4 pieces.  

This post includes affiliate links, which means if you click on the link I get a portion of any sales at NO COST to you.  See my disclosure page for more details. 


Step 1: 

First take 2 sheets and staple the edges together.  To do this you need to first fold about an inch on each edge, then you can staple the edges together.  Staples break down, which is why I chose to use them.  Make sure to staple close together so you don't have gaps in your bag later. 


Step 2: 

Second, take the other two pieces of newspaper and do the same. 

Step 3:

Then, you will do the same with your two larger pieces of newspaper and connect them together. This can get a bit tricky as the edges have staples, so just watch as you fold. 


Step 4: 


Flip it all over.  Before you start the fold, you want to have the folded staple parts on the bottom.  


Step 5:

Start the folding process.  It is the same process as the smaller folding process.  It really does fold better than you think even though it's so much bigger.  Don't worry about making the lines crease tightly.  You can watch the video from Improvised Life here or you can follow along below with a step-by-step tutorial: 

Step 1: Place newspaper at a diagonal, then fold in half. 
Step 2: Fold the newspaper in half 
Step 3: Take the right corner and fold it over to the left side.  Make sure the bottom has a flat edge. 
Step 4: Flip over the newspaper and repeat step 3, just fold over the other left side to the right side. 
Step 5: Then take the flap and fold it into the pocket. 
Step 6: Flip over and repeat on the other side. 

One extra step for the larger newspaper bag that I've learned is to staple the sides together.  Where the corner kind of sticks out a bit, on the larger bag it's a lot more and so I just staple it to the side.  


That's it! Remember you can check out the youtube video posted on the Improvised Life post for a visual.


So far, I've been happy with this as a trash bag in my girls' bathroom.  But, if you want to help the environment by switching from plastic and don't want to make a newspaper trash bag, check out the Amazon link at the bottom for another option.  I use these green bags for  my kitchen trash.  I'll be honest, I tried the larger newspaper bags for the kitchen trashcan and let me just say, they don't work well for large amounts of mess.  But, I really like these green bags for the kitchen, they work great!  If you can buy them in bulk, it makes the cost a lot less and closer to the plastic you already get! Plus, you can split the bigger bulk size with a friend & it helps the cost! 


I hope you were inspired to find a way to be a little more environmental.

~ Blessings 


Thursday, February 23, 2023

Life Hacks

 Here are 3 simple life hacks. 

1. Use hangers as clips 

Did you know you can re-use those pant hangers for clips in your kitchen? Super easy, just break off the clip part!  I recommend using a sharp pair of scissors first to cut it a bit.  Then just bend back and forth and you have a clip for your chips, cereal, or anything else you may need a clip for in the kitchen! 

2. Newspaper trash bags

WHAT? Yes! You can make trash bags out of newspapers.  This isn't a new idea, in fact, it's been around since Audrey Hepburn, but, what a great way to cut back on plastic PLUS, save some money!  You don't need a lot of newspaper, just one sheet actually. Then it's a basic origami fold.  Check out this post by Improvised Life for the how-to.  


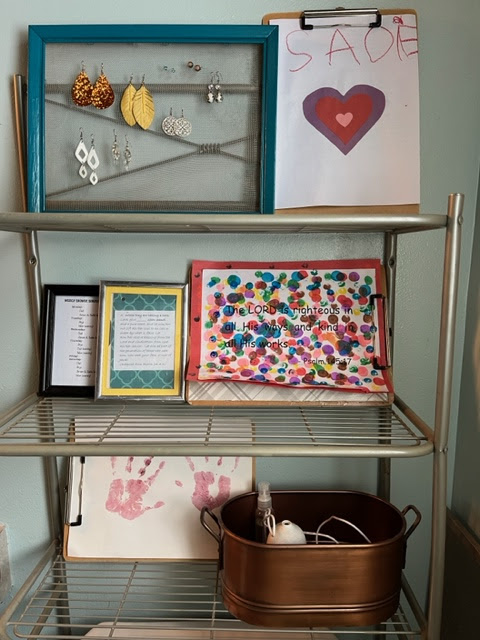
3. Clipboards for kid art 

Sometimes those school artwork pieces don't fit your normal 8x10 frame.  Over the years, I've accumulated a bit of artwork from my girls from school and other areas.  Recently I stumbled across a way to display their artwork without having to spend anything.  We had a few clipboards in a drawer.  So I tried them out.  They work great! The best part about them is they don't leave tape damage on the artwork! Plus, with them not being closed in the artwork is able to move freely.  They work for so may different sizes of artwork! 


Thursday, February 16, 2023

Silicone ~ Mats & Cupcake liners


    Ok so I know that this blog is about saving money not spending money. And I know I did a post last month on a spending freeze, but when you are back to spending money I have a couple that will save you in the long run.  Sometimes we make purchases that spend a little more in the beginning, because over time they will save you more. 

With that, have you heard of the silicone mats? Silicone is all the rage now in many items.  I wanted to share about two that I've been using for a while now and think are worth the money spent on them, which really isn't that much!

     This post includes affiliate links, which means if you click on the link I get a portion of any sales at NO COST to you.  See my disclosure page for more details. 

First up; Silicone mats! 

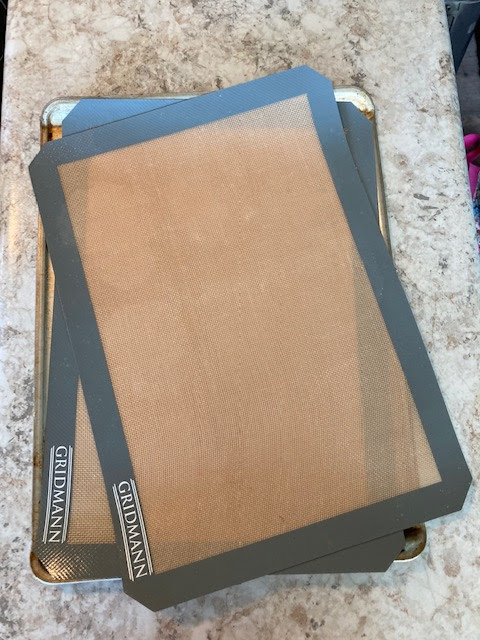
I shared a while ago on my IG feed about how easy they are to use, but I thought I'd share a little more in depth about them.  Why silicone mats? 

1. They are reusable, instead of using a different sheet of wax paper each time and throwing it away, you can rinse the silicone mats and store for another time! 

2. They make clean-up a breeze! No more cleaning those pans, just the mats! 

3. They are non-stick! You don't even need to spray them, just drop your cookies and you're good to go! No more using that spray oil!  


Second: Silicone cupcake liners: 


Ok, so once I was hooked on the silicone mats, I started to hear about silicone cupcake liners.  Guys! They are awesome! I have one set and want to buy another! They clean up well and work great for baking! All the good things with silicone mats apply to the cupcake liners too! 

I'm pretty plain and I wanted them to match my kitchen so I went with the grey/teal/white set.  But, I'd like to get either the rainbow or a set of a fun color for birthdays! 

Also, my sister found this cute idea on IG about using them for kids at Thanksgiving.  We tried it this last Thanksgiving and it worked awesome! They were the perfect portion size for the kids. The cups kept their food separated AND it was fun for them too! 

Sorry, the photos are real life, I was not planning on needing to use these at the time.  


So when you are spending again add these two items to your list! In the long run you will save because you won't be re-buying a product to use-up. Plus you'll be helping out out planet in the save process! 


Thursday, January 26, 2023

Homemade Hot chocolate


Oh my word, can I just start off by saving we have gone through so much hot chocolate this winter! One of the reasons is because we've had a lot of snow. Lots & LOTS of SNOW to be exact!! Seriously, I can't even count how much we've gotten at this point except that we've had 8 snow days due to it!  SO, with that we have drank a lot of hot coco! 

I have referenced making homemade hot chocolate in a couple different blog posts over the years, but I wanted to devote one just to hot chocolate. 

First of all, we've used this recipe from Eating on a Dime for years and we really do like it.  A couple things I've learned with this recipe over the years. 

1. Add the salt: 

    In a previous post I had said we didn't add the salt, but recently I was told how salt is a flavor enhancer so I would say add it for sure!  It will help! 

2. Add a little more sugar:

    Let's be honest, homemade hot chocolate is not healthy, it's hot chocolate.  BUT, it's better than store bought because you know what you are putting in it.  If you are switching from store bought to homemade you are going to notice a difference in the sweetness, especially your kiddos.  So I started by adding a little more sugar to the mixture. Then you can slowly pull back on the sugar as taste buds adjust. 

3. Ease into homemade:  

This is my preference instead of adding sugar, but it just takes longer.  Make your batch of homemade hot coco following Eating on a Dime's recipe. Then, buy the big container of store bought hot chocolate. Taking a new jar, put 1/2 of the store bought into the jar & 1/2 of the homemade into the jar.  Shake well. As you use it continue to add a little of each, but slowly taper off on the store bought and use more of the homemade each time.  Again, eventually your tastebuds will adjust. 

So if you are looking for a way to save this winter, try making homemade hot chocolate; you'll save money and be a little healthier too, (but remember it's hot chocolate)! And if you live where I do just sip and enjoy the snow! 


Thursday, January 19, 2023

Ice Cream bucket = free storage


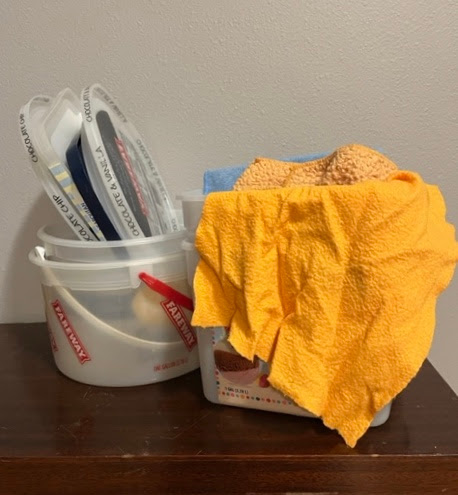
Way back when I first started my blog, I did a post or two on re-using ice cream buckets as storage. You can check them out here: Ice Cream bucket storage or 3 ways to use that Ice Cream bucket but over the years I've added a few new ways to re-use that ice cream bucket and wanted to share. 

1. Freezer storage: 

This is my new favorite! We have a deep freezer and if you have one you know how hard it is to lose something at the bottom. Well, if you use ice cream buckets to store your items in it helps getting those items from the bottom better.  Things I use my buckets for in the freezer: 

  • meat
  • homemade cookies/treats
  • gluten free items 
  • homemade mini pizzas

2. Storage in your shed: 

I recently have been trying to organize our shed better.  Here are some ways I organize with the buckets in my shed: 
  • gardening gloves (mine + my girls) 
  • seed packets 
  • soil pods
  • gardening tools + markers 
  • summer toys for girls 

3. Pots for your plants:

In the last couple of years, I've become a plant lady. Well, I always have enjoyed plants, but in the last few years I've added a lot of plants to my house.  It started with a couple as gifts from my grandpa-in-law's funeral.  My husband and I were gifted two beautiful plants to take home, since then I have added many more! Ice cream buckets make great pots for plants; especially if you don't want to spend a lot. 

4. Outside toy storage: 

We have a big toy box we keep summer toys in.  After awhile the toys were just getting dumped.  So I took some of our ice cream buckets to use: 
  • jump ropes 
  • chalk 
  • bubbles

5. Around the house: 

  • Use for plastic bags: both ziplock or grocery bags  
  • Kids' toys 
  • cat/dog toys 
  • homemade baby wipes 

Thursday, January 12, 2023

January Spending Freeze


This post includes affiliate links, which means if you click on the link I get a portion of any sales at NO COST to you.  See my disclosure page for more details. 

    January calls for a spending freeze in our house. What's a spending freeze you ask?  Well you really can make it work how you want, but the basic idea is it helps you to spend less in the month of January, and even February or as long as you choose to follow it. In our house my goal is Jan-Feb., after that I'm usually ready to stop, but that's just my preference.  However; let me explain to you what all a spending freeze is plus ways you can incorporate it and then you can decide how you want to go about it. Let's get started!

First of all, as I stated above a spending freeze is a way to save.  Basically, it's giving you permission to not spend. Sometimes we need that don't we?  Even though we know we shouldn't spend, it's nice to have a way to say, "sorry I can't".  So that's what a spending freeze in short is. 

Secondly, there are many ways to have a spending freeze. Here are the questions to ask when starting your spending freeze. 

1. What do I WANT to spend my money on this month? 

    For example, we usually say only the basics:  Groceries, gas, house payment, heat, phones, giving etc. 

2. What do I NOT WANT to spend my money on this month? 

    For example, eating out, getting coffee, buying those small items that don't feel they add up, but they do, EVEN IF it's a good sale.  Really, this is where you can make your list big or small.  Do you participate in a get together each month and go for coffee, would you want to keep that or not, you're choice. This is the part where you can make your list big or small depending on what you want to cut out. 

    Some things we include for this; extra snacks, clearance rack, eating out, coffee dates etc. 

3. How long do you want to try this? 

    Like I said we aim for 2 months. You could decide you want to for one month and take it month by month.  Again, that's the easiest part you get to pick. 

    That is the basis of a spending freeze in our household.  Now, this idea is not new, there are many other ways to do this.  You can google spending freeze and have lots of blog posts pop up.  So feel free to take this as a start and research other options.  

Also, let me share with you some other ideas that I've heard of as I was planning out this post: 

1. Don't spend your $5.

    This one is based off the idea that you use cash.  You could switch some of your purchases to cash if you wanted for this purpose.  But the plan is you get your cash in $10 & $20 (think Charlie Brown Christmas) anyways, and then don't spend your $5.  For example, say you go shopping for some clothes and you spend $15, you hand the cashier your $20 and get $5 back.  That $5 goes into an envelope or jar somewhere instead of getting to spend it.  So essentially you "spent" $20 on those clothes at that moment.  At the end of the month you see what you've saved.  Add it to your account or use it for something you are saving for.  

2. Save your change, round up 

    This one is similar to the "don't spend your $5" idea. But instead you just save all your change.  When you go to the coffee shop and spend $5.76, you put the 24 cents into a jar or box.  At the end of the month or year, count to see where you are.  Again deposit into your account or use for something you are saving for. 

3. Shop from your freezer and pantry this month: 

    This is a great time to take stock of what you have.  Jordan Page's Shelftember Challenge is a great way to get started with that.   

4. Use up what you have before you try something new: 

    We've all been there. That new lotion comes out and you want to try it.  But then your old lotion sits on your shelf not being used.  Just like throwing out money.  So, as you are done taking stock of your pantry above, do the same with your toiletries and such.  Don't plan to buy something new until you have used up what you have.  

5. Cross legacy's ways to save on produce: 

    Another great blog to follow is Amy Cross's A Cross Legacy.  She has so many tips on ways to save on groceries throughout the year.  But, she has some great tips on how to use up what you already have too.  PLUS with her process you don't have to go shopping as often which means spending less because we all know we spend more when we go more! 

Plus check out a few different books linked at the bottom that I have found helpful as well. 

But remember, just like all New Year's resolutions, give yourself grace.  This is not as easy as it sounds. especially when you are in the grocery store with your kiddo who just really want that snack that you said you weren't going to get his month. Really, give yourself grace if you spend when you really had planned not to.  It's a process, just a destination.  Every little bit is going to help.  


Thursday, September 22, 2022

Cereal Crumbs for Muffins

 Let's talk how to save on flour. Did you know you could save on flour by replacing it with cereal crumbs?  I've mentioned the Tightwad Gazette before on my blog.  In her book, she talks about making muffins with crumbs of any sort to help cut down on flour.  

*Check out her book linked at the bottom of this post for her muffin recipe.* 

Well, we eat cereal in our household and there's always the crumbs that no one wants in the bowl, but instead of throwing them out you can save them to use as flour! 


This post includes affiliate links, which means if you click on the link I get a portion of any sales at NO COST to you.  See my disclosure page for more details. 


After reading this idea in the Tightwad Gazette, I started attempting it. While I found it worked, I was needing to store the crumbs until I needed them.  So, I have a pint sized jar in my freezer.  Anytime we finish a box of cereal, or crackers I take the crumbs and pour them into the pint sized jar. As the jar gets filled I know I can start making muffins soon.  Before I make the muffins, I take out the crumbs from the jar and blend them up until they are smooth. This helps the flavors blend together better.  Sometimes, if my jar is full of chunks of crackers and cereal, I'll blend it up to see if I can get more in. 


You can use this to make all kinds of muffins.  

We like to add cocoa and make chocolate ones sometimes too!


Also, check out these awesome reusable canning lids! I use them anytime I use a mason jar, but don't need to water bath or pressure can it.  They are super easy to use and are freezer safe! 


Wednesday, August 10, 2022

Homemade Brown Sugar


Dark: molasses, Light: sorghum


This post includes affiliate links, which means if you click on the link I get a portion of any sales at NO COST to you.  See my disclosure page for more details. 

Making homemade brown sugar helps in many ways.  One, it's just helpful to know.  There have been many times I've gone to get brown sugar and realized I didn't have any.  Being able to make my own in the spur of the moment has been so helpful. 

Two, you can gear it toward your family's taste buds. If you look up homemade brown sugar you're going to find the same ratio on almost any blog. 1 TBSP molasses to 1 cup of sugar. Pretty basic. But, you may find that doesn't match the store bought as well. At least, my family did. We use brown sugar when we eat oatmeal.  I put a little in and mix it and then I sprinkle a little on top just for fun.  Well, one of my girls noticed that the homemade brown sugar did not taste the same. However; I just learned how to make brown sugar homemade and I don't want to have to buy it anymore, plus if I make it homemade it's one less plastic bag item I'm purchasing. So I did some experimenting.

I use 1 1/4 cup of sugar to 1 TBSP of molasses.  Molasses does have a strong flavor and that extra 1/4 cup just helped take the edge off.  Plus, you make a little more which means your molasses bottle stretches a little further.

Now, while I was experimenting, I found out that some people use sorghum in place of molasses. While, sorghum is similar; here's what I found on google: molasses is made from sugar cane, sorghum is made from the sorghum plant.  They crush the sorghum stalks, then heat them, steam off the excess water and the sorghum syrup is what's left. Because of this, sorghum is sweeter than molasses. So I did some experimenting with sorghum instead of molasses to make brown sugar. 

Prior to inflation, sorghum was actually cheaper than molasses, making it a better use for homemade brown sugar. However; recently it's prices have increased quite a bit, I 'll break down both options later and you can decide which works for your family best.  Also, if prices ever go back to normal you have this guideline to help you determine which is cheaper.  

With sorghum being sweeter I did only used 1 cup of sugar to 1 TBSP of sorghum.  I found that the brown sugar I made from sorghum was lighter than the molasses brown sugar.  It would depend on if you prefer dark or light brown sugar, but if you prefer dark then you'd need to double the sorghum, keeping the sugar the same.

My how-to: 

1. Add the sugar (I always started with 1 cup before I strayed from the normal ratio)


2. Add the molasses or sorghum (1 TBSP or 2 if using sorghum and want it darker)


3. Mix on level 2 until the consistency is to your preference. I did have to stop it and scrap the bowl a bit and stir a little longer. 


4. Store in a mason glass jar. If you use 1 1/4 cup of sugar you can fit it in a pint size jar. If you double it you will need to use a quart sized jar.  


Now let's break down the prices shall we.  Using the recipe above for the molasses; 1 1/4 cup sugar to 1 TBSP molasses, and keeping everything measured by cups and TBSPs here's what I gathered: 

***Prices will vary depending on where you go and where you are located.***

Molasses:

1 bag of brown sugar costs between $1.70 - $2.29/32oz

    Using the $2.29 cost, this equals about .70cents per recipe or 1 1/4 cup of brown sugar. 

Molasses: $3.48 - $4.49/12oz = This will yield about 24 Tbsps or 24 recipes of brown sugar.  That's .19cents per 1 1/4 cup recipe. 

Sugar: $2.83/4lb = This will yield about 9 cups of sugar or 7 recipes of brown sugar. That's .31cents per cup of sugar + .08cents per 1/4 cup. 

    Using the $4.49 cost of molasses + the $2.83 cost for sugar, this equals about .58cents per recipe or 1 1/4 cup homemade brown sugar.  

As you can see you are saving around .12cents per recipe using molasses. 

Sorghum:

Remember for sorghum I only used 1 cup of sugar to 1/2 TBSPs of sorghum 

Sorghum: $16.99/16oz = This will yield 32 TBSP or 32 recipes of light brown sugar/16 recipes of darker brown sugar. 

Light brown Sugar: One recipe cost would be .84cents 

    Using your .31cents per 1 cup sugar + .53cents per TBSP of sorghum 

Dark brown Sugar: One recipe cost would be $1.37 

    Using your .31cents per 1 cup sugar + $1.06 per TBSP of sorghum 

As you can see right now, you would be paying around .14-.36cents more per recipe using sorghum vs. buying brown sugar. 

So depending on taste will determine if you'd rather use molasses or sorghum.  Luckily, my kiddos prefer the molasses to the sorghum as it's cheaper to make currently.  While sorghum has a sweeter flavor, personally I also feel the molasses tastes the most like the brown sugar in the store.  However, I will be watching those prices of sorghum to see if they go back down below molasses and we will just make another switch if they do! 

Remember it's the small savings that add up.  Plus, you are saving the planet by not buying another item in plastic. Molasses and sorghum both come in a glass jar and sugar in a paper bag.  No more need to buy the plastic wrapped brown sugar.  Save money and the planet!! 

I hope this helps you! 


Pinterest