
So a couple weeks ago I posted on my Facebook page the image of my finished mason jar soap dispensers. This is something that I wanted to make for a long time, but never had the right power tools to do so. Finally, I decided that I was going to use what I had and make one as best as I could. You might seen something like this going around on Pinterest and have thought I'd like to do that, but don't have the power tools I'd need. Well, I'm here to show you, while it does take some time, you can still make it! But really plan to work for a little bit. Find the movie you can watch without watching, the one you've seen 100's of times, pop it in and start making your soap dispenser!

First of all supplies. If you look this up online, most sites will say you need a drill with a large drill bit. While I have access to a drill, we don't have a large enough drill bit. So, I will be showing you how to make it using just a simple hammer and nail, along with some other supplies.
Supplies:
Hammernail (different sizes)
or a large screw
pilers
board to nail on
Mason jar
Mason jar lid and ring
soap pump*
*for this, I just used an old lotion pump after the lotion was gone. They are easy to cut to the size you need.
Step 1:
Gather your supplies (I wouldn't recommend using your cutting board to nail on as the nail will make a hole in your board....I don't speak from experience :) )
Step 2:
Place nail in as centered as possible and starting hammering a hole into the lid.

Step 3:
Hammer a circle around the first hole.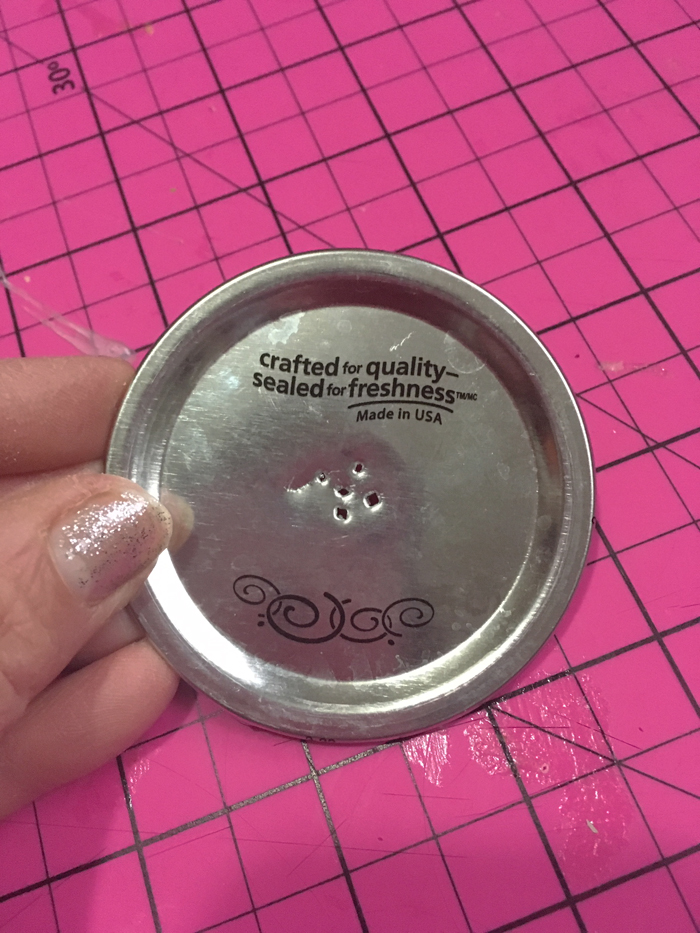

Step 4:
Here you have a couple options. I took a screw and then just hammered it a little. ( I used an old screw that I didn't care if I stripped it & I only hammered it enough to start twisting it).Or, you could use a nail that's a little bigger and nail it in the holes.

This is what it looks like after you work and work making each hole a little bigger. They eventually start to overlap and make a bigger space. This is also where your pilers come into play. As you make the hole larger, you can start to break some of the spaces with pilers too and pull the metal back carefully. If you don't have a hole, the metal will just rip wherever. Having the holes there to guide it helps.

Step 5:
This is a good time to get out the dispenser you want to use and measure. This way you know how much larger you need to make the hole. For this one I was almost there. I didn't need to make it much larger to start getting the first part of the pump dispenser in.
HOWEVER, when you look at your dispenser the topper part is even a little wider. Now, maybe you're asking why didn't you just make that size to start. I'm not great at getting the right circle size, so I like to start small and get the first part through then see how much wider to go. BUT, more power to you if you can figure out the exact size right away. I also am not looking for this to be perfectly centered...that way I have room for edits if need be.

Step 6:
Keep making holes a little larger than the hole you have, use your pilers to pull the metal in places as you slowly make the holes bigger. Remember I said this takes time, but once you get to this stage it starts to go faster.
Step 7:
Make sure the dispenser can fit through, if you have some gaps it's ok, you can fill them in with hot glue.These are two different ones I made, the one on the left has some extra gaps, but it still worked in the end, I just added extra hot glue.


Step 8:
Hot glue the dispenser to the lid. I do this in three parts. First I hot glue the rim of the dispenser to the top of the lid. (This step is okay if you miss, I did it for one, but not my other jar. It helps for those that are a little loose).
Step 8: part 2
Secondly, I turn the lid and dispenser over and hot glue the inside, making sure to cover up as much holes as possible. I usually go over it a few times here just to make sure it's completely covered.
Step 8: part 3
Thirdly, I glue a small amount around the rim on the outside, just to make sure everything is secure. The less holes, the less likely it will rust.
Step 9:
Cutting off the extra. Now, take your dispenser you made, and by the way way to go! This takes a while without power tools and it's so exciting when you've accomplished it! Also, no worries if it didn't work, take some time walk away and try again another day. All you're out is mason jar lid...the rest you can salvage.Anyways, now take your all done, made by yourself soap dispenser and stick it in your jar, measure or guess and cut approximately until you get the length you desire. Don't worry, if it sticks up a little, it helps the soap go through, plus how many times do you let the soap get ALL THE WAY to the bottom? Ok maybe many, but this way you're fill it up sooner :)


And voila you're done!!


