Showing posts with label Holidays. Show all posts

Thursday, October 19, 2023

Travel Snack Prep


It's getting close to travel season and with traveling comes trying to keep the kids happy while you or your spouse is driving.  One way to help keep them happy is to keep them fed.  Let's be honest a fed kiddo is a happy kiddo.  

We went on a long trip this summer to see family in Indiana, for the most part my girls travel well, they've just always had to travel so that helps, but this was going to be a long trip.  So I prepared snack bags for the trip to and from (honestly, who wants to pack snack bags leaving your trip).  That was my best decision, it made packing to come home so much easier! So anyways, here is my how-to on prepping snacks for a long trip or any trip for that matter!

1. Make a schedule - 

Below are my schedules for there and home of our trip this summer.  These are the real scratch lists. They don't need to be pretty, just something that you can reference as you go.  Those longer trips can be harder to keep track of what everyone ate when, this really helped me.  Now, honestly did I follow this schedule like it was set in stone, did we not buy Cheetos at the gas station at one point, no.  Things changed, we had lots of rain, the schedule got bumped up a bit here and there, BUT, I was able to have a guideline to follow, I had a roadmap per say to help me. It was nice to have a reference of what we'd had or had available as we went.  


2. Make a list of snack options - 

I wanted to make sure that even though we were traveling, we were able to get some healthy snacks in along with some treats.  While treats are fun and exciting, it's those healthy snacks that keep everyone sane as well.  Snack ideas: cheese sticks, carrots, applesauce pouches, various cracker snacks, fruit strips, fruit snacks and raisins.

Repacking your own snacks is where you can save some money. Cheese sticks, raisins, and any of the cracker snacks are really easy to prepackage yourself instead of paying for them to be prepackaged.  

  • Cheese sticks: you can easily buy a large block of cheese and cut your own, throw in a cooler bag and voila your own cheese sticks for cheaper.  Check out my post here: Cheese Sticks for more details. 
  • Raisins: Yes it's fun to have your own individual box, but if you buy the large container you can pour your own individual baggies full.  You can also mix in some peanuts or cashews too if you are able. 
  • Cracker snacks: So first of all our youngest is gluten free, so she needs her own individual cracker snacks.  Also, if your house is anything like mine, no one likes the same snacks, so I just grab a few larger containers of the snacks we usually eat and divide up smaller baggies of them for each kiddo.  It beats spending more for the prepackaged + spending even more, because we all want different prepackaged snack bags. 

3Purchase the items needed 

Now that you know what all you want, it's easier to buy your snacks. It's really easy to go shopping and then get a bunch of items because you didn't plan ahead and end up with more than you need or items you weren't planning on.  Also, now that you know what snacks you are planning on saving with making your own, you can pick a few fun items too.  For example, yes it would be cheaper to buy applesauce and use my reusable pouches; however for the 12 hour drive it was not feasible to try and do, and honestly I didn't want to balance that.  So for this trip I saved on the cracker snacks and bought applesauce pouches.  We also bought fruit snacks and fruit strips as a fun treat. Things we don't have often, so it makes it fun.  You'll also note I had cereal listed as the first snack.  For this particular trip we took off early, so I let my girls pick ONE special box of cereal to share.  I then poured it into baggies for them.  Again a special treat, but we limited that one to one option and they only got the one bag full.  

4. Gather all your supplies, label and start packing 

Now, with all these different snacks I'm collecting, I do use our reusable baggies as much as possible.  I don't have any fancy ones we got ours from Walmart.  They work well, except the zipper sticks after I use them in the freezer, so if you are in the market for them make sure they are freezer safe.

Anyways, back to gathering your supplies.  I did use regular ziplock bags to hold all the snacks, because I wanted to write on them with Sharpie each kiddos name and either "THERE" or "HOME",  so I knew what bags were for when.  


Then I loaded each bag up.  I started with my schedule and figured out how many fruit strips I'd need for there, then put them in each kiddo's larger bag, then I did the same for the fruit snacks, applesauce pouches and raisins.  Then I took the cracker snacks and decided how many times we'd need a cracker snack and made up their individual bags of their cracker snacks choices and put those in their larger bag.  Then I repeated the process for the the trip home.  Again, seriously, this was my best decision, BECAUSE, I was having too much fun hanging out to want to pack like this while there the night before we came home.  And that worked out great, because it was already done.  

The cooler items, like the carrots, cheese sticks or other veggies I packed the morning of. I got them ready, carrots in one bag, cheese sticks in another, etc.  But, then packed them in the cooler in the morning.  

When I loaded our larger snack bag, I made sure the "HOME" bags were on the bottom and the "THERE" bags were on top. Then I didn't have to dig so much.  

5. Tips & Tricks I learned after 14 hours on the road: 

  1. Pack few extra snacks - you never know what might happen, pouring rain FOREVER or just extra hungry i.e. bored kiddos. I had a bag at the bottom that was leftover items we got; applesauce pouches, fruit snacks, fruit strips and we used a few of them. 
  2. Snack/hour - really even if you don't end up having a snack that often, if you are going for a longer trip plan snack/hour. 
  3. Have those fun snacks intermixed. Whatever is a fun snack for your household, us it's the fruit snacks and fruit strips.  I made sure to have those a few times for our long trip.
So if you are traveling for 5 hours or 20, I hope you find something here that you can use to help make that trip a little less costly, but still being able to have some good snacks along the way.   

Blessings on your upcoming travels 


Thursday, July 13, 2023

Homemade Scavenger Hunts

    Summer is the time for traveling.  And traveling with kids can be an interesting combination.  A while ago I posted about our busy folders that we use for church and traveling.  If you missed it you can check here: Busy Folders . Recently I added a homemade BINGO/scavenger hunt to our busy folders and wanted to share.  

Have you tried BINGOS/scavenger hunts while you travel yet?  They are so fun and they really work great for all ages.  It's a fun new twist on the old games we used to play, you know before DVDs in the car. 

You can search Pinterest for travel scavenger hunt ideas or even download printable ones, or you can make your own.  

Some of our favorite themes and ideas include: 

Fall ~ colorful trees, leaves

Easter ~ flowers, crosses, Easter eggs, bunnies 

Christmas ~ Christmas lights, Christmas trees, manger, snow,  Santa 

Summer ~ flowers, trees

Special places ~ We travel to a couple different cities often and there are certain things our girls want to see.   I include these on the scavenger hunt list as well.  They make for easy spots to mark to keep it going and not drag on. For example, when I was little and we traveled to Missouri and my sister and I always watched out for the green bridges. So if you have a normal route you can think of places to add, this makes it more personable. 

Items you could include on all or a basic list: red car, motorcycle, semi, street lights, highway sign, speed limit sign etc.  I have included our Christmas and general one for you to use.  Just click on the image and right click to save then print. 

Tips and Tricks: 

Pictures for younger kids vs. words 

Markers to cross off the items 

Going further: 

If you want them to be reused; print on cardstock and laminate or use dry erase pockets.  Then use dry erase markers & a reusable towel. This is great for themed scavenger hunts like; Christmas, Thanksgiving, Easter etc. 


Thursday, April 20, 2023

Teacher Appreciation gift ideas


    Teacher Appreciation week is almost here! What a great time to show your kiddos' teachers that they are important.  I've gathered our family's favorite gift ideas that also won't break the bank.  Check them out: 

1. Print-out paper


A couple years ago I found this print-out paper on Pinterest.  It was really fun to do with my kiddos for their teacher.  It helped to make the gift be more from my kiddo than from me.  I wanted it to be more meaningful for my child as well.  This was a great option from The Suburban Mom. 

2. Bouquet of flowers 


        Have you heard of the old-fashioned gift of flowers on the last day of school? Well, the last day of school has changed quite a bit since then, so what better week than Teacher Appreciation week!  These can be hand-picked from your local garden or you can purchase them.  If you purchase them, you can always buy a medium bouquet and spilt it up between your kiddos; the bouquet doesn't have to be big.  

3. A card 


Similar to the first option, you can make a card and have your kiddo write a thank you in it as well.  

4. Their favorite candy 

What a simple gift, but a great way to say thank-you.  This doesn't have to be huge, but a simple candy bar saying thanks.  If you're good with puns you could include one as well. 

5. A book for their classroom 

In our school we have the option to purchase a book for our kids' teachers at conferences from the Book Fair.  The teachers each pick a few books they'd like for their classroom and then parents can buy them in honor of their child.  However, teachers can't have enough books; especially at the elementary level.  Picking out a book from heir classroom is great end of the year gift.  


Hope this helps inspire some ideas! Have a great week, until next time

Blessings, 

Inisha 


Thursday, March 23, 2023

Easter Gift Ideas


Easter is almost here!! With that comes another holiday to get gifts for.  I love Easter, I love Easter because without Easter there would be no way for me to be redeemed.  However, Easter just like other holidays has become a time for lots of gifts, treats and spending money.  Why? Why do we let these special holidays get so wrapped up in the gifts and the spending? Well, I'm here to help you out with minimizing that spending this year.   Plus give you a way to bridge the gap between what Easter is about and gift giving, if you are looking for that. 

Think of the number 3. Yes 3.  3 simple gifts = the 3 days Jesus was in the tomb.  I love to tie my kiddos' gifts to the real meaning of Easter as well.  Any chance to talk and discuss about why we are celebrating Easter. Plus, three is a simple number. 

We have changed over the years what we give our girls, but one thing always stays the same, 3 items. Here are some of the items we've gotten over the years: 

1. Book (this one stays pretty consistent). As the girls get older this has turned into a devotional one year, or a special Bible another year. But, we always get them a book of some sort.  Christianbooks.com has great sales right before Easter, or Thriftbooks.com is another great one to go through as well.  


2. Treats: We always do treats.  We don't go over board with them, they are generally small. Some of our favorites include: 

Fruit snacks, a few pieces of candy in a egg or two, puff corn in a small bag or any other small snack. 


3. Small, simple gift: my husband and I are very into gifts that get used up, rather than another toy to take up space. Some ideas we've done: 

jump ropes, bubbles, gift card to a favorite store or for a coffee date with mom or dad, bath bombs, & coloring books.  These are just a few of what we've done in the past. 


One more thing we do that helps save money, we reuse our Easter decor each year.  From the girls Easter baskets, the plastic eggs, all the way to the green grass.  I save everything and re-use it for the next year.  I've only bought plastic eggs two times in the last eight years.  My girls also love being able to know who's basket is whose because we've been using the same baskets for the last few years. These are just small things that add up over time.  

I pray that these tips help you to stress less and enjoy this season, but also be able to share in the joy of giving as well. 

Blessings ~ 
Inisha  


Thursday, February 2, 2023

Homemade Valentines


This post includes affiliate links, which means if you click on the link I get a portion of any sales at NO COST to you.  See my disclosure page for more details. 


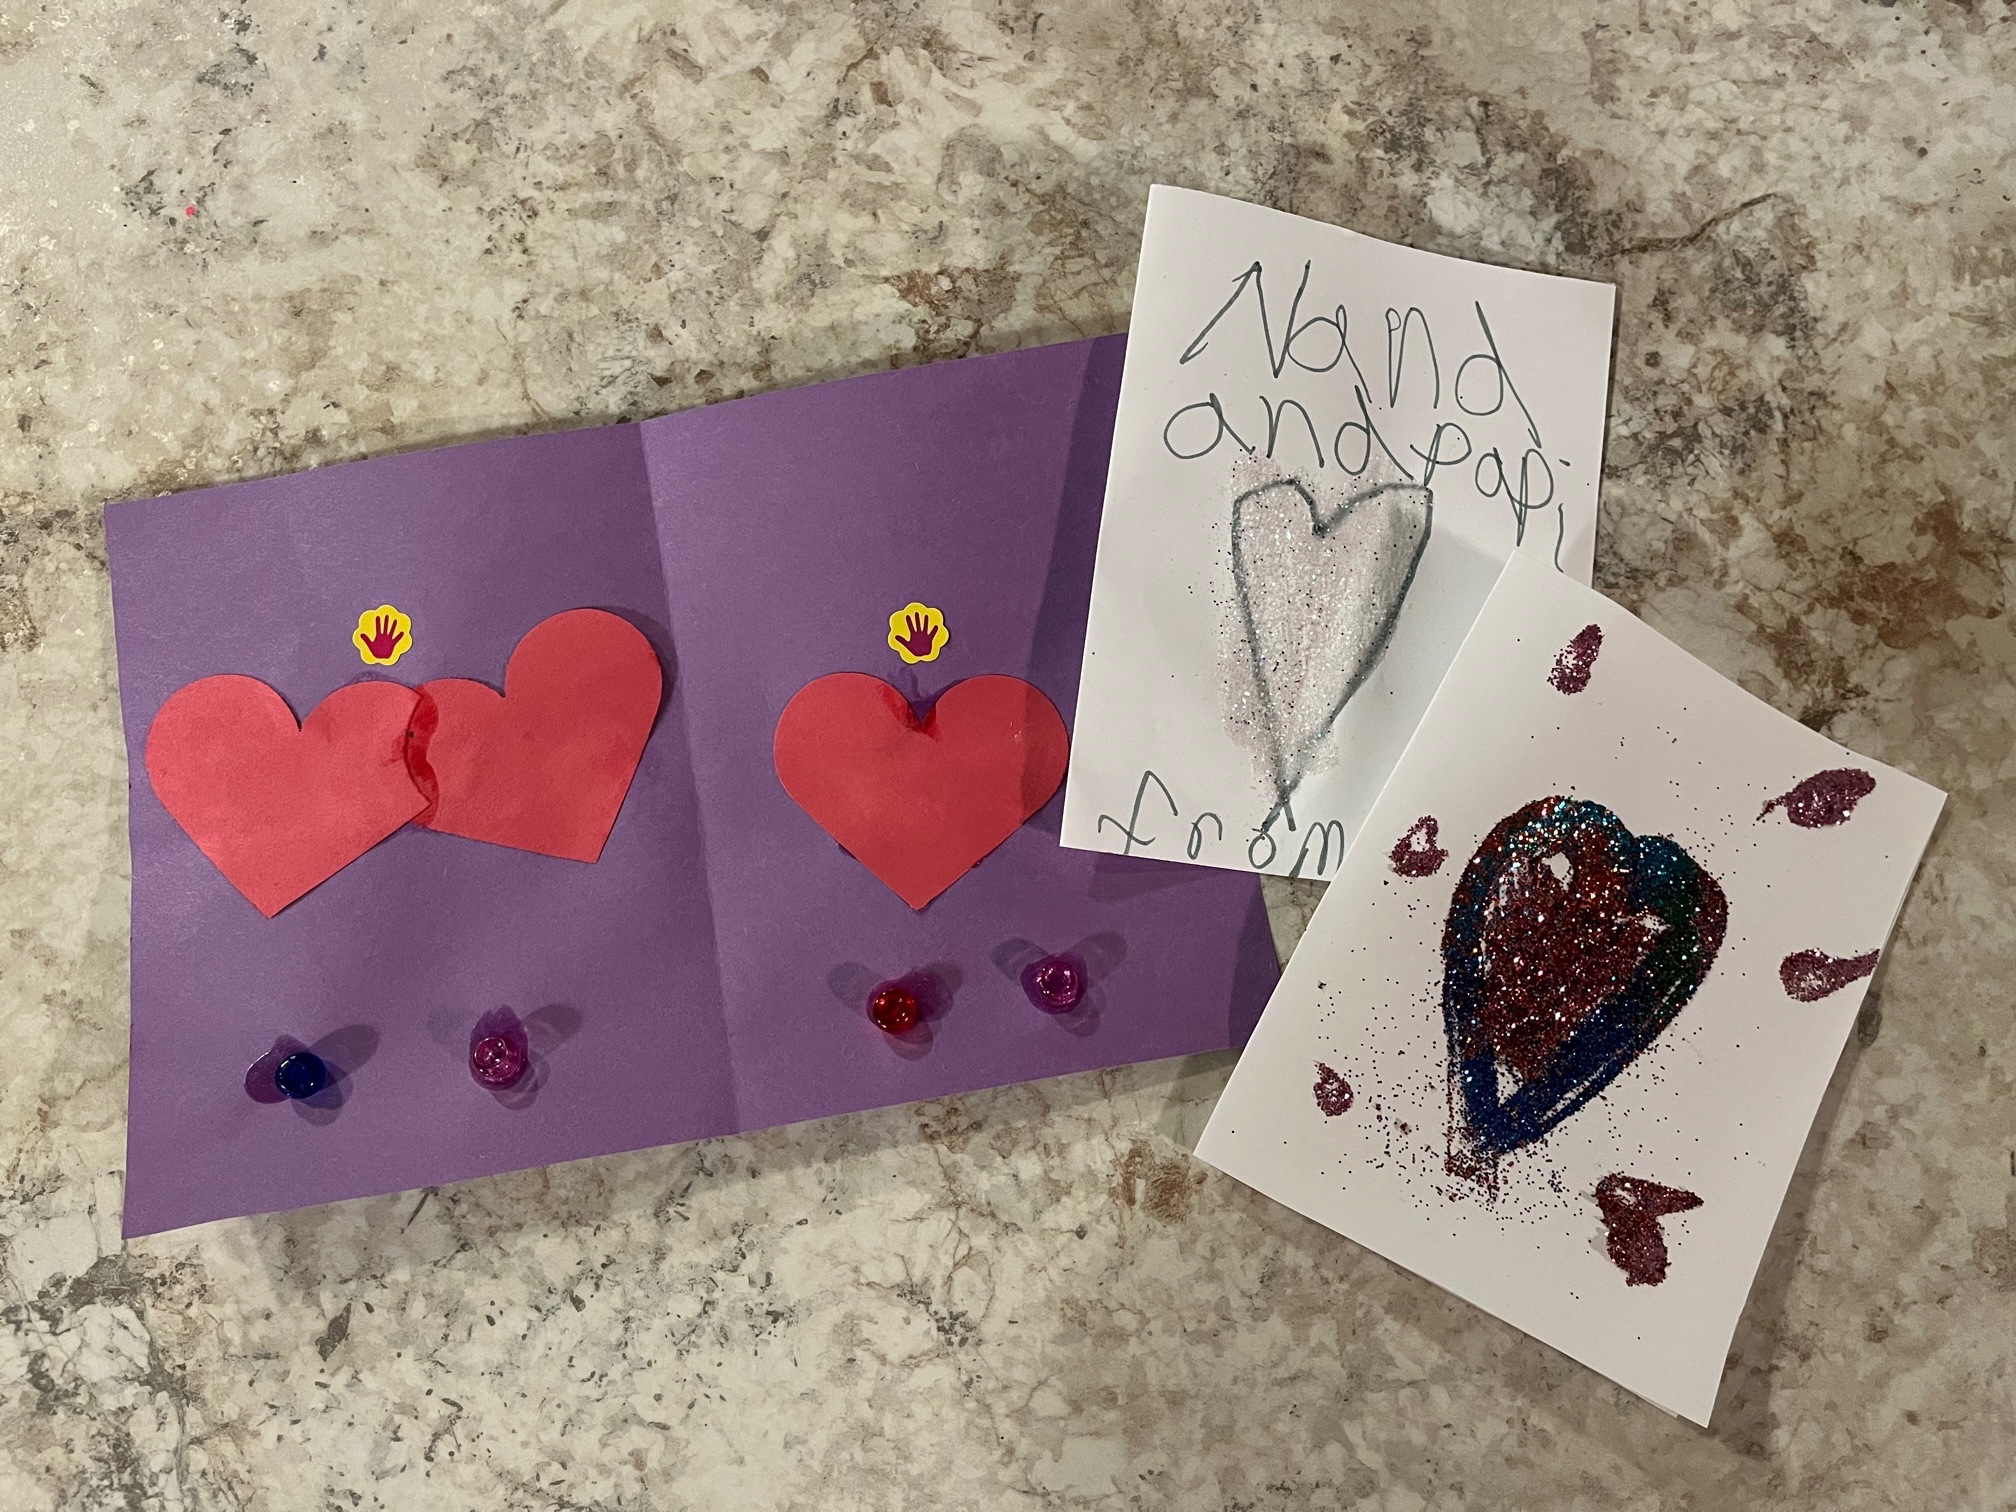
    Valentine's Day is just around the corner! Now's the perfect time to start making those valentines for family and friends.  Homemade Valentine's are so easy to make!  If you are up for some craft time it's a fun project to do with kids. 

In our house, I like to take all the things out and let my girls be creative!  I usually have cards made for them to start. Check below for my easy how to! Then they can write in them, add construction hearts, glitter, glitter glue, felt hearts, stickers and anything else we have on hand that would work. 

The simple way to make a card: 

1. Take a piece of computer paper/white cardstock

2. Fold in half. 

3. Cut on folded line. 

4. Take the two halves and fold each one in half. Now you have two cards.  

   They will fit perfectly in the small photo/invitation envelopes. 

Now, like I said I'm one that lets my girls just go and be creative, but I wasn't always that way. My girls are a little older now so it works for them to be able to do more.  You can set it up however you like.  I'll share some of our different homemade cards for some ideas! 

1. Painted Hand print cards ~

Remember my post about homemade Father's Day cards? Well you can do a similar card for Valentines! Don't remember? You can check it out here. 

2. Glitter heart cards ~

My girls can't get enough glitter.  You can make glitter heart cards two different ways. 

    1. Draw a heart using Elmer's glue and let your kiddos shake some glitter on.  A great way to keep the mess down; put the card on newspaper or wax paper and then shake the extra glitter off onto the newspaper/wax paper. Then you can reuse that glitter for another card, or pour it back into the container. I linked some glitter at the bottom of this page that is similar to what we have and we've used a few times. 


    One tip for using glue: I pour some glue into a small container (we reuse fruit cups) and then let my girls use q-tips.  It makes for a little less mess, because they can't get a lot of glue on the q-tip. 


    2. Using glitter glue, you can draw a heart on the card. Younger kiddos may need help. I linked both bottles and pens at the bottom of this post.  While the pens get used up so fast, sometimes they are easier to squeeze for the younger kiddos.  Although we've had success with the Elmer's bottle glitter glue.  

3. Construction paper heart cards ~


    This one is an easy one. Using construction paper, cut out many different hearts.  Big ones, little ones, pink, red, purple & even blue! Let your kiddos glue them onto the card.  You can overlap them, you can glue one on each spot and so on.  For older kiddos you can draw the heart shape and they can cut it out following the line.

You could even make a card using a heart shape too! 

Or, if you have heart punch you can use that too! 


There you have it! Easy and fun homemade Valentine cards! Some other things that are fun to let them add on the inside, stickers! You can't go wrong with a pack of stickers! 

Now that you have your cards all figured out for family, onto those school Valentines.  Check out a post I did for Traditionally Cozy on ways to make your own Valentines for those school friends! Plus don't forget to check out all their other Valentine's Day ideas, including my favorite: Valentine's Day pancakes! 


Friday, December 2, 2022

Advent


 Looking to make an Advent calendar, but don't want to spend a lot.  

Check out this easy to use Advent calendar we re-use each year! I got tired of having to re-create the Advent calendar on top of scheduling the activities every year.  As my girls get older we are more involved in activities and therefore, just making the schedule is a lot of work.  

So, I created this simple Advent set I can re-use again and again.  I just printed it on card-stock since it holds up better than paper. Then each year I just erase and fill in the new dates and activities.  

Super easy and simple! 

If you want to use the image above: 

  • click on the image
  • Right click to save as a download
  • Then you can print! 

Monday, September 5, 2022

Grandparents Day gifts!


Grandparents Day is; September 11th this year.  Do you have ideas planned for those special grandparents in your kiddos lives? We were blessed to have one set of grandparents move close to us just after COVID hit.  It has been such a blessing! It's hard to remember what we did before they moved here.  First of all Sunday dinners have gotten a whole lot better! 

So, I love that there is a day we can show them how much care even more.  The best part about Grandparent gifts, is I don't know a grandparent who doesn't love a homemade gift from their grandchild.  It doesn't need to be perfect, but that it was made just for them. 

Here are some of our favorite grandparent gifts: 

1. Homemade cards: 

My girls enjoy making cards. We do a lot of crafts in our household and making cards is just another craft. These are easy to do and each kiddo can make them to their ability.  

2. Perler bead creations:

Another thing that's easy to make are the perler bead creations.  Pick a form, let your kiddo fill it in however and then add a magnet to the back. Voila! You have a cute refrigerator magnet. Or, thread a string through it to make an ornament. Also, they make great coasters, make a few and tie a ribbon around them for a coaster set! 

3. Flowers in a vase or pot ( could be store bought or wild):

Take a moment go for a walk and collect some wildflowers.  Put them in a vase and there you go a simple, but pretty gift. You can also purchase a bouquet, put them in a mason jar & tie a ribbon around it! 

4. Candy: I mean I don't think I need to explain this one. 

5. Coupons:

We like homemade coupons in this house.  If you saw my Father's Day gift idea post you know we use them a lot.  What we like about them is you can gear them to a particular person. Here are some ideas we like: 

free ice cream 

1-2 hrs date with said person (this would be good for an older kiddo, gift of their time with their grandparent)

golf date 

coffee date 

Well I hope these ideas help you.  Pair any two together and you are all set! Enjoy! 


Wednesday, November 24, 2021

Homemade & Upcycled ornaments


It's that time of year again! Homemade ornament making season!  This year, as I was contemplating what I wanted to make I decided I wanted to not only spend as little as possible, but also maybe use up some of my craft scrap items.  Ok, so I really didn't know what to call my craft scrap items, so let me explain what those are.  If you've been following my blog you know that not only do I try to spend little on a project, but I also like to up-cycle materials I can't recycle.  With that, my craft scrap items are things that I don't want to throw away to make more trash, but I can't recycle them so they get stored in my craft room to maybe serve a new purpose in the future.  

While I was looking through my craft scrap items, I found a bag full of lids.  Lids from spaghetti jars, jelly jars, pickle jars and more.  Yes, I saved the lids.  I can't get myself to throw them away and I can't recycle them, so I store them in a ziplock bag.  And guess what?! They were the perfect item for my ornament idea!  

This year, my husband and I started Civil War Re-Enactment.  It was something my husband did when he was in middle school and we thought it would be fun to do as a family.  When I was thinking about ornament ideas, my husband mentioned making something that tied into re-enactment. (Each year the girls' ornaments represent something from the year).  Knowing I wanted to do something with a photo of them from Re-Enactment and finding the lids, my idea started forming! 

Ok so that brings me to our project! Did you know you can make cute photo holders out of old lids?  Let me show you how! 

Materials: 

lids from jars (your choice on size)

circle cutter OR sharpie & scissors 

twine or ribbon of choice 

4x6 photo of choice 

hot glue gun & glue sticks 

1st: Cut out your photo based on the size of your jar lid.  

I used lids from spaghetti sauce.  The lids measured about 2 1/2 inches in diameter.  I first used my circle cutter to cut out the photo.  However, after my 2nd photo my blade didn't work, so I just ended up tracing the rest with a sharpie and cutting them out with scissors.  This works just as well, so if you don't have a circle cutter you can still make it work.  Place your lid on the photo you want to use covering the part you want to show case, then trace with a sharpie.  Note that the inside is a little smaller than the outside of the lid, so just cut along the inner part of the sharpie line.  


2nd: Pop the photo in! 

NO GLUING NEEDED! The photo will just pop right in and stay in since there's a rim around the edge of the jar!  Plus, if you ever want to swap out photos you can! 

3rd: Add the twine or ribbon to the back of the lid.

Hot glue the twine or ribbon to the back of the first lid. 


4th: Glue the two lids together. 

Take the 2nd lid (If you want to make it double sided) add hot glue to the edge and press the two lids together. Now you don't have to have the photo ornament be double sided, but you can cover up the hot glue spot if you do.  Plus as it spins you can see two different photos! 

All in all, once I had the photos printed this took me maybe 30 minutes and that was for all three! It's a really fast project!  You can make these photo holders as gifts for Christmas, or a special occasion too! I hope you enjoy!  


You can check out last year's ornament craft here


Tuesday, February 9, 2021

Melted crayons


This post includes affiliate links, which means if you click on the link I get a portion of any sales at NO COST to you.  See my disclosure page for more details. 

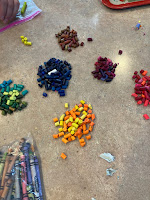
Have broken crayons lying around?  They are perfect to use to remake crayon molds.  At Christmas time we made some trees and stars for family.  Crayon molds are a great gift that kids can help make and they can work for almost any holiday!  


So here's the simple way to make your crayon molds. 

First what you need: 

broken crayons 

silicone molds (shapes of your choice) 

cookie sheet 

oven 

How to make them: 

First: Peel any crayons that need peeled.  Sometimes you need a small knife to slice down the peel. 


Second: Break up your broken crayons enough that they can fit in the mold.  Depending on your molds some of the crayons will need to be broken up even more.   You can use a knife to cut them if needed.  


  Third: Place the crayon pieces into the molds. Make sure to fill the molds pretty well, as they fill less space when liquefied. 


  Fourth: Place the silicone mold on a cookie sheet, bake @ 215 degrees for about 20 min.


Fifth: Take out of the oven and let cool on counter on cookie sheet for a couple minutes.  Then keeping the crayon mold on a cookie sheet place in the fridge for 
about 5-10 min. 

Sixth: Place just the crayon mold in the freezer for about 5 min. 


Seventh: Pop the new crayon molds out of the mold.


And there you have it!  A fun and easy gift for Valentine's!!   


Thursday, December 21, 2017

Homemade Gifts


One of our favorite gifts to give to family and friends during the Christmas season are homemade hot coco jars.  It's super easy for the girls to make so it can be a present from them.  I love having them learn to give gifts early on and this is something that can be truly from them, since they can help make it.  Plus it's affordable.

I've shared this link before, but Eating on a Dime  has a great recipe.

This recipe will fill about 3/4 of a jar so 1 recipe = 1 jar gift.

We made 9 jars this year for our family and friends and spent about $20.00. Even with decorating the jars to make them more festive it didn't cost that much to do.

Here was our breakdown:

Jars - free (I just use old spaghetti jars, pasta jars, pickle jars, etc.) You can see my post for that here.
Dry Milk ~ $6.98 ~ I got about 9 jars out of one bag + I've made it a few times for ourselves. 
Coco Powder ~ $1.98 x 3 = $5.94 ~ You can get about 3 jars out of one container
4lb Sugar* ~ $1.78 x 2 = $3.56 ~ You can get about 7 jars out of one 4lb bag
Mini-marshmellows* ~ $0.99 x 2 = $1.98 ~ You can get about 8 jars out of one bag
Bows ~ $2.50/32 = (You could buy these the day after Christmas and save for next year too) ~ This set had green, red, white, blue & purple bows.  I opted to not use the blue and purple, which left me with 29 bows instead. So I could get 29 jars done, or use for my 9 jars and have bows for presents too.
Tags - free (I just download printable tags and let the girls color them) ~ This is optional, but it gives the kids something else to help make.  If you do have your kiddos make tags, depending on how many you do I'd divide up the tags amongst different days.  My girls got bored coloring after a few tags, so I'd just save the others for another day.  It's no fun if you're making them color :)
Construction paper ~ I usually buy a big pack at the beginning of the school year when school supplies are on sale. 

*bought when on sale and stocked up

Some of the items are things you can save again to re-use for the next year; such as the bows or construction paper. You can even freeze the marshmallows to use again, if you have enough will power. Mine always get eaten before the end of December.  

Well I hope this helps you out this season.  I know Christmas is already on Monday, but if you need a last minute fast gift, these are perfect!  Otherwise just pin this post and save for next year! 


This post includes affiliate links, which means if you click on the link I get a portion of any sales at NO COST to you.  See my disclosure page for more details. 

Thursday, December 7, 2017

Christmas Saving


Christmas is almost here and with it comes all the joy and happiness of the season, but sometimes it also can bring frustration with finances.  Christmas can be expensive, from gifts for co-workers, family and friends to Christmas dinner and all the in betweens.

Sometimes I long for the old-fashioned Christmas, the Christmas' of times like in Avonlea.  Recently, my husband and I have been rewatching Anne of Green Gables.  We watched the new season on Netflix, have you seen it yet?  It's not bad, but I still like the original; however, both make me long for the simplicity of life back then; especially when it came to holidays.  Not only was it simple, it was cost-friendly too. So I came up with some old-fashioned Christmas ideas that will keep your Christmas simple and cost-friendly.


1. Popcorn and cranberry garland

Every year I try to have us make this.  I have this vision in my head of us all sitting around the tree stringing popcorn and talking as a family.  Now, I know with three littles 4 and under this vision is not going to be a reality, but I still want to try.  We've yet to attempt this tradition; however, it's on our Advent calendar so this year it's happening.

Another option from is to make a paper chain garland. 


2. Bake from scratch

Cookies, brownies or any other treat, instead of buying them pre-made or as a kit just make them homemade, it does cost less.  Plus by making your own, you can then divide them up and pass out to your neighbors as a cost-friendly gift or advent activity. My girls and I have made and passed out cookies to our neighbors for the last two years, it's such a fun and simple advent activity that doesn't cost a lot.


3. Make your own wrapping paper

I love doing different things for wrapping at Christmas.  A simple alternative, brown packaging paper (or even the brown filler paper you get in those packages).  You can jazz up brown paper in so many ways.  Here are some of my favorite ways.

Brown paper with stamped name and ribbon ~ from: Confessions of a Wisconsin Housewife
Brown paper with twine and felt flowers ~ from: Design Dump
Brown paper with photo of gift recipient ~ from: Our Suburban Farm

Other ideas for brown paper:
add lime green &/or red duct tape or washi tape
add just a large initial of the recipient


4. Go caroling

Just like the popcorn string, I try to find a way to go caroling every year.  This year I was talking to my husband about how in just a few years, we can go as a family because the girls will be old enough.  I use to go caroling with a church group and I think it's such a fun thing to do.  So find some friends and go caroling!


5. Spend time as a family playing games

Play games, get out those board games and spend time together as a family in the evening.  Or do some fun Christmas crafts with your kids.  My girls love crafts, and doing special Christmas crafts is even more fun!  Here are some of my favorites we've done


6. Read the Christmas Story by the tree

Simple and no cost.  The true meaning of Christmas.  Recently I heard on the radio a new song that talks about what wasn't there the first Christmas.  If you think about all that we try to squeeze in and spend money on for Christmas, how many of those things were actually present at the first Christmas?  That really puts it into perspective of what all we try to do or buy during Christmastime.


7. Reuse/Recycle

I'm all about recycling by reusing first.  We get special treats from our hanging of the greens tradition that we do with my husband's family.  Generally they are given to us in Christmas tins.  I don't like to throw them away, but can't save them every year then I'd have too many.  (I will say I've saved some as Christmas decoration holders).  But, I've started using them to put our cookies in that we give to our neighbors.  It actually works out perfectly, now that we have 5 people in our family, because we have 5 neighbors.  This is just one way I reuse at Christmas.  Are there things you are given that you can reuse for anther purpose at Christmas?


8. Simple Advent calendar ideas

Toilet paper advent calendar ~ from: Coffee and Vanilla 
I tried this one last year and it worked really well.  You can see mine here.  
Get the how to on her blog above.

Mason jar advent calendar ~ from: Mama.Papa.Bubba
I loved the simplicity of this idea; however, I'm always having to rearrange my Advent Calendar it seems, so I made another version where the activity is a write in as well.  She has LOTS of different activities already planned so if you are looking for something already made this one is perfect! 

You can also download mine at the bottom of the page if you'd rather a write in option.  

Bible verse banner ~ from: Espresso and Cream 
I love how she ties in a bible verse for each day with this.  Plus, how simple and cost-friendly is this idea? 


9. Simple advent calendar activities 

Make and drink homemade hot coco
Make homemade hot coco as a simple gift for family, friends or neighbors
Make cookies for your neighbors
Wrap presents together 
Read the Nativity Story by the tree
Watch a Christmas Movie
Read Christmas books
Make a paper chain countdown

These are just a few, you can check out more free advent activities here. 


I love this time of year and decorating for it


If you liked this post you may also like 


This post includes affiliate links, which means if you click on the link I get a portion of any sales at NO COST to you.  See my disclosure page for more details. 

Pinterest