Saturday, December 10, 2016

25 ways to save this Christmas

Christmas can be expensive...it is so easy to let all those little things add up and not realize how much you've really spent.  This year I saved all my Christmas receipts to see how much we spent.  I mean everything from stocking gifts to gifts we bought to donate to the advent calendars for the girls.  In the end I don't feel we broke the budget, but we tried this year to save anywhere we could.  Here are a few ways we saved this year along with some other ways you can have a cost friendly Christmas.

Now any of these things listed you could opt out of completely and save more, this is just to help you save on those things if you choose to do them this Christmas.


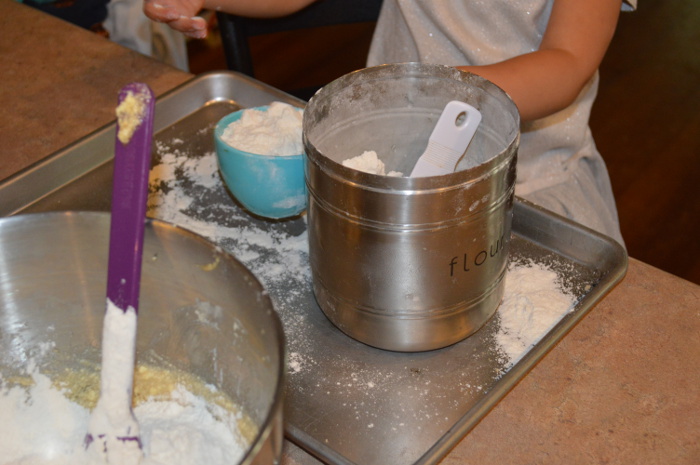
25.  Homemade Hot chocolate:

We go through so much hot chocolate during the Christmas time...its the one time I'm more lenient  about how much chocolate/sweets the girls have.  Homemade hot chocolate is not only healthier for you, well let's be honest as healthier for you as it can be, I mean its hot chocolate after all!  But, it can be cheaper too.  Here is a recipe that I have used from the blog, Eating on a Dime, for the last couple of years and I really like it.  Easy Homemade Hot Chocolate 


24. Homemade Advent calendars:

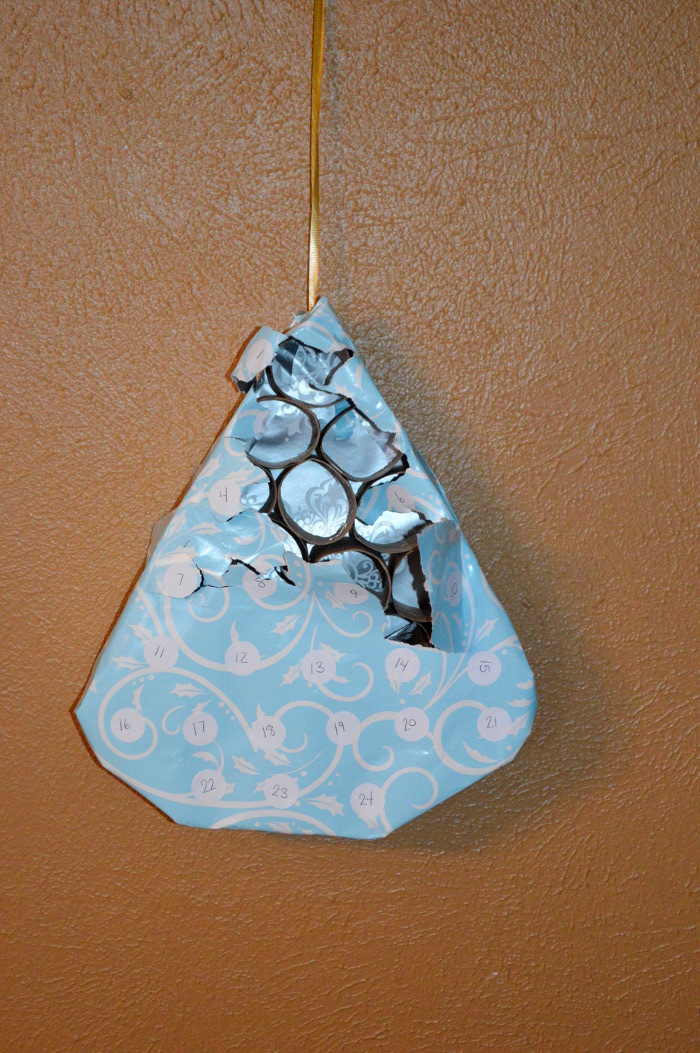
I love the Advent calendar tradition, but those candy calendars can start to get costly depending on how many you need for your family.  Right now we just need two but at $10.00 a piece that easily adds up.  I found this great homemade advent calendar that is pretty easy, cute and way affordable!  It's from Coffee and Vanilla.  All you need are 12 toilet paper rolls or about 6 paper towel rolls/calendar, wrapping paper, ribbon & a bead or button.  Plus I just bought 2 packs of stickers to divide up to put inside, so it ended up costing me $2.00!! I already had all the other supplies  (Ask around for family members to save their toilet paper rolls if you need to).  So if you are still looking for an easy advent calendar check out her blog!

I thought I had a photo pre the Christmas frenzy, but I didn't; however, there's proof they hold up and my girls love tearing a piece each day. 


23. Limit your gifts/Set a budget:

Our girls are very blessed.  They get presents from both grandparents and both aunts and uncles.  With that we don't really need to get them presents, but as parents it's nice to do something. We give our girls 1-2 gifts each and no more.  Some years both gifts are small.  Some years we do a bigger gift.  Either way we're not spending a ton on gifts because we don't need to, nor do they need a lot.  I will say even if we didn't have parents and siblings that bought our girls' gifts, we would still limit the gifts. 

If limiting your gifts doesn't work, maybe your family is way out of town and can't give gifts, or maybe you are the sole gift giver, no problem, you can still set a budget.  The important thing is to stick to that budget.  My mother in love always went by the rule of: Something they want, Something they need, Something to wear, and Something to read..  4 simple gifts.  Plus the book, clothes and something they need can be bought early in the year at a sale price, so you have more to spend on the want item, which let's be honest with kids that can change right up to Christmas Day!  My daughter told me she wanted a skateboard over Thanksgiving...and yet since then it's always something different.


22. Homemade gifts:

Homemade gifts are also always a way to go.  You can do all homemade gifts, or you can do mostly homemade with one bought gift.  Homemade gifts are a great hit for most grandparents, or even your spouse. Whatever you choose making gifts is usually cheaper in the end than buying gifts.  Plus depending on the gift it can even act as a Christmas decor for future years. For more ideas check out my posts on Christmas Creations or Christmas Creations part 2.  I have lots of homemade gift ideas listed there.


This is one that I helped my daughter make 2 years ago.  It's one of our favorite Christmas decorations now.


21. Re-use/Re-gift:

Okay I know this one isn't one of the favorites out there, but there are times it works great and you can save some money.  One year I had a family member who didn't want a coffee grinder of theirs and asked if I wanted it, which of course I was all about and guess what I got it for Christmas and I was thrilled!!  This year our oldest is ready for a bike, so we are planning on getting her one for Christmas.  While our youngest is going to be getting the balance bike that older sister won't need anymore.  Why should we buy another balance bike when we have one that will work perfect?  Why not wrap it up and give it to our 1 1/2 year old for Christmas?  Re-using/Re-gifting is being wise about what you have.  This way we can get that more expensive bike for the older girl who needs one.  As I said before, we usually get them 1-2 gifts, so the younger one is also getting something else from us.  


20. Homemade decorations:

Some of my favorite decorations are ones that my girls make.  The countdown Christmas chain, hand-print wreath, the hand-print tree (pictured above under homemade gifts, this was also a homemade gift to her Daddy a couple years ago, see gifts can double as decor later on!) the cotton-ball snowman that hung in our kitchen for a whole YEAR, yep I seriously JUST took it down the other day.  Homemade decorations can have more meaning than store bought and they are more unique too.  So grab some construction paper, scissors and some glue and get started making some fun decor!


19. Shop the after Christmas sales for next year:

Our oldest daughter's first Christmas she didn't have a tree in her room, now I know that might not sound like a lot, but my husband & his sister grew up having mini trees in their rooms and I wanted to continue that tradition.  So we were given a little tree that we had in our room and decided to use that for her until we could purchase her one.  Now it was December, there were PLENTY of little trees we could go out and buy, but we didn't because why pay full price for something you don't need right away.  We waited until after Christmas sales and it wasn't until the next year's after Christmas sale we found 2 mini matching trees that were only $10.00 for the pair!  Score and now we have a tree for both girls' rooms and we only paid $5.00 a piece.

This is one of the trees to the set.  What's really neat is since we waited we found 2 that match, so the girls have matching trees! 


For years I've always wanted a wreath for our porch and last year we found one during an after Christmas sale for 75% off...it was originally $4.00!  We got a wreath for $1.00.  It pays to wait you don't need to get everything right away.


18. Collect decor or ornaments from your family or friends who don't want them anymore:

Some of my best decor, besides my homemade decor from the girls are items that have been given to us from family members that were purging.  I like things that have meaning, I like to decorate with things that I can say, "that use to be your Nana's" or "When I was a little girl I had this in my room".  It gives the feeling of belonging even more to have decorations that have a past.


17. Make your own Christmas card:

Recently I did a post on how easy it is to make your own Christmas card.  Make your own via Publisher or even a word doc. and then print it as a 4x6 photo for as low as 9 cents!  You can check out the post here.


Along with making your own Christmas card, you can save on postage and hand deliver any that live near by or in your area.


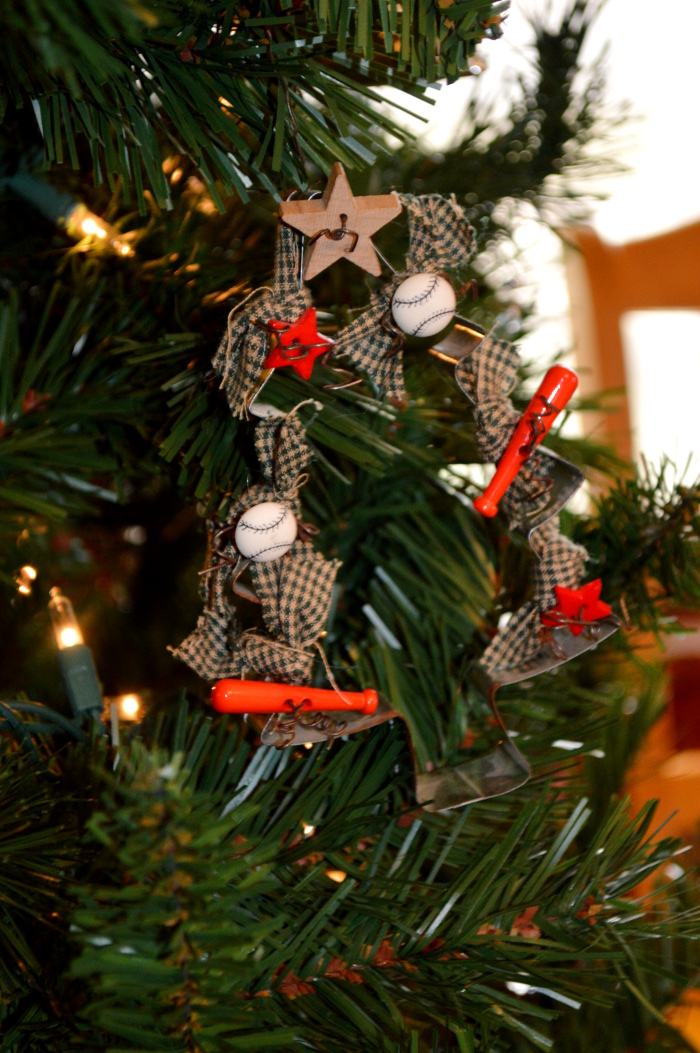
16. Homemade ornaments vs. of store bought:

We have a tradition that was passed down from my husband's family of giving ornaments to the girls every year.  While store ornaments are cute and there are SO many options now a days, you can easily make your own ornaments too.

Here are a few that were hand made over the years:

Hand-print salt ornaments
Felt Ornaments 
Cookie cutter with little treasures on them: 


pipe cleaner candy canes 


You can also buy those make your own ornaments for pretty cheap:


Here are more ideas I found on Pinterest:
Popsicle snowflakes
Glittered monogram 
Melted Peppermint candy  (These are one year use only)
Mason Jar Lid wreaths

Pinterest has everything, homemade ornaments for toddlers, kids or just in general, you can find so many by just typing in homemade ornaments!

15. Shop those consignment stores throughout the year:

There are some people that you know just what you're getting.  Those are the ones to watch out for at consignment stores.  Those and toys,  I really like getting toys at consignments stores because they're cheaper, they've already been played with so that means they're pretty durable and you can buy it throughout the year and not feel guilty about the cost.  You can score some great things at consignment stores.  Check out my post here, about some great deals I have found.


14. Homemade crafts for kids:

This can tie in with the homemade gifts too.  Those homemade crafts can become gifts as well or they can just be activities for the kids to play with or create during Christmas time.  One I made a couple years ago is a felt tree, it was super easy to make and my daughters still love playing with it.  In fact my 3 year old was so excited to get it out this year, when we told her we were going to get the Christmas stuff out she asked for 3 things, her mini tree, her nativity and her felt tree.  Felt is a great thing to use for making Christmas crafts, check out my other Christmas homemade crafts here. 


13. Homemade cookies or other treats:

Okay, really who doesn't like a homemade cookie?  You can even go entirely homemade and it's even cheaper than the bag or box.  We don't really buy a lot of cookies, but around Christmas we have a little sweets.  Making cookies is way cheaper than buying all the Christmas candy or sweets.

Another way to use homemade treats, make them for your neighbors. We usually give our neighbors homemade cookies as part of the Advent calendar activity.  They are simple, cost friendly and a nice way to say Merry Christmas to the neighbors.  You can even put them in a simple tin or box with a little tissue paper and a homemade tag.


12. Free family advent activities:

There are so many things you can do as Advent traditions that don't cost a lot or are free.  Such as make a snowman, make homemade hot coco, make a Christmas chain countdown,  sleep under the Christmas tree.


One Advent calendar activity I like to do is go see the Christmas lights, this can cost if you go to a special park, but you can easily drive around your local neighborhood and see how people decorated their houses.  We usually visit another local town in our area to get out and make it a little more special.  Another way you can make seeing lights special, give the kids a little bag of popcorn, some hot coco in a thermal and let them go in their jammies!


11. Buy things at beginning of the year:

Just like looking around at consignment stores throughout the year you can stock up at sales on things for stocking stuffers.  This year my 3 year old is really into art, cutting, coloring, gluing, you name it.  At the beginning of the year when school supplies were on sale I stocked up, any extra I have (because I didn't think about this at the time), will go to her stocking.  You can check out my post on school supplies here   Next year I plan to plan ahead and grab some extra deals for Christmas, little peanut will be into art supplies soon I'm sure!  


10. DIY scents for your home or candle warmer vs. candles that burn up:

I wanted to have a candle that smelled of pine trees for our home this year.  I was pretty proud of myself for getting one 1/2 off, but you know what, it's only the 2nd week of December and the candle is almost gone!!  I was planning on reusing that baby for at least another year!  So, I realized I had a candle warmer upstairs in our bathroom, I plan to use that with my new candle next year (because at this point, this candle is a one year candle)

Another option to help your home smell Christmasy, you can make your own scents that cost a lot less than candles (even when they are 50% off).
Here's one I found: Wintery Scent
Here's a link to many other ideas: http://pioneersettler.com/make-home-smell-nice-holidays/


9. Use that stock of bags instead of wrapping paper or use brown paper:

Instead of buying new wrapping paper every year, use that stock of bags and tissue paper you've been saving.  Missed that post, you can find a link here


Otherwise, buy some brown paper, it can be cheaper than decorative wrapping paper 1. You get way more in a roll, 2.you're not stuck with mix match wrapping paper the next year, and 3. you can make it really cute + change it up every year.  You can also use that brown packaging paper that comes with those online orders.  Here are some of my favorite ways to use brown paper: Brown Paper Wrapping Ideas


8. Save those bags, tags, or ribbon for next year:

Okay so if you didn't check out my previous post about stock piling those bags and tissue paper from different parties, stop reading and go check it out.  Here's another link: Gift Bag stock Pile   You can also ask family members who don't want theirs if you can have them and add them to your stock pile.  I always get more when I ask family members if I can save theirs too!  Honestly, when Christmas comes around next year, you'll be glad you saved them.  Last year, I didn't have to buy any supplies to wrap or package gifts, I re-used everything!

7. Buy a little at a time:

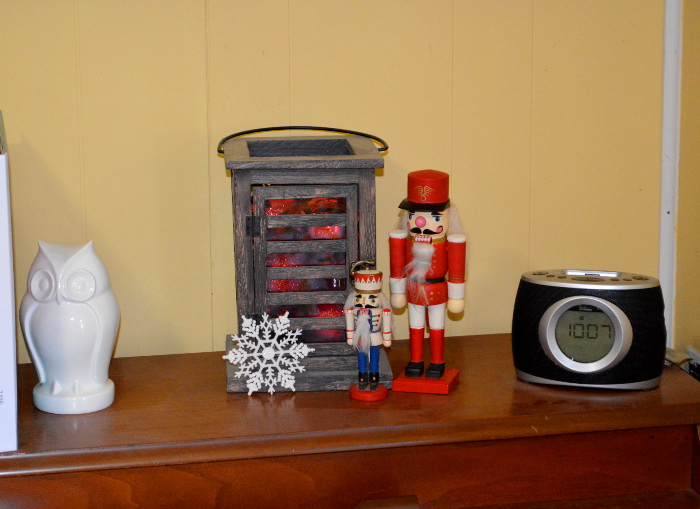
It's so easy to want everything right away, especially when you have your first home, and/or are newly married.  It's so easy to see all the decorations and know that you have little if any and want to buy for your home.  Just remember every year there's always more and there's always something different.  So start small, build your collection a little at time.  As I said above shop the after Christmas sales too to save even more.


6. When it comes to decorating, simple is better and don't buy stylish:

I love to decorate with simple decorations.  The old saying less is more, I completely agree with when decorating for Christmas, or any holiday for that matter.  One way is ornaments in glass jars, they can be classy, but don't cost much.  (See the photo above under Homemade Gifts.  Plus some years you can use them to decorate your tree, when you have options with your decorations that's even better.

This is a lantern that I usually have a candle in, but took out for Christmas and just added some of our extra bulbs we didn't need for the tree (We've added new ornaments since our first year and can now use those bulbs for decorations).  The nutcrackers came from my in-laws.


This village came from my husband's grandpa.  I love having decor that is from family, it just makes it more special to decorate with.  Notice the snow in my village, super simple and affordable, cotton balls stretched out.  Then I just throw them in a ziploc bag and pack them up with the village for the next year.


Another idea for decorating is invest in decor that isn't seasonal.  I like chevron stripes, but I'm not going to buy all chevron Christmas decor, who knows how long that's going to be in style.  Maybe I get a chevron item on sale, but the rest of my decor are items that I can use year after year.    


5. Free family traditions:

We have a tradition that was passed down called Hanging of the Greens.  We spend one afternoon or evening, eating pizza (homemade) and watching a Christmas movie.  Then setting up our tree, decorating it, getting out the girls' nativities and mini trees, opening up their new ornament for the year (can be homemade), and then watching another Christmas movie before bed.  It makes Christmas a little more special and it's a free Advent Calendar activity.  The only cost is the supplies.

Another free family tradition is the Advent wreath.  We (well try to) do the Advent wreath every Sunday night.  The only cost for this was getting the candles and wreath.  Then after that you can use it every year.  We don't let ours keep burning all week long, lets the candles last longer, but it's safer for the girls too.  Some other ides: go caroling, visit a nursing home, or or donate some extra toys to an organization like Justice for All, Salavation Army, or Goodwill. 

Some other free family traditions are listed above under free Advent activities.  


4. Use what you have:

This also goes along with don't buy everything at once.  Right now we don't have a train under our tree, I'm hoping to ask for one next year for Christmas, but as of now I improvised.  We have a train set, thanks to my daughter who is really into trains (that was her present last Christmas), so we took her wooden train set and made a track around the tree.  Using what you have makes it a more cost-friendly Christmas.


3. Use paper clips for hooks as opposed to store bought:

The other day we were at Wal-Mart browsing the Christmas section for fun, when I saw you can buy hooks for your ornaments.  Now you do get about 100 for only 98 cents, but I thought how many of these are bought every year!  We always just used paper clips which you can get really cheap too and they can be saved in a baggie to re-use, unlike the ones I saw.  Now I will say I didn't buy them and I haven't used them, but they didn't look very sturdy to re-use.  Plus paper clips aren't really visible once the ornaments are on.

Don't like the idea of paper clips, go ahead and invest in some hooks, but if I were you I'd buy some nice ones (we do have some of those) and then put them in a bag to save for next year, just store with your ornaments so you have them.  That way you're not having to re-buy them every year.


2. Decorate outside without lights:

Okay, I have always wanted to have lights on our house.  I grew up having our house decorated with lights every year.  So since we have had our house I've always tried to get lights up, but we never do.  We have no outside outlet and our garage isn't attached so it just doesn't work.  This year though as I was adding the garland around our step rails and hanging up our new on sale wreath (I'm very proud if can't tell), I realized we can decorate our front porch for Christmas without having lights and we aren't having to pay that extra energy bill for those lights either.  So while I will miss having lights on the house, I can be content with the fact that we aren't having to pay extra this month for electricity, even if it is just a few dollars.


1. Remember what Christmas is all about: 

Remember that Christmas is primarily about our Savior's birth.  In the end it's not about the toys, or presents, or decorations or what we buy.  In the end it's about remembering that God sent his Son to die for our sins that we may have eternal life.  This is what over everything else my husband and I want our girls to learn.  Trying to keep Christmas simple, and focusing on Jesus is our ultimate goal.

There are so many songs and movies that tell this story, My daughter's newly favorite: How the Grinch Stole Christmas,  even after the Grinch stole all the Christmas stuff, the Whos' still celebrated Christmas. My all time favorite: A Christmas Carol, the three spirits show Scrooge how money is not the most important thing in life. And finally, the song "Christmas is all in the heart" by Steven Curtis Chapman, also talks about how Christmas is more than things, but rather its in the heart and what's the heart of Christmas?  Jesus. 

So this Christmas no matter what your budget may be, remember that Jesus is Lord and it's HIS birthday we are celebrating!  God gave HIS greatest gift, eternal life through His Son, Jesus Christ!!! 


God Bless and I pray you each have a MERRY MERRY CHRISTMAS!! 


This post includes affiliate links, which means if you click on the link I get a portion of any sales at NO COST to you.  See my disclosure page for more details. 

Saturday, November 26, 2016

Christmas Cards

It's that time of year again, time to put the tree up, unpack the Nativity, make some hot chocolate and stay up late watching Christmas movies. Well, as a mom that last part doesn't always happen, but Christmas is here! Now, I will say I'm one that doesn't start decorating or doing anything Christmas like until after Thanksgiving, but when it comes to getting our Christmas cards ready I make an exception. I need time to take our photo, print them and pass them out. Plus my goal is to have it done by Thanksgiving so I can pass them out to family and save on stamps.  Remember every little bit helps.  

Christmas cards can be costly. It's one of those things that I love to do, but it's hard to draw the line on who to send them to and so the cost just keeps going up. One year a friend of mine told me she made her own and gets them printed as a photo. That just blew my mind.  Make them yourself?  Why hadn't I thought of that?  I have a digital scrapbooking program it'd be easy to create my own!  Don't have a digital scrapbooking program?  No problem, my friend creates her on a word document on her computer. Yep, it's that simple. She adds a couple pictures, changes the background, adds something festive, then saves it as a pdf and then to a jpeg and voila! Her Christmas card is done! 

Did you know that you can print 4x6 prints for under $0.20 cents at Walmart, $0.09 cents for home delivery or $0.15 cents for site to store. Or for $0.15 cents through Shutterfly, or $0.09 cents through Snapfish?  Plus, if you plan a little in advance they usually have sales going on to save even more. 

If you do have a scrapbooking program you can jazz up your Christmas card a little more, but really it's amazing what you can do with just the paint option on the computer.  Another option would be to edit the photo in publisher if you have it.  That'd be a step up from paint, but without having to buy a scrapbooking program if you don't plan to scrapbook.   

So if you were looking for an alternative to spending so much on those Christmas cards this year, hopefully this helped!


Here's ours from last year


Merry Christmas!! 

Monday, October 17, 2016

contacts vs. glasses

I've worn glasses since I was 5.  I also don't have the best vision, in fact when I wear glasses my eyes get twice as big as they really are.  Because of this, as I got older, I couldn't wait to get contacts.  My parents let me get contacts when I started high school, and I have worn them ever since.  Now, I will wear my glasses from time to time and as I've gotten older I've not worried about how they change my eyes as much as I use to.  Side note, college is a great way time to help you grow.  


Recently I've tried to start wearing my glasses more, as in 3-4 days a week and my contacts less to save some money.  Doing this I can get just a 6 month pack and make it last a year.  So save some money and sport those glasses!!  If I can do it, anyone can! 

Thursday, October 13, 2016

Gifts in a jar

I love Pinterest and all the ideas on different gifts you can do in a jar.  While mason jars aren't necessarily expensive, a way to save even more on these gifts is to re-use glass jars you have.  Remember my post on Organization in General, well this is a similar concept, only this time you are using the jars as gift holders.  I have made many jar gifts using old spaghetti, salsa, and even pickle jars.


Things you will need for all: 

jars of all sorts
spray paint or acrylic paints
paint brushes
paper (to decorate) 
tape

Here are some additional items for specific jars: 

Father's Day

Additional items:
computer
printer
cold laminator or packaging tape
Father's Day labels from Martha Stewart

Baby shower gift

Additional items: (optional) 
small animals 
hot glue sticks
hot glue gun

Bridal Shower

Additional items to go in jar: 
nail clippers 
mini hair spray
travel klennex pack 
needle and white thread 
lip gloss or chap stick 
travel deodorant 
a small note 
anything else you might need as a bride the day of the wedding. 

For each jar you start the same.


1. Wash the jar in warm soapy water.
2. Fill jar half way with vinegar and shake (this helps eliminate any smell from what the jar use to hold). 
3. Wash again to rinse out the vinegar & help remove any of the label that didn't remove the 1st time. 
4. Paint the lid the color of your choice. (If you are making one for a baby shower and want to attach a little animal, hot glue it to the lid first.  Then spray paint all together.)


I always start with white when hand painting, whether it's for primer or final color.  I also do about 2 coats in addition to the 1st coat of white.  Make sure you let the paint fully dry before you add another layer or it will peel off the 1st layer.  


5. Add the paper by taping it together in the back.
6. You can then add anything extra you want.  On these I just printed off the words on my computer and attached them with tape.  These jars are for my guests.  

Here are what they contain if you are interested: 

Brush: travel toothbrush & toothpaste.  
Relax: nail clippers, nail file and some hand cream. 
Wash: hotel bottle of shampoo, conditioner and lotion.  


This post includes affiliate links, which means if you click on the link I get a portion of any sales at NO COST to you.  See my disclosure page for more details. 


Thursday, September 1, 2016

Preschool-Stay at Home Part 4

Since staying at home, I've noticed I've been able to apply my teaching skills to helping my littles learn, which has been really fun for me.  I loved teaching and to be able to teach my own girls more at home is such a joy.

As the school year approaches, I try to structure the day with a little more set aside learning time.  This year we are reviewing our letters and numbers, just as we did last year.  If you want to see my set-up for last year you can check it out here.  Also this year, I'm adding learning about time.  Now, I know A is only 3, but, we've already started a little and she is catching on so fast + she loves it.  I chose to start learning to tell time for two reasons.  1., it will help tie in with number recognition and 2. I can schedule our day around the clock (with some unstructured time in there too) and that way A knows exactly what we're doing and when.   My goal is that this will help with fits over wanting to do something when she wants to.  In the past we've had a schedule which has helped with that, but this year I wanted to take it a step further and have her learn to recognize the time as well.


So I made these clocks and really they were so easy to make.  Here's what you'll need:


Materials:


Paper of your choice
Markers
Circle to trace ( I used a glass plate)
A list of times you want to make clocks for

1. Trace circle on the paper of your choice:


2. Number clock:  I start with 12, 3, 6, & 9.  Then I go in and fill in the ones in-between.  This helps me get them more even.  The best part about this though, is as long as the numbers are in the right place, it doesn't have to be perfect.


3. If you are planning to make multiple clocks, you can trace additional clocks, just make sure to line up the circle. 


4. Mark the center:


5. Mark the time with the arrows: Make sure the small hand and large hand are noticeably small and large, you want it to be easy for your preschooler to recognize which one is which.


6. Label what the clock is for: (Lunch time, Walk time, Snack time, Letter/Number time, Picking up Daddy time).


7. Cut out clock and if you want the name:  Or you can write the name on the color paper too.  Glue onto colored construction or card stock paper.

     ***You could skip this part and have the clock and title on one page and not cut it out.  I just really like color and so wanted to include that somehow.*** 


I also like to coordinate things in some way so I chose color.  I didn't buy any paper, I just used what we had and made it work.  Here's how ours are organized: 

Bright Pink: A or J or friends specific (Pick-up Daddy or friend(s) arrives/goes home). 
Pink: Free play 
Green: Food (lunch, dinner or snack time)
Grey: Quiet time (books, TV,  pick-up toys or nap time activities)
Orange: Activities (Letter/Number time, crafts, special toys or outings) 


8. Then, hole punch each clock and tie with string, twine or ribbon:

      ***You could also just tape them up one at a time too.***


9. Finally, designate a spot where your clocks will be:  I have ours right by the large clock in our dining room.  I just added a command hook and then I just flip through the clocks as the day goes on.  Although, I may be switching this clock out for one that has more "normal" looking numbers. 


And there you go, you have your own clocks for different activities.  I love this because I can add or take away clocks as need be.  Plus, I can just flip the pages as opposed to writing the times down each time.  

Monday, August 22, 2016

School Supplies/Office Supplies

I LOVE back to school shopping.  I have loved back to school shopping since I can remember.  Getting new pencils, folders, pens, backpack, highlighters, sticky notes, I enjoy back to school supplies. (side note I can't have enough sticky notes)  While I love shopping for school supplies, school supplies can get expensive!  Which is something I really never paid attention to when I was a kid, I mean my parents were the ones buying all the school supplies, I was just having fun picking out what I wanted (from the choices they gave me of course).


However, even though I'm not teaching anymore, I still am in need of office supplies.  Whether it be notebooks that my husband likes to write our finances in, or pencils to write with, or crayons, construction paper and glue for my now 3 year old who is starting to love crafts.  We use office/school supplies just as much as the back to school kid.

Well, when is the best time to buy those office/school supplies?  Yep, you guessed it in August when the back to school supply shopping happens.  This is one of those times it pays to spend more in the beginning as opposed to trying to spend on what you need.  Think about notebooks for example, they usually start around 0.75-$1.00 or maybe more!  During back to school sales, they can be less than $.20 a piece!  Why buy only a few especially if you know you're going to need them?  I bought 5 the other day, and I plan to buy 5 more before the sale ends.  That's 10 for the price of about 2 during the rest of the year! This is also great for all you parent's who have kids in school.  As much as you tell those kids, "you can only have 8 notebooks for the year and that's it", you know you're going to end up buying at least 2-3 more at some point in the year.  Why buy those at regular priced, when you can get them in the moment for way cheaper?  Now maybe you are really good at making those notebooks or folders last throughout the year and more power to you, but for those that say you're going to make them last and then end up re-buying later on, just pick up a few extra (hide them where you only know where they are), and enjoy when that day comes that you don't have to go spend that extra $0.50 per book.  

For all you moms and dads out there of preschoolers, think about how many glue sticks or crayons, or pencils you can go through in a year.  Whether you're homeschooling or they're at a school those little tikes are notorious for going through dozens of those items.   I taught art, I remember...those glue sticks are the worst!  So why not just stock up?  I mean there's no expiration date on those things so why not have extra?  Don't spend those extra pennies, nickels or even dollars later on, because stores know that you WILL run out before the end of school and will pay again.


What's your favorite school supply item to buy?   


Thursday, August 18, 2016

4 tips to save money in your kitchen

I'm going to be talking about 4 tips to save some money in the kitchen.  These are just a modge podge of ideas that I've found help me save a little money, making that grocery budget go a little farther.


1. Spaghetti sauce mix in or no?
So I've grown up with having spaghetti and the sauce mixed together, it was just what we did.  I honestly never thought about not mixing it together until one night my husband asked to have it separate.  It really wasn't anything to me, no more extra work really to not, so we had it separate.  Now, first of all, I don't use a whole jar of sauce each time I make spaghetti, with just the husband, me and two girls under 3, we don't really need a lot of spaghetti.  So I use 1/2 a jar each time.  However, the night we didn't mix the spaghetti and the sauce, I felt like I needed to go and heat up more from the jar.  Which the next day for the leftover spaghetti I did, because the sauce was lacking that day.  So needless to say we went back to mixing the sauce in with the spaghetti, because you know what, that sauce is still good in the fridge for another 2 weeks.  So we just plan spaghetti again about a week later and use the remaining sauce.  So there you go, mixing the sauce in makes it go farther, at least in my experience.

2. Dry milk for baking and cooking
I am not a fan of dry milk, even though I know the powder dissolves well, I just can't mentally drink it; however, I can cook with it.  Dry milk is significantly cheaper than liquid milk and I don't know about you, but I feel like I'm always adding milk to some recipe of some sort.  Dry milk can also be stored in the freezer, which then makes it last longer, and so makes it easier to use for cooking.  As someone who, honestly, said she'd never buy dry milk for anything, it really is my choice over liquid milk to cook with, saving me money and my liquid milk for drinking.

3. Shredded cheese ~ buy in bulk and freeze in small bags
Shredded cheese, have you noticed you pay more for it when it's in smaller bags.  I mean sometimes when it's on sale it's cheaper, but for the most part it's better to buy it in 8 cup bags.  Now we like chesse and we eat it a lot, but an 8 cup bag is a lot for even us.  However, I buy it in the 8 cup bags and then spilt the bags into 2 smaller bags and freeze them.  That way I can stock up when they're on sale (or when Hy-vee has a fuel saver reward on theirs, stay tuned for a post about how I save on groceries), and save some money.

4. Saving on flour
Now this one is how to save on flour with those little helpers.  A while back I posted about little helpers in the kitchen, you can check it out here, I mentioned in that post about trying to find a better way to save the flour my little one plays with.  Well one day when I was having her help me do some baking, I put a baking tray under her bowls so that whatever spilled we could put it back in the flour container.  Then, I had a duh moment, why haven't I been doing this when she just plays with flour, the pan is large enough for her to play on with the roller, and cookie cutters and whatever else she wants to use.  So if you are wanting to find a way to save on some of those kitchen supplies you let your little play with, grab a large cooking sheet and let them go.  Just make sure the cookie sheet is clean first and you can easily save whatever spills on the tray.

This also works great for when they want to help you refill something in the kitchen.  A loves to refill my coffee canister, but would get upset when she spilled.  Now we just dump what spilled on the cookie sheet and it works great! 


So there you have it, my 4 ways to save some money in the kitchen.  Hope 1 or all were helpful!  How are ways you save some money in the kitchen?


This post includes affiliate links, which means if you click on the link I get a portion of any sales at NO COST to you.  See my disclosure page for more details. 

Monday, August 15, 2016

One year later

It's been a little over a year since I've started these new adventures, first with my decision to stay at home and then second to start a blog. First off, I want to say thanks to all who have been following my blog as I'm still molding it to be what I want. Thanks for your support and your time to read what I've written. It really means a lot to see my ideas being used or inspiring other ideas. Overall I have really loved this last year, including both my struggles and triumphs.


One year, I really can't believe I've made it that long, both in creating and managing a blog, along with staying at home. Being a stay at home mom, has many mixed feelings for me.  In the beginning I was optimistic, staying at home was going to be AWESOME!
EVERY. 
SINGLE. 
DAY.
I mean really I love my girls why wouldn't I love spending every minute with them? Then....I started staying home.  First off-to all you stay at home moms and dads out there, you are Awesome!  Keep up your hard work because you are molding great young minds and are having a daily impact on them. I don't know why but, staying at home is WAY harder than I imagined.  Constant cleaning up (I mean really where do all those crumbs come from?), constant diapers (whether cloth or disposable there's A LOT) , and the little one that's always at your feet, even in the bathroom. I recently saw a pin on Pinterest with a picture of motherhood and two little girls were sitting in front of the toilet while Mommy was trying to do her thing. Yep, that pretty much sums up my life this last year. Somewhere around October/November I remember thinking, "Am I sure this was the right choice?"  I honestly thought "Am I doing the best for my girls?" It felt like there were many days that I was more stressed, more tired, more emotional (I'm sure husband could list many times here), and more flustered than I had ever been before.  But, then....there were those moments. Those small tender moments, where I was able to teach my oldest her letters, or how to wash dishes, or hear her tell Daddy about all the things we did that day TOGETHER. Or getting to snuggle as long as I want to with Peanut as she's going down for a nap. Writing this brings tears to my eyes because now that I'm staying home I get to have more of those moments. I'm not rushing through the door, trying to cook dinner as well as hear about my daughter's day at daycare, but rather I get to be apart of that day with her. Especially when A stopped taking naps. Which became a positive too, because it gave her and I more one on one time. I wouldn't have that if I wasn't home.

Now, I don't write this to make anyone feel guilty about not getting to stay at home, because that's not what this post it about. Staying at home is not for everyone and that is 100% okay. However, if you read this and have that desire to be a SAHM or SAHD, then check out the rest of my blog for tips to start saving on little things to help make that desire happen.

That's how it all started for me. I didn't really think I'd want to stay at home, I really loved being a teacher, but after my husband and I found out we were expecting I had a slight desire to but it just didn't seem to work for us financially. A couple years later after we found out we were expecting our 2nd, that desire really grew and I couldn't accept the idea of not being able to stay at home with my girls. I remember breaking down to my mother-in-love that I just wanted something, either to move back close to family, or be able to stay at home.  I felt I wasn't asking for a lot, I didn't need both, I just wanted ONE.  So staying at home became a priority to make.

The blog idea started shortly after the decision to stay at home.  My mother-in-love started helping me come up with ideas to help save a little here and there. Then one night we were talking and my sister in love mentioned starting a blog about my experience and how I'm making it work.  I remember thinking, "Me? I'm not super techy, I'm not the best writer and I don't really feel like I would have enough content."  But, then I thought why not, and with help from my sister in love, I started this blog.  And guess what, it's been over a year and I'm still writing and I'm LOVING IT!  Just staying at home has given me so much to write about and I really believe God gives me inspiration from my girls, or family, or friends.

So one year later, am I happy that I chose this path of mine?  YES!  I wouldn't trade any moment both good and bad, because through the bad I've been able to learn and grow. Staying at home is not easy, but I wouldn't trade this life of mine.  One day my littles will be starting preschool (for A that's next year already!) and then kindergarten, so right now I'm soaking up as much time with them as I can, while trying to help others do the same through blogging. For this next year I hope to continue to grow and help mold my daughters to be the best they can, while also giving an example of how to work hard to pursue what you want to do.


This is my absolute favorite photo of A.  I use this photo as a reminder, life is just a snapshot of our eternal life.  I'm loving what I'm doing in this snapshot of mine and I'm so thankful for you all who have helped make this a possibility for me.


Pinterest