Showing posts with label Organization. Show all posts

Thursday, October 19, 2023

Travel Snack Prep


It's getting close to travel season and with traveling comes trying to keep the kids happy while you or your spouse is driving.  One way to help keep them happy is to keep them fed.  Let's be honest a fed kiddo is a happy kiddo.  

We went on a long trip this summer to see family in Indiana, for the most part my girls travel well, they've just always had to travel so that helps, but this was going to be a long trip.  So I prepared snack bags for the trip to and from (honestly, who wants to pack snack bags leaving your trip).  That was my best decision, it made packing to come home so much easier! So anyways, here is my how-to on prepping snacks for a long trip or any trip for that matter!

1. Make a schedule - 

Below are my schedules for there and home of our trip this summer.  These are the real scratch lists. They don't need to be pretty, just something that you can reference as you go.  Those longer trips can be harder to keep track of what everyone ate when, this really helped me.  Now, honestly did I follow this schedule like it was set in stone, did we not buy Cheetos at the gas station at one point, no.  Things changed, we had lots of rain, the schedule got bumped up a bit here and there, BUT, I was able to have a guideline to follow, I had a roadmap per say to help me. It was nice to have a reference of what we'd had or had available as we went.  


2. Make a list of snack options - 

I wanted to make sure that even though we were traveling, we were able to get some healthy snacks in along with some treats.  While treats are fun and exciting, it's those healthy snacks that keep everyone sane as well.  Snack ideas: cheese sticks, carrots, applesauce pouches, various cracker snacks, fruit strips, fruit snacks and raisins.

Repacking your own snacks is where you can save some money. Cheese sticks, raisins, and any of the cracker snacks are really easy to prepackage yourself instead of paying for them to be prepackaged.  

  • Cheese sticks: you can easily buy a large block of cheese and cut your own, throw in a cooler bag and voila your own cheese sticks for cheaper.  Check out my post here: Cheese Sticks for more details. 
  • Raisins: Yes it's fun to have your own individual box, but if you buy the large container you can pour your own individual baggies full.  You can also mix in some peanuts or cashews too if you are able. 
  • Cracker snacks: So first of all our youngest is gluten free, so she needs her own individual cracker snacks.  Also, if your house is anything like mine, no one likes the same snacks, so I just grab a few larger containers of the snacks we usually eat and divide up smaller baggies of them for each kiddo.  It beats spending more for the prepackaged + spending even more, because we all want different prepackaged snack bags. 

3Purchase the items needed 

Now that you know what all you want, it's easier to buy your snacks. It's really easy to go shopping and then get a bunch of items because you didn't plan ahead and end up with more than you need or items you weren't planning on.  Also, now that you know what snacks you are planning on saving with making your own, you can pick a few fun items too.  For example, yes it would be cheaper to buy applesauce and use my reusable pouches; however for the 12 hour drive it was not feasible to try and do, and honestly I didn't want to balance that.  So for this trip I saved on the cracker snacks and bought applesauce pouches.  We also bought fruit snacks and fruit strips as a fun treat. Things we don't have often, so it makes it fun.  You'll also note I had cereal listed as the first snack.  For this particular trip we took off early, so I let my girls pick ONE special box of cereal to share.  I then poured it into baggies for them.  Again a special treat, but we limited that one to one option and they only got the one bag full.  

4. Gather all your supplies, label and start packing 

Now, with all these different snacks I'm collecting, I do use our reusable baggies as much as possible.  I don't have any fancy ones we got ours from Walmart.  They work well, except the zipper sticks after I use them in the freezer, so if you are in the market for them make sure they are freezer safe.

Anyways, back to gathering your supplies.  I did use regular ziplock bags to hold all the snacks, because I wanted to write on them with Sharpie each kiddos name and either "THERE" or "HOME",  so I knew what bags were for when.  


Then I loaded each bag up.  I started with my schedule and figured out how many fruit strips I'd need for there, then put them in each kiddo's larger bag, then I did the same for the fruit snacks, applesauce pouches and raisins.  Then I took the cracker snacks and decided how many times we'd need a cracker snack and made up their individual bags of their cracker snacks choices and put those in their larger bag.  Then I repeated the process for the the trip home.  Again, seriously, this was my best decision, BECAUSE, I was having too much fun hanging out to want to pack like this while there the night before we came home.  And that worked out great, because it was already done.  

The cooler items, like the carrots, cheese sticks or other veggies I packed the morning of. I got them ready, carrots in one bag, cheese sticks in another, etc.  But, then packed them in the cooler in the morning.  

When I loaded our larger snack bag, I made sure the "HOME" bags were on the bottom and the "THERE" bags were on top. Then I didn't have to dig so much.  

5. Tips & Tricks I learned after 14 hours on the road: 

  1. Pack few extra snacks - you never know what might happen, pouring rain FOREVER or just extra hungry i.e. bored kiddos. I had a bag at the bottom that was leftover items we got; applesauce pouches, fruit snacks, fruit strips and we used a few of them. 
  2. Snack/hour - really even if you don't end up having a snack that often, if you are going for a longer trip plan snack/hour. 
  3. Have those fun snacks intermixed. Whatever is a fun snack for your household, us it's the fruit snacks and fruit strips.  I made sure to have those a few times for our long trip.
So if you are traveling for 5 hours or 20, I hope you find something here that you can use to help make that trip a little less costly, but still being able to have some good snacks along the way.   

Blessings on your upcoming travels 


Friday, September 29, 2023

Breadcrumbs Re-visited


Way back I wrote about how I use breadcrumbs.  If you didn't see it you can check out that post here: Bread Crumbs. A pretty simple concept, but a process that can save you money over time.  If you've already started saving those bread crumbs from your toaster drawer, then this won't be a huge change as well. 

If you're like our house your kiddos don't eat their crust very often.  Most days, I will eat their crust, but there are days I just don't want to.  I started adding the crust pieces to my bread crumb jar.  I keep my bread crumb jar in the freezer so after a few days the crust pieces are easy to break down and crumble.  


This is just one more way you can get bread crumbs.  This has been really helpful with our family's recent shift in being more gluten free.  We don't all need to be gluten free, but my youngest has done better when she's not eating gluten.  With that, she also doesn't like the crust.  We now have a bread crumb jar and a GF bread crumb jar in our freezer.  Instead of having to buy GF bread crumbs, we were able to make our own without spending any extra money.  That is huge when GF food is just so much more pricey. 

Hope this helps you save a little 

Blessings, 


Thursday, September 21, 2023

Potato Soup with Sausage

    As I said in my previous soup post, it's soup season!  Being one who really likes soup, IF I had my way, we'd have soup 2-3 times a week during this time.  But, alas I have children and so we have soup twice a month at most. If you missed my last post on how to make your garden produce go farther by making soup you can check it out here: Soup.  Potato soup is my favorite soup.  I have different versions of potato soup that I make, but one way the whole family enjoys is adding sausage. 

We have made potato soup based on recipe I found years ago that added andouille sausage.  It's really good.  But, I wanted to make it cheaper.  So one day I bought a summer sausage.  Now, summer sausage is a little more, but I halved it and only added half the sausage in the potato soup and then froze the other half for another time.  You can do this with the andouille sausage as well, but there's just a little more sausage to the summer sausage roll so I found it works a little better.  Also, if you have a SAMS' CLUB or COSTCO membership, you usually can get them even cheaper in bulk. 

Another way, I've cut back on the expense of sausage in our potato soup is by using pork sausage.  Pork sausage is even less expensive than summer or andouille sausage.  If you can handle the more ground beef texture in your potato soup then this would work great. I accidentally stumbled upon this one time when I was cleaning out the fridge.  We had a little pork sausage and potato soup leftover, I decided to just combine them and see.  I actually really like it this way; however my family does not agree, so we stick to the summer sausage, but only use half the roll each time.  

Andouille sausage: $4.69/lb

Summer sausage: $4.74/lb

pork sausage: $2.32/lb 


Thursday, September 14, 2023

Soup


As we near Fall, we near soup season.  Although, I'm one that can eat soup all year long, but that's not the case with everyone else in my family.  So, I save soup for the Fall and Winter seasons.  I really enjoy making homemade soup and one thing that works great is to use up all those vegetables that you haven't used from your garden to make your soup.  Then you can store the soup in smaller containers and freeze for when you need them.  

This is great for those busy school nights, just pop a container or two out of the freezer and put in your fridge in the morning.  Then around supper, all you need to do is reheat it.  Quick, easy and you saved money by using produce from your garden.  

Garden Produce

Here are some garden produce that are great to add to soups:  

  • squash
  • peppers - ours had a woody taste this year,  (that's the best way to describe it) but cooked in a soup, you can't tell. 
  • tomatoes - all tomatoes work well in soup.  I accidentally planted multiple cherry tomatoes this year and we don't like tomatoes.  I usually use them to make sauce.  So I found myself with a lot of cherry tomatoes to use up.  I gave away a bunch and then added the rest to my soup. Also froze them before hand so I could wait to make my soup when I had the time. 
  • cabbage 
  • sweet potato 
  • carrots 

Those are just a few, there's so many more veggies from the grand that are great to use in soups! 

My favorite soups

Potato Soup  

This recipe is one that I start with, but have changed a few things.  Instead of bacon, I use sausage.  Instead of the green onions, I use our onions & peppers from the garden, you could keep the green onions too. 

Cabbage Soup

This one is a great recipe to use up that cabbage, it uses 1/2 a cabbage head!  It also uses up carrots &  potatoes.  Plus, you could cut the sausage in half you used for the potato soup and add the other half to this soup.  We tried this one this late summer and I froze it.  It froze and thawed well (I only had it from for about a month).  Also a great add in after you thaw it, make some white rice and toss it in.   

Autumn Squash & Sweet Potato Soup 

This soup uses squash, sweet potatoes and tomatoes. 


Thursday, May 18, 2023

Summer Learning


    Summer is almost here! But, don't let this summer get away!  Summer is still a great time to keep learning. Here are a few ways keep our kiddos brains moving during the Summer. 

1. READ

I can't stress this one enough! Taking time to read is so beneficial to your kiddos in the summer. Whether you read to them, or they read on their own.  Whatever it takes, find some time to read this summer. A couple ways we like to include reading is:

  • The Summer Reading Program at the library ~ check out your local library and see what they have for their summer reading program! 
  • Making a Summer Reading List or a goal of how many books to read in the Summer 
  • Setting aside a specific time during the day to read; for me it was after lunch, I told my girls after they ate they needed to go find a book to read (or look at for the younger one) so I could clean up the kitchen/eat my own lunch or talk to their dad while was home for lunch. 
  • We also tried to pick a book series to read through. Each night before bed we'd read a few pages or a chapter.  We've read Little House on the Prairie, The Chronicles of Narnia and even some Boxcar Children books (we haven't read all of them yet). 

2. Make a Summer Learning Folder: 

So I've done Summer Learning Folders almost as long as my oldest has been in school.  I think I started them the summer after she finished 1st grade.  They can be as easy or as complex as you want to make them.  

Items you will need: 

1. 3 ring binder; grab a few of those cheaper 3 ring binders, you know the more flexible flimsy ones.  


2. Lined paper or notebook

3. Math games or flash cards 

4. Reading workbooks or Language arts books - we really like Summer Solutions


Then start making your Summer Learning Folder: 

First: make your schedule

    How often are you wanting your kids to work from their binders?  Everyday? 2-3 times a week?  For me, I gauge this based on what all we have going on.  When they were younger I made a specific schedule; Monday: Math, Tuesday: Lang. Arts Wednesday: Writing, Thursday: Math & Friday: Free day. I have found it's easier now that my kids are older to say 2x a week you need to do a language worksheet, 1 time a week you need to do a math activity and so forth.  Here's what our schedule looks like for this summer: 

Weekly: 

15-20 min doing 1 math game OR complete 1-2 math worksheets 

2 Pages from Reading/Lang workbook 

20 min reading/day = 2 hours for the week 

Write a letter or card to someone 


Then get your copies made or your supplies together: 

Reading: This year, I chose to order Reading/Language Arts Summer Solutions to use.  So each of my girls will have a workbook they can work from for Lang. Arts. 

Math: For math, we have different Math games they can play; 

UNO, TRASH, Usborne's (now Paper Pie) Learning Palette, I have Game 24 & Colorku on my wishlist, plus flash cards to keep it fun. We just have a designated drawer that has all the math games in it. 

 I also, will print a few math worksheets for each one to have in their binders. Then when it's math day or a day they choose to do math, they have many options on something to do. A couple sites I use: 

  •  K5 Learning: I really like this site, they have lots of options for many different grades and subjects.  Plus for math they include answer keys for each worksheet, which is so helpful as my oldest is doing fractions!
  • Education.com is another good one; this one you need to set up an account and you can only download 1 worksheet/month for free.  But, once you have them downloaded you have them.  OR you can pay to have more download options.  


Writing: I've tried to have them write a letter to a friend, family member, etc. once a week or depending on how the summer is going 2x a month. Or if you have a kiddo who likes making up stories, they could work on story for the summer or write a play.  Anyway to get them writing.  I make sure their binders have lined paper in them for the whole summer.  

Finally, I have a grid in the front that they can color a box each time they do an activity.  I've done it for each activity as below: 

Summer Learning Folder Log


Math 

Reading Workbook

 (2 pages)

Wrote a letter/card/part of my story

Week 1


Week 2


Week 3


Week 4


Week 5


Week 6


Week 7


Week 8


Week 9


Week 10


And then the Reading books one: 

Summer Reading Log


For each book you read you can color in a space.


Name: __________________________                              Month: ___________________________


1

2

3

4

5

6

7

8

9

10

11

12

13

14

15

16

17

18

19

20

21

22

23

24

25

26

27

28

29

30

31

32

33

34

35

36

37

38

39

40

41

42

43

44

45

46

47

48


But, this year I was thinking of finding a fun picture they could color and have done if they did something each day. 

\

That's it! If you have your binders fully packed, then it helps to make sure your kiddos can be consistent in doing something each day.  My goal is that they spend about 15-20 min a day doing something that is helping them learn or keep what they learned from the last school year present. 

Oh also a if you need it have a fun incentive if they complete the goal.  Some ideas include:  

  • Each week go out for ice cream
  • Visit a different pool/park each month it's complete
  • Have a big celebration at the end of the summer 


\

Thursday, April 6, 2023

Indoor Garden Savings


    Starting your summer garden indoors can add up fast. But, did you know there are many ways to start it without having to buy a lot of extra supplies? There are so many items around your house or as you go out and about that you can use to start your indoor garden, without having to buy specific items.  

Let's talk the containers.  Instead of buying the seedling pod packs, there are so many things you can use instead: 

1.  Coffee Cups: 

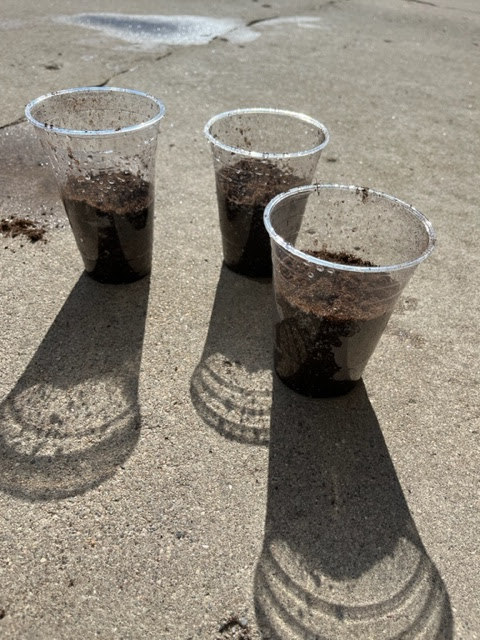
Start by saving those coffee cups.  You can use either plastic or the paper.  The paper will break-down so you can plant it right in the ground, the plastic ones you'd need to replant the plant in the ground.  


2. Egg cartons

Egg cartons make the perfect seed starter.  They also are able to break-down so all you have to do is just replant them into the ground.  One tip for these is, I would mist the cartons when you are ready to plant them in your garden, that way they tear apart easily. Also, depending on what you start in the egg cartons and how soon you start them; you may need to replant them into something bigger before you plant in your garden.  But, with the egg carton you can just place in larger container as it will break down.  


3. Milk jugs: 

Last year I used a couple milk jugs for lettuce.  I ended up starting them inside too soon, but it worked out as I had a big enough container for the lettuce to mature inside! 

4. Coffee Canisters: 

Coffee canisters make great pots for plants, but you can also use them for seed starting as well.  The plants would need to be re-potted when you place in your garden.  

5. Toilet paper rolls 

Did you know you can use toilet paper or paper towel rolls to start seeds?  Check out this post by Pam's Greenhouses for more of a how-to! 


Finally, make sure to keep those seeds moist, a great way to do this is to place a container over them to help keep the moisture in.  Any of those plastic oven bake covers you get with the tin foil baskets work great! Or anything else in your recycling! 


There you have it! Rather than buying containers for your seeds you have a few ways to try and save instead.  Good luck! Please share your photos too! 

Have a great week! 

Inisha 

Thursday, March 2, 2023

Homemade plant pots


It's getting time to start repotting those houseplants! Plant pots can add up and while I enjoy my houseplants, I don't want to spend a ton to have them either. I have two different ways that I save on my plant pots.  

First, did you know you can use almost anything as a planter?  Being a newbie to plants in the last few years, I've started to find some unique ways to save on pots.

Here are my 3 favorite homemade planters: 

1. Tin cans 

What I like about tin cans, is they are pretty stylish already.  Really all you need to do is drill some holes in the bottom for drainage and you're set! And drilling holes is not that hard, all you need is a nail and a hammer, it's pretty simple to do. 

2. Coffee cans 

Whether you buy the tin coffee canisters or the plastic, they both work great to use for planters.  The tin canisters look great on their own, just like the tin cans.  The plastic ones you may choose to paint.  

3. Ice cream buckets 

These work great for those big hanging plants.  One they need more room, two they will drape over the sides and cover the bucket themselves. But, if you still want you can paint the bucket as well. 

Some more options for homemade planters include the following; 

  • tea cups 
  • plastic to go coffee cups ~ these work great for starting plants too! 
Second, reusing the pots you already have for other plants in your house: 

I am always thinking which plant can go to which pot next.  Rotating my plants is a great way to save on buying pots.  This takes a little bit more thought, but it does help to not over buy pots when needed.  

1. I grab all the plants that need repotting. 


2. Then starting with the largest, I repot it into the newest largest pot.  
3. From there, I take the next largest plant to put in the empty pot.  Then I just continue down to the smallest. 


Sometimes it pays to have a few spare pots around the house.  I had a lot this time around that needed split up and so needed extra potters.  Luckily I had a couple in my basement.  Plus, I ended up with a few babies I was able to give away!  


With this system, instead of repotting every time a plant grows, I am able to wait and use the pots that I have.  Unless your plant is really busting through, usually you can have it wait a bit to be repotted.  

I hope this helps! 


Thursday, February 23, 2023

Life Hacks

 Here are 3 simple life hacks. 

1. Use hangers as clips 

Did you know you can re-use those pant hangers for clips in your kitchen? Super easy, just break off the clip part!  I recommend using a sharp pair of scissors first to cut it a bit.  Then just bend back and forth and you have a clip for your chips, cereal, or anything else you may need a clip for in the kitchen! 

2. Newspaper trash bags

WHAT? Yes! You can make trash bags out of newspapers.  This isn't a new idea, in fact, it's been around since Audrey Hepburn, but, what a great way to cut back on plastic PLUS, save some money!  You don't need a lot of newspaper, just one sheet actually. Then it's a basic origami fold.  Check out this post by Improvised Life for the how-to.  


3. Clipboards for kid art 

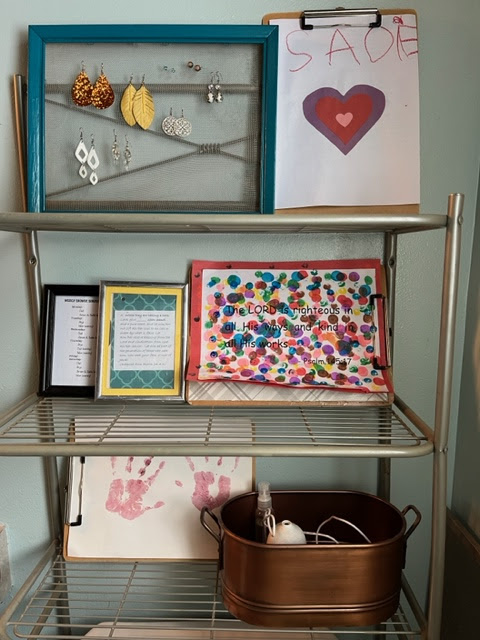
Sometimes those school artwork pieces don't fit your normal 8x10 frame.  Over the years, I've accumulated a bit of artwork from my girls from school and other areas.  Recently I stumbled across a way to display their artwork without having to spend anything.  We had a few clipboards in a drawer.  So I tried them out.  They work great! The best part about them is they don't leave tape damage on the artwork! Plus, with them not being closed in the artwork is able to move freely.  They work for so may different sizes of artwork! 


Thursday, January 19, 2023

Ice Cream bucket = free storage


Way back when I first started my blog, I did a post or two on re-using ice cream buckets as storage. You can check them out here: Ice Cream bucket storage or 3 ways to use that Ice Cream bucket but over the years I've added a few new ways to re-use that ice cream bucket and wanted to share. 

1. Freezer storage: 

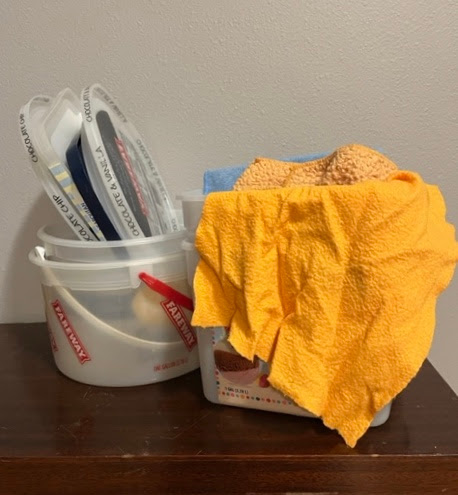
This is my new favorite! We have a deep freezer and if you have one you know how hard it is to lose something at the bottom. Well, if you use ice cream buckets to store your items in it helps getting those items from the bottom better.  Things I use my buckets for in the freezer: 

  • meat
  • homemade cookies/treats
  • gluten free items 
  • homemade mini pizzas

2. Storage in your shed: 

I recently have been trying to organize our shed better.  Here are some ways I organize with the buckets in my shed: 
  • gardening gloves (mine + my girls) 
  • seed packets 
  • soil pods
  • gardening tools + markers 
  • summer toys for girls 

3. Pots for your plants:

In the last couple of years, I've become a plant lady. Well, I always have enjoyed plants, but in the last few years I've added a lot of plants to my house.  It started with a couple as gifts from my grandpa-in-law's funeral.  My husband and I were gifted two beautiful plants to take home, since then I have added many more! Ice cream buckets make great pots for plants; especially if you don't want to spend a lot. 

4. Outside toy storage: 

We have a big toy box we keep summer toys in.  After awhile the toys were just getting dumped.  So I took some of our ice cream buckets to use: 
  • jump ropes 
  • chalk 
  • bubbles

5. Around the house: 

  • Use for plastic bags: both ziplock or grocery bags  
  • Kids' toys 
  • cat/dog toys 
  • homemade baby wipes 

Pinterest