Saturday, January 30, 2016

Re-arrange vs. Re-Model

Last weekend my father & mother-in-love came to visit.  I love it when we get together, I'd say my mother-in-love and I are kindred spirits.  We enjoy staying up chatting, sharing ideas and drinking pounds of coffee.  While they were here I was telling her all about the re-moldeling ideas that Matt and I (well mostly I) are dreaming of.  Now I will say I have had some plans for this house for a long time (since we bought the place), but Matt did bring up the latest one himself.  Yay! Anyways, the plans we have won't happen for at least 8 years, but its fun planning and dreaming.

So I was expressing my big plans for the house to my mother-in-love and how excited I was for the addition of a mud room.  I explained how it would be nice to not have dirt and snow tracked through the house; at the time our shoe rack was at the front door which we use 1 out of 10 times, compared to the back door which we use 9 out of 10 times.


 Now, I will say I almost cleaned up just to take the photo of the before, but then I thought, why?  This really is the before.  If I was truly honest with myself, most of the time this is how it would look.  Recycling, coats and gloves all overflowing on the half wall.   So I included it so you could see what it truly would look like.  

As we were sitting at the dining room table, she looked at our kitchen towards the back door and thought for a moment.  Then she said, "what if you made a make-shift mud room in the space you have now?"  I said, I had thought about it, but didn't know where all the stuff that's there would go.  She said, "What if we could find homes for the other stuff?"  I thought for a moment and said yeah why not.  So we started brainstorming, looking at my cabients and seeing where I could make more space.  Then I said, I want to try this, and this is what I love about my mother-in-love, (remember it's already almost 9pm), she was game for helping me re-arrange right then and there!  Honestly, if she didn't I don't know when I would have done it.  I'd probably still be dreaming of one day when I have a mud room...

It was so helpful to have another set of hands and brain to help move things and think through what would work best.

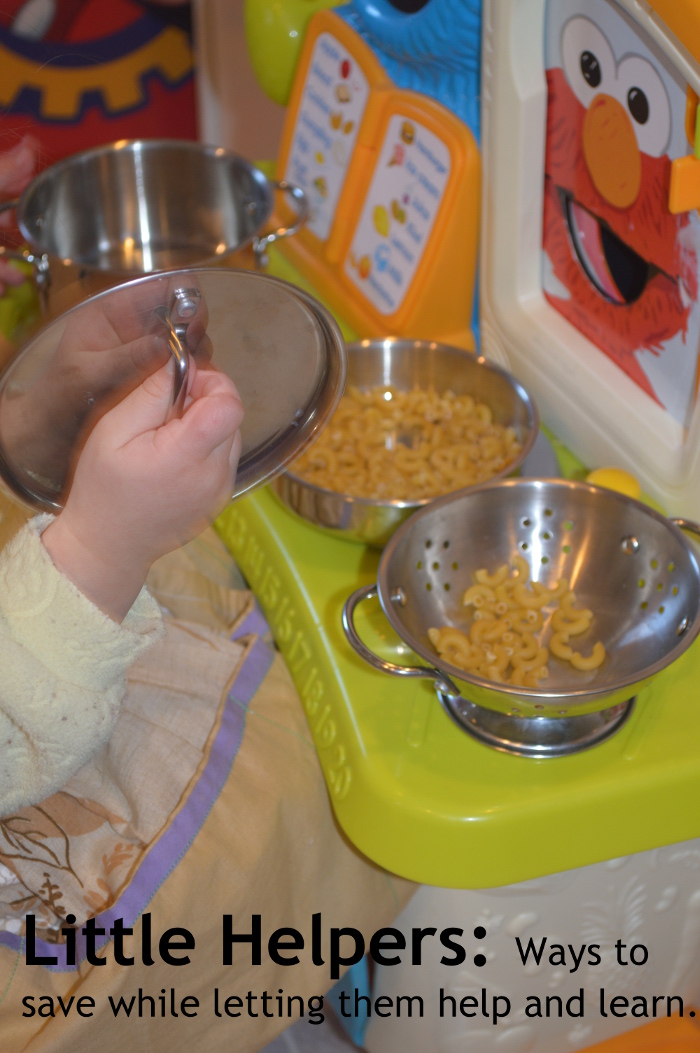
In a couple years I plan to swap out the little kitchen set for some hooks for backpacks. 

While this make-shift mud room will keep me from dreading winters and all the winter gear piling up, I still have plans to add a mud room; however, that is years down the road when we have the funds. So until then, I am happy with my rearrangement and now I can dream without agonizing over when will we have a nice mud room.  I love our house, I loved it the moment we stepped in with the realtor to see if it was what we wanted, but there are always ways to improve.  Right now improving by adding on isn't in the budget and that's ok, so I find ways to make it work for the time being.


Recipe books that were in the white cabinet are now on top of the fridge, in a neat organized way. 


Good-bye plastic see-through bin for recycling, hello cute Trader Joe's bag.  No more overflowing recycling here! I also added a brown bag to keep our plastic bags in because we seem to have a hard time taking them downstairs right away.  

We found a new place for everything.  The cereal containers went on the peninsula.  The white cabinet relocated to the main bath and the table and chairs were moved to the play room.  


My mother in love also gave me a book about a year ago called The Nesting Place.  This is one thing that she talks about in her book.  Loving the home you are in now and not planning to love it when...fill in the blank.  Like I said I love our home, I loved it the moment I walked in, my husband can atest to that.  But, after a few years it's easy to notice what you don't have or ALL the things that need fixed and lose sight of what you have.  Adding my little nook mud room helped me to see the potential in my house again.  This book is a must read! It really helped put my house into perspective.  She has A LOT more tips on ways to love the home you're in.  If you haven't read it before check your local library for a copy!  Or buy a copy yourself (I like having my own to make notes in).  Now I will say if it's in your budget to remodel then by all means remodel.  Like I said, once we can I will be adding a mud room, but if you aren't able to spend the money find a compromise and this book is great at helping you do just that!


This post includes affiliate links, which means if you click on the link I get a portion of any sales at NO COST to you.  See my disclosure page for more details. 


Thursday, January 28, 2016

Christmas Activities for kids

Now I was going to save this post for next Christmas, but then was thinking if any of you are like me, you plan on doing all these Christmas activities, but then don't get them ready until November.  This way you have a whole year to prepare, order supplies, and create.  Then come next Christmas all you have to do is set them up and watch your kids have fun!

Christmas is such a great time of year.  A time to remember how God loved us so much and sent his Son for us. This is such a great time of year to teach our kids about God's love and his sacrifice for us. I love teaching my girls about Christmas. I also love to do Christmas activities with them, and while this year was more for Baby Girl, Peanut had some fun too. There are a lot of different activities that you can do and do them on a cost-friendly budget. The best part about these activities are that they are adaptable to what you have on hand, or what you can get affordably.  The main thing you will need is felt.

Felt is such an affordable material and you can get a lot for your money's worth, making it easy to invest in. You can always pick 1 or 2 colors to buy in a bigger quantity and then buy a bunch of colors on a smaller scale. There are so many things you can do with felt.  Tune in next week to see some more projects that are popular now, but until then enjoy some Christmas crafts! 


This post includes affiliate links, which means if you click on the link I get a portion of any sales at NO COST to you.  See my disclosure page for more details. 


So here are a couple of my favorite felt Christmas activities to do with my girls.

Felt Christmas tree:

What you will need: 
felt
glue
sharpie
circle items to trace
ruler
command strips
optional items:
glitter


Now I don't have a pattern, but it's really simple. I got this idea from Pinterest via this blog.  She has a lot more Christmas ideas too, so ! 


Tree: I just free handed this. On tip I have is to fold the felt in half, then cut half of your tree. That way when you unfold it you have a symmetrical shape. If you aren't able to get your hands on a large sheet of felt, you can make a smaller tree that can fit on a cookie sheet.  But remember if you buy 1 or 2 colors in large quantity its a good investment, kids LOVE felt!

Bulbs: I just used different sized circles to trace; cans, jar ids, anything circular you have around the house.  Adjust the circular things to trace based on the size of your tree.

Presents: I drew different sized boxes. Then I cut out strips and cut them to the length of the box.


I used the command strips to hang it to the wall. They hold just enough to keep it from falling, but it doesn't tear up the wall. 
I made this last year and then this year decided that it needed something, so I added some glitter. It's amazing what a little glitter can do.  


Block Nativity Original Inspiration: 

This is my in-laws, both my husband and his sister grew up playing with it. They also were taught the Nativity story through it. The following is a link to the pattern book; however, it's not in stock currently. It is about 30 years old, but you might be able to find it in print still, otherwise you could probably work from the photos. 


I also added some patterns at the bottom of this post that my mother-in-love created herself.


What you will need: 
2x4's
sand paper
saw of some sort (or have your local hardware store cut the 2x4's for you, it's usually a free service)
felt
glue
additional if wanted:
glitter
ricrack

1. Cut the 2x4's into desired lengths
2. Sand the edges and corners so that they are safe for kids to play with
3. Make your Wiseman, Joseph, Mary or animal pattern and glue together.
4. Then glue onto the desired wood piece.


You can order a sample pack of felt on amazon for about $11.00.  You get 42 squares sized 5.9 x 5.9 inches,in assorted colors. 


Or you can opt for the assorted colors in larger squares; 9x12 and get 50 for $20.59, that comes to about $0.41 cents a piece. 


Or if you know what colors you want you can order larger squares; 9 x 12 inches at 0.35 cents a piece from Michael's.  Cost varies depending on where you are located, so make sure to do your own pricing before buying. 

 Below are some free patterns, I'd love to see what styles you come up with!


Camel 


Cow 


Inn Keeper's door 


Inn Keeper part 1 


Inn Keeper part 2 


Star 


Sunday, January 17, 2016

Baby Food- Make Your Own to Save Money

Baby food can get expensive. In the last couple months my peanut started eating baby food so I'm back in the swing of making my own. Making your own baby food is so much cheaper and even can be healthier for your baby. Some simple ones to make are carrots, peas, and applesauce.

Below are my tips on how to save money while making your own, natural baby food. If a bag of peas costs $0.99 and you get 36 servings, whereas a single container of baby food peas at the store can cost roughly $1 and you only get 2-3 servings, you're automatically saving at least $17 by making your own. That can add up quickly! Even better if you are able to maintain your own garden and grow the produce. 

One trick a friend of mine taught me is to freeze servings in ice cube trays. Each ice cube is about 1 serving, so you can keep track of how much your baby needs and cut down on waste. 


On a side note, another way to make your breast milk go farther, freeze in ice cube trays as well.  Stay tuned for a later post about the how to. 


What you will need: 

1 2lb bag of large carrots
1 2lb bag frozen peas 
peeler 

blender 
pot 
ice cube trays 
spatula 


Peas:

1. Toss frozen peas in a pan large enough to hold them, then add water just until they are slightly covered. 


2. Gently boil, or boil & then let simmer until they are pretty soft.


You can see about the softness I let them become in this picture. 


3. Scoop peas into a blender, add a little of the water from the pot to the blender (The water has a lot of the nutrients, so use as much as you can without it becoming too runny).


4. Puree for about 30-45 seconds. 


5. I like to blend it as well for 4-5 seconds. You want to make sure that it is pretty liquidy.  This is something I have had a hard time with, making sure it was a thin enough consistency for her. I ended up making sure to not feed peas to peanut until she has ate baby food for a couple weeks. You can also add water to it later when feeding it to your baby if needed.  

Or, as an alternative I've tried adding a little applesauce to it. I know it sounds gross, but it actually doesn't taste that bad. Yep, I'm one of those moms, I had to try it! If my baby's going to eat it I need to try it too. It adds a little sweetness to the peas, plus it helps make it a little easier for them to eat. Then you kill two birds with one stone feeding the  both veggies and fruit at the same time! 

I just started giving peas to peanut this week and I have to say she is not a fan. The applesauce does help a little, at least when I add the applesauce she doesn't shake her head as much. Seriously, she's only 7 months and she can already hold her mouth locked tight and refuse to eat.

6. Once you're done blending the peas, freeze the mixture in the trays for a few hours. I've frozen them overnight too, but you don't want to leave them in too long without putting them in something with a cover. This made 3 trays of ice cubes.  Now, as you can see in the photo my trays have both large and small sized cubes.  Which right now comes in handy because Peanut is still getting used to baby food and I had been cutting the cubes in half. This way I can start with the smaller cubes and work our way up. 


7. Take out of ice cube trays and store in a plastic bag or jar.  I prefer to store mine in pyrex bowls.  They are easy to stack and store in my deep freezer. 


These are photos of the carrots, but the same concept applies to the peas or any other homemade baby food you are making. 

***I need to add that if you are planning to keep these in your freezer for a few weeks and you go the pyrex bowl route, line the bowl with that free wax paper. You can get the how to for that here.  After a week or so in the deep freezer the cubes stick to the glass and take a little bit to get removed.  Otherwise, freezer bags work great***  


 I also put some in a quart mason jar that I keep up in my fridge freezer for easy access.  


Carrots:


1. Peel the carrots


2. Slice them up


Repeat steps 1-7 from above. 


So figuring in an average ice cube tray, I'd have about 36 cubes total.  I was able to get that 2lb bag of peas for 0.99 cents, which makes each cube only 0.03 cents a piece.  Each ice cube (the average one) is about one serving.  Even right now, when I can get 3 servings out of a baby food jar  at $0.98 cents a jar, that still costs $0.32 a serving. That comes to $0.66 cents savings per serving.  That's when I can get 3 servings! Once peanut starts eating only 2 servings per jar, or even one serving the difference will be even more!!


Peas:

$0.99/2lb bag

36 ice cubes = $0.03 cents a serving


Carrots: 
$1.49/2lb bag 
36 ice cubes = $0.04 cents a serving

Applesauce:


10 apples of your choice, some that I prefer are Braeburn or Fuji, although I have thrown in a Granny Smith here or there.  I usually just use whatever I have on hand that are getting too bad to eat on their own. 


Then I follow the applesauce recipe from: Cutting Coupons in KC


Then I add it to my blender and puree it for awhile to make it smooth.  I would recommend doing this if you are planning to use it as baby food.  I do this for us as well, because we don't like it thick. I also leave out the sugar, I just always have because I feel applesauce is sweet enough as is, but that is my personal preference.


Also for applesause I freeze it in pint jars, rather than ice cube trays because we all eat it, not just little peanut.  


With her recipe, I get about 2 1/2 pints.  This time I was short 3 apples so it didn't quite make it to a full 1/2.  It's perfect, because I can freeze the 2 pints and then refrigerate the 1/2 pint to use right away   

Now, I will say that making applesauce isn't really that much cheaper.  According to a friend of mine in order for you to make it so that it's cheaper, you have to get the apples as low as $0.33 cent a lb, but in this area I splurge because I like to have homemade applesauce. I also don't make homemade applesauce exclusively, I buy it too, but when I can I try to make it homemade. 
 A few ways you can make homemade applesauce more affordable, find a friend who has an apple tree.  Peope who have apple trees are usually more than willing to give away their extra apples for free or just a small fee.  Or plant your own apple tree, one day I might finally get the hubby on board with that idea, but until then, I spurlge for the applesauce or get them from a friend.   

How to defrost:

There are 2 ways you can defrost
1st you can microwave the cube for 10-15 seconds. 
2nd, I prefer to take a cube out of the freezer in the morning and let it slowly defrost in the fridge.  


What are some of your favorite baby foods to make?  I'm always up for trying new recipes so I'd love to hear what you've tried! 


This post includes affiliate links, which means if you click on the link I get a portion of any sales at NO COST to you.  See my disclosure page for more details. 

Thursday, January 7, 2016

Little Helpers...can be costly.

My daughter LOVES to help me in the kitchen and I LOVE to have her help, really I do.  What I have a hard time with is the money that I lose on things she helps me with.  Two of her favorite things to play with in the kitchen are flour & macaroni noodles.  When I became a SAHM, I noticed how much more easily I would get annoyed at how many noodles were being wasted each time she played in the kitchen while I worked. But, I didn't want to take this time of learning away from her nor did I want to take away my time with her as she helped and played.Plus, I didn't want to send the wrong message that it's ok to play and waste food. 

This post includes affliate links, which means if you click on the link I get a portion of any sales at NO COST to you.  See my disclosure page for more details. 


Then one day I realized, why do I need to give her fresh noodles every time?  So I got a little mason jar and a plastic reuseable lid to store her own noodles in.


This little jar is what she uses and after we are done we pick them back up and put them in the jar, yep even the ones on the floor.  I mean she doesn't eat them, they are strickly for play cooking.  That way she has them for the next time we need them.


Obviously, there are some noodles we don't put back into her jars; the under the fridge, under the stove or in the stovetop. But really, when all she does is put them in her little pans and plays cooking and then returns them, I'm fine with them being less than squeaky clean and then replacing them as needed.


These lids are great, and since they're plastic there's no possible way of her getting hurt by the lid.

These jars are great, they are the perfect size for her little hands to grab.  She loves having her own set, just like mom!  She knows exactly where her jar of noodles are and enjoys being able to get them out herself.

Now I will say I haven't quite tried this with the flour yet, it might be a little harder since it picks more dirt off the ground than the noodles do.  But maybe I can just recycle the flour off the counter instead.  Either way, I plan to use the same method of storing it.


Now if you like this idea, but don't want to spend any money, you can use any jar to store the noodles (or whatever you let your little one use) in.  
An old salsa jar, jelly jar, or even a plastic bag will work great! 
I just happened to have these jars and lids at home and wasn't using one.


If you like the mini stainless steel pots and pans here's a link, they're pretty afordable.  My little one used to just use my pots and pans, but soon she realized they wouldn't fit in her stove and so for Christmas the hubby & I bought her her own set.

One last thing, my little peanut is 7 months and so baby girl and I make sure we scan the entire floor for any noodles since they can be a choking hazard. Let me know if you try to recycle any dried foods with your kids or have any tips! 


Pinterest