Showing posts with label Summer. Show all posts

Thursday, July 20, 2023

Landscaping ideas


 Looking for ways to improve your landscaping, but don't want to spend a lot?  Recently, I wanted to update our front landscaping, plus I wanted to have flowers available for our pollinators.  I've really been working hard to try and include more flowers in our yard and garden.  There's such a need for those pollinators that I want to make sure they have a place.  So much that I made space in my garden this year for flowers.  It works two-fold, it's great for them + they help your veggies and fruits grow! If you're interested in more of that you can check out my post "Grow your own flower garden"

But, anyways I was looking for ways to add more flowers and make our front yard look better.  I have two big pots that sit on my porch, that were a lime green color.  I knew I wanted to spray paint them yellow, I liked the yellow against our blue house. 

Before
After


 So after talking this over with a family member, she mentioned getting more pots and placing them around the house with flowers in them.  I thought this was genius.  A great way to add some color.  Plus I knew I could save by doing a couple things;  

1. Shop end of season sales 

    Plants ~ I recently bought the plants in the new picture for 25 cents/piece.  They were originally over $2 a piece.  Now, they won't come back each year because they are annual, but for $1.25 I still have the rest of the Summer and the Fall to enjoy them.  

    Pots ~ Now that I know what I want to add to our yard, I can buy pots at the end of the season as well.  Those big plastic pots aren't that expensive to start with, but when you need a lot it adds up.  Plus, why not wait until you can get 2 or 3 for the price of 1 originally. 

2. Spray-paint pots 

Then, once you've got your pots you can spray paint them to all match! Especially since you are waiting to buy them at the end of the season, you might not get all the same color.  But, that's ok, because you can buy a couple cans of spray paint and paint them to match. Spray paint isn't that much and they make it now with primer + paint in one. 

Now, I know spray paint is not the best for the environment.  I use to spray paint all the time; however, as I've become more environmentally friendly, I only use it here and there.  For example I made one can work for my two pots.  I could get more and go over it better, but I decided that was enough to make the difference I wanted and I wasn't using two cans.  So with that, this is totally an option you can take out.  It would just take you longer to maybe find matching pots or you cold go for the eclectic look of mismatch pots.  

I am hoping to find a bunch of white pots to put around our house for the flowers.  I'll keep you posted. 


Thursday, June 1, 2023

Summer Bucket List


    So I was listening to a podcast the other day and they were talking about their summer plans and how to make the most out of your summer.  Side note, it's a great podcast; Legacy by Gretchen & Elisabeth, you should check it out!  Anyways, one of the things they mentioned doing was a bucket list with your kiddos.  

I loved this idea! I'm always looking for ideas for the summer.  We can be busy with different summer rec activities, but it can be easy to get too busy and not do the things you wanted to do.  So they mentioned make a list of the activities you want to do and then cross them off as you accomplish them. 

I recently sat my girls down and we did just that!  We came up with all kinds of things to do this summer.  A couple were things they've been wanting to do, but each summer we run out of time.   I'm really excited to cross off some of these things this summer! 

While I was starting this post it reminded me of what my girls and I did last year.  We needed to change up our schedule a bit last year so we took each Friday and visited a different local town's park.  We live in a small town with lots of towns nearby.  Sometimes we drove 20 min, sometimes we drove almost 45 min away, but we planned each Friday with a different park/town in mind.  It was so fun! My girls have always wanted to go to the different parks when we go to the different towns for other things and so this was a great way to do just that! 

So here's to the start of summer and making a bucket list or making a park list, or something in between!  Whatever you plan, I hope that you are able to make it a fun summer! 


Thursday, May 25, 2023

Grow your own flower garden


    Did you know that you can grow a flower garden in your backyard that you can pick from?  Ok, maybe this is just news to me, but in case this is news to you let me share. 

Recently, I learned about how you can plant flowers in your garden that you can pick and then they will regrow so you can pick them again! I always knew that flowers were good for my garden, each year I've tried to plant some sort of flower, but I never thought I could pick them and they'd keep growing.  I love having flowers in my house, but honestly, I don't like to have to buy them.  So therefore, I only end up with flowers in my house for birthdays and Mother's Day, which for my family only consists of three different months.  

But, I could plant flowers in my garden, help my vegetables to grow, help the bees AND get to pick some flowers to bring into my home! Needless to say I was excited!  

Plus, its really not that hard to do.  We've always planted sunflowers so we did that again.  While we didn't get them planted this year, milkweed is on my list for the butterflies.  But then there are so many flowers you can plant to pick; 

Sunflowers 

Zinnias 

Black-eyed Susan 

and more! 

If you want a great resource for more info, the book linked at the bottom is a great one! She talks about how to grow your flower garden, how to clip them and so many more things!  Grab your copy today or check out your local library to see if they have a copy! 


Thursday, May 18, 2023

Summer Learning


    Summer is almost here! But, don't let this summer get away!  Summer is still a great time to keep learning. Here are a few ways keep our kiddos brains moving during the Summer. 

1. READ

I can't stress this one enough! Taking time to read is so beneficial to your kiddos in the summer. Whether you read to them, or they read on their own.  Whatever it takes, find some time to read this summer. A couple ways we like to include reading is:

  • The Summer Reading Program at the library ~ check out your local library and see what they have for their summer reading program! 
  • Making a Summer Reading List or a goal of how many books to read in the Summer 
  • Setting aside a specific time during the day to read; for me it was after lunch, I told my girls after they ate they needed to go find a book to read (or look at for the younger one) so I could clean up the kitchen/eat my own lunch or talk to their dad while was home for lunch. 
  • We also tried to pick a book series to read through. Each night before bed we'd read a few pages or a chapter.  We've read Little House on the Prairie, The Chronicles of Narnia and even some Boxcar Children books (we haven't read all of them yet). 

2. Make a Summer Learning Folder: 

So I've done Summer Learning Folders almost as long as my oldest has been in school.  I think I started them the summer after she finished 1st grade.  They can be as easy or as complex as you want to make them.  

Items you will need: 

1. 3 ring binder; grab a few of those cheaper 3 ring binders, you know the more flexible flimsy ones.  


2. Lined paper or notebook

3. Math games or flash cards 

4. Reading workbooks or Language arts books - we really like Summer Solutions. 


Then start making your Summer Learning Folder: 

First: make your schedule

    How often are you wanting your kids to work from their binders?  Everyday? 2-3 times a week?  For me, I gauge this based on what all we have going on.  When they were younger I made a specific schedule; Monday: Math, Tuesday: Lang. Arts Wednesday: Writing, Thursday: Math & Friday: Free day. I have found it's easier now that my kids are older to say 2x a week you need to do a language worksheet, 1 time a week you need to do a math activity and so forth.  Here's what our schedule looks like for this summer: 

Weekly: 

15-20 min doing 1 math game OR complete 1-2 math worksheets 

2 Pages from Reading/Lang workbook 

20 min reading/day = 2 hours for the week 

Write a letter or card to someone 


Then get your copies made or your supplies together: 

Reading: This year, I chose to order Reading/Language Arts Summer Solutions to use.  So each of my girls will have a workbook they can work from for Lang. Arts. 

Math: For math, we have different Math games they can play; 

UNO, TRASH, Usborne's (now Paper Pie) Learning Palette, I have Game 24 & Colorku on my wishlist, plus flash cards to keep it fun. We just have a designated drawer that has all the math games in it. 

 I also, will print a few math worksheets for each one to have in their binders. Then when it's math day or a day they choose to do math, they have many options on something to do. A couple sites I use: 

  •  K5 Learning: I really like this site, they have lots of options for many different grades and subjects.  Plus for math they include answer keys for each worksheet, which is so helpful as my oldest is doing fractions!
  • Education.com is another good one; this one you need to set up an account and you can only download 1 worksheet/month for free.  But, once you have them downloaded you have them.  OR you can pay to have more download options.  


Writing: I've tried to have them write a letter to a friend, family member, etc. once a week or depending on how the summer is going 2x a month. Or if you have a kiddo who likes making up stories, they could work on story for the summer or write a play.  Anyway to get them writing.  I make sure their binders have lined paper in them for the whole summer.  

Finally, I have a grid in the front that they can color a box each time they do an activity.  I've done it for each activity as below: 

Summer Learning Folder Log


Math 

Reading Workbook

 (2 pages)

Wrote a letter/card/part of my story

Week 1


Week 2


Week 3


Week 4


Week 5


Week 6


Week 7


Week 8


Week 9


Week 10


And then the Reading books one: 

Summer Reading Log


For each book you read you can color in a space.


Name: __________________________                              Month: ___________________________


1

2

3

4

5

6

7

8

9

10

11

12

13

14

15

16

17

18

19

20

21

22

23

24

25

26

27

28

29

30

31

32

33

34

35

36

37

38

39

40

41

42

43

44

45

46

47

48


But, this year I was thinking of finding a fun picture they could color and have done if they did something each day. 

\

That's it! If you have your binders fully packed, then it helps to make sure your kiddos can be consistent in doing something each day.  My goal is that they spend about 15-20 min a day doing something that is helping them learn or keep what they learned from the last school year present. 

Oh also a if you need it have a fun incentive if they complete the goal.  Some ideas include:  

  • Each week go out for ice cream
  • Visit a different pool/park each month it's complete
  • Have a big celebration at the end of the summer 


\

Thursday, May 11, 2023

Homemade Compost


So I've been working on composting the last few years.  When I first started composting, I used a small ceramic compost container that I got from World Market.  When it was full or about 1/week, I'd run it out to my garden and put it in the posts.  However, I wanted to have a bigger compost so that I could do throw even less away. 

A couple years ago I found this sweet galvanized trash can at Walmart on sale...only $11.00!  It was perfect, I was so excited! 


Then my husband drilled some holes all around the sides. 


It was so simple to make!  We added a couple cinder blocks for it to sit on in our backyard.  That's it! 

Now, I am able to dump my under the sink compost right out my back door into this larger compost, along with clippings from our yard and I can make my own compost! 


Last Fall was the first time I added the compost from this bin to my garden.  We recently planted some vegetables and the soil was so soft and easy to till.  I did give my larger compost in the can two years before I used it on my garden.  BUT, it is large enough that I didn't have to empty it in-between and was able to add all our food scraps throughout the year. 


So if you are looking to make your own compost, grab an old trashcan, plastic works too, and get started.  It really is easy to do!  Just make sure to layer brown items too; egg cartons, toilet paper rolls, leaves, that will help it to not be too wet.  


Thursday, April 6, 2023

Indoor Garden Savings


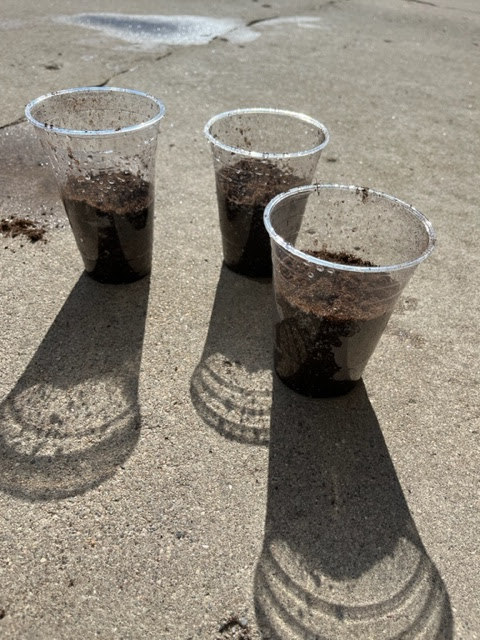
    Starting your summer garden indoors can add up fast. But, did you know there are many ways to start it without having to buy a lot of extra supplies? There are so many items around your house or as you go out and about that you can use to start your indoor garden, without having to buy specific items.  

Let's talk the containers.  Instead of buying the seedling pod packs, there are so many things you can use instead: 

1.  Coffee Cups: 

Start by saving those coffee cups.  You can use either plastic or the paper.  The paper will break-down so you can plant it right in the ground, the plastic ones you'd need to replant the plant in the ground.  


2. Egg cartons

Egg cartons make the perfect seed starter.  They also are able to break-down so all you have to do is just replant them into the ground.  One tip for these is, I would mist the cartons when you are ready to plant them in your garden, that way they tear apart easily. Also, depending on what you start in the egg cartons and how soon you start them; you may need to replant them into something bigger before you plant in your garden.  But, with the egg carton you can just place in larger container as it will break down.  


3. Milk jugs: 

Last year I used a couple milk jugs for lettuce.  I ended up starting them inside too soon, but it worked out as I had a big enough container for the lettuce to mature inside! 

4. Coffee Canisters: 

Coffee canisters make great pots for plants, but you can also use them for seed starting as well.  The plants would need to be re-potted when you place in your garden.  

5. Toilet paper rolls 

Did you know you can use toilet paper or paper towel rolls to start seeds?  Check out this post by Pam's Greenhouses for more of a how-to! 


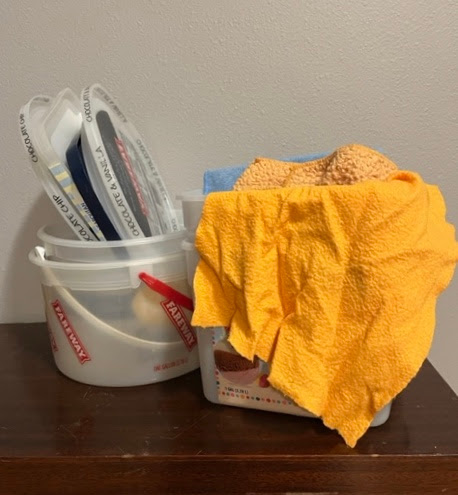
Finally, make sure to keep those seeds moist, a great way to do this is to place a container over them to help keep the moisture in.  Any of those plastic oven bake covers you get with the tin foil baskets work great! Or anything else in your recycling! 


There you have it! Rather than buying containers for your seeds you have a few ways to try and save instead.  Good luck! Please share your photos too! 

Have a great week! 

Inisha 

Thursday, March 30, 2023

Spring/Summer Clothes


    It's almost April 1st, and in our household that is about the time we start looking at our Spring and Summer clothes.  In the last couple of years I started having a note in my phone on April 1st as a reminder to start taking inventory of what we have for the Spring and Summer as well as make a list of the items we will need.  It's so easy to go and shop for a bunch of new items that we might only need a handful of.  On the flip side, it's also easy to assume I have what we need in our totes from previous years; that's what I kept doing and unfortunately it didn't end well.  At the time, my 2nd grader was starting to care more about what she was wearing; and not having what was needed or have items to match her sisters if she wanted to, caused some problems.  With that, I made sure to have time to go through our clothes before it got too warm.  For our area that's about April.  We always have one or two shorts on hand from the previous year that still fit just enough for if we need them in a crunch in March, but by April we'd need more.

With that, here's my tips for switching over the next season.  

First: Go through those storage totes 

Like I said, it's easy to just run out to a local store and buy what you'd want for the next season, but going through what you have is so helpful.  Don't have storage from the year before, make sure you check out my post on how I save from kid to kid so that you can start doing so after the Summer. You can check that out here: Clothing Switch

Second: Make a list 

So back to going through what you have.  After my girls have sorted through what we have and what fits I make a list. I list how many shorts, shirts, jackets, shoes; anything else my girls would need that still fit.  I like to use my phone notes for that, I just make a list for each kiddo.  

Third: What will we need 

This can change each year.  For example, one of my girls is just starting to like wearing jean shorts.  So we may talk about how many jean shorts she'd like vs. athletic shorts.  This also will depend on what she's active in for the summer.  Another one of my girls prefers capris, while my 3rd prefers dresses. So what they need may vary.  But, I like to make a estimated list of what we need so I know when we go shopping.  

And that's it!  It really does help to know what you already have and what you'd like to get, before you enter the store.  There are so many times before that I would blank on what they had, or get items I thought we needed and really we didn't. I hope this helps you as you might be transitioning to warmer weather in your area as well. 


Thursday, January 19, 2023

Ice Cream bucket = free storage


Way back when I first started my blog, I did a post or two on re-using ice cream buckets as storage. You can check them out here: Ice Cream bucket storage or 3 ways to use that Ice Cream bucket but over the years I've added a few new ways to re-use that ice cream bucket and wanted to share. 

1. Freezer storage: 

This is my new favorite! We have a deep freezer and if you have one you know how hard it is to lose something at the bottom. Well, if you use ice cream buckets to store your items in it helps getting those items from the bottom better.  Things I use my buckets for in the freezer: 

  • meat
  • homemade cookies/treats
  • gluten free items 
  • homemade mini pizzas

2. Storage in your shed: 

I recently have been trying to organize our shed better.  Here are some ways I organize with the buckets in my shed: 
  • gardening gloves (mine + my girls) 
  • seed packets 
  • soil pods
  • gardening tools + markers 
  • summer toys for girls 

3. Pots for your plants:

In the last couple of years, I've become a plant lady. Well, I always have enjoyed plants, but in the last few years I've added a lot of plants to my house.  It started with a couple as gifts from my grandpa-in-law's funeral.  My husband and I were gifted two beautiful plants to take home, since then I have added many more! Ice cream buckets make great pots for plants; especially if you don't want to spend a lot. 

4. Outside toy storage: 

We have a big toy box we keep summer toys in.  After awhile the toys were just getting dumped.  So I took some of our ice cream buckets to use: 
  • jump ropes 
  • chalk 
  • bubbles

5. Around the house: 

  • Use for plastic bags: both ziplock or grocery bags  
  • Kids' toys 
  • cat/dog toys 
  • homemade baby wipes 

Saturday, May 30, 2020

Bubbles


Did you know???  You can make your own bubbles!!  Ok, so before you say, yes I know this.  Did you really know...how EASY it is?  Anyone out there have pins on homemade bubbles;  but then realize wait, I don't have...glycerine and so then your pin sits there pinned and you continue to buy bubbles. 

Well, what if I were to tell you, you can make homemade bubbles that work great without anything extra you don't have?! 


So here's the crazy super easy way to make homemade bubbles. 


What you'll need: 

1. Container of some sort (we've been using old ketchup bottles, it makes it really easy for the kids to pour it out.) 


2. Soap: I put in a few tablespoons 


3. Water: Fill the rest of the bottle with water. 


THAT'S IT!! 


Little bit of soap, some water and you are ready to blow some bubbles!  If it seems it isn't bubbly enough, just add a little more soap. 

What I really like about this is that after the bubbles are gone, you can just add more water and it still works!  After about the 3rd time, I usually need to add more soap again.  


Pinterest