Showing posts with label Re-Purpose. Show all posts

Thursday, July 20, 2023

Landscaping ideas


 Looking for ways to improve your landscaping, but don't want to spend a lot?  Recently, I wanted to update our front landscaping, plus I wanted to have flowers available for our pollinators.  I've really been working hard to try and include more flowers in our yard and garden.  There's such a need for those pollinators that I want to make sure they have a place.  So much that I made space in my garden this year for flowers.  It works two-fold, it's great for them + they help your veggies and fruits grow! If you're interested in more of that you can check out my post "Grow your own flower garden"

But, anyways I was looking for ways to add more flowers and make our front yard look better.  I have two big pots that sit on my porch, that were a lime green color.  I knew I wanted to spray paint them yellow, I liked the yellow against our blue house. 

Before
After


 So after talking this over with a family member, she mentioned getting more pots and placing them around the house with flowers in them.  I thought this was genius.  A great way to add some color.  Plus I knew I could save by doing a couple things;  

1. Shop end of season sales 

    Plants ~ I recently bought the plants in the new picture for 25 cents/piece.  They were originally over $2 a piece.  Now, they won't come back each year because they are annual, but for $1.25 I still have the rest of the Summer and the Fall to enjoy them.  

    Pots ~ Now that I know what I want to add to our yard, I can buy pots at the end of the season as well.  Those big plastic pots aren't that expensive to start with, but when you need a lot it adds up.  Plus, why not wait until you can get 2 or 3 for the price of 1 originally. 

2. Spray-paint pots 

Then, once you've got your pots you can spray paint them to all match! Especially since you are waiting to buy them at the end of the season, you might not get all the same color.  But, that's ok, because you can buy a couple cans of spray paint and paint them to match. Spray paint isn't that much and they make it now with primer + paint in one. 

Now, I know spray paint is not the best for the environment.  I use to spray paint all the time; however, as I've become more environmentally friendly, I only use it here and there.  For example I made one can work for my two pots.  I could get more and go over it better, but I decided that was enough to make the difference I wanted and I wasn't using two cans.  So with that, this is totally an option you can take out.  It would just take you longer to maybe find matching pots or you cold go for the eclectic look of mismatch pots.  

I am hoping to find a bunch of white pots to put around our house for the flowers.  I'll keep you posted. 


Thursday, June 29, 2023

Jean pants turned into jean shorts


Jeans have too many holes? Make them into shorts! 

I know this is something that our moms did that we'd swear we'd never do; well at least I did.  But, really truly it's awesome! Can I just say how much I love not having to try on shorts! I already know my jeans fit me; but they have too many holes in the knees, so what better idea than to make them into shorts. 

Plus, I can send the scraps to For Days  and they can recycle them for me into something new.  Since I'm not the best at making something new out of the scraps this is a win win for me! 

But, cutting jeans into shorts seems complicated you say....really it's not the hard! It took me 30 min tops to do from beginning to end! 

First lay our you jeans length wise with one leg on the other.  

Second, cut just above the hole. Later, after you've cut other side and rolled them up, you can see if you want to cut them shorter. 


Third, cut the second leg to match.  The best part is you can roll them up so the cuts don't have to be even!  


That's it! You don't even have to stitch them!! 

You can stitch the sides, if you'd like, but its not necessary.  Also, if you are better at hem/sewing, you can cut them shorter and leave them not rolled up.  I would suggest at least making a slight hem so they don't unravel though.  This also would work better with tight fitting jeans, because when you roll the tight fitting jeans they are even snugger as shorts.  


I hope this helps you make your wardrobe go farther. The nice thing about this, is if they don't work they were jeans you were already going to get rid of anyways. 


Thursday, April 13, 2023

Newspaper Trashbags


A couple weeks ago I posted some life hacks.  One of the life hacks I talked about was making trash bags out of newspapers, from the blog Improvised Life.  If you missed it you can check it out here.  I wanted to take it a step further and try what Improvised Life does, only make it for my larger trash can in my girls' bathroom.   

These trash can liners are easy to make and are a great way to help out the environment. Instead of buying more plastic, you are reusing what you have.  So I figured if I can make it work for a small can, why not try a larger one?  

In order to do this, you will need 4 sheets of newspaper instead of just the 1 sheet. After that the process is merely the same, you just need to connect the 4 pieces.  

This post includes affiliate links, which means if you click on the link I get a portion of any sales at NO COST to you.  See my disclosure page for more details. 


Step 1: 

First take 2 sheets and staple the edges together.  To do this you need to first fold about an inch on each edge, then you can staple the edges together.  Staples break down, which is why I chose to use them.  Make sure to staple close together so you don't have gaps in your bag later. 


Step 2: 

Second, take the other two pieces of newspaper and do the same. 

Step 3:

Then, you will do the same with your two larger pieces of newspaper and connect them together. This can get a bit tricky as the edges have staples, so just watch as you fold. 


Step 4: 


Flip it all over.  Before you start the fold, you want to have the folded staple parts on the bottom.  


Step 5:

Start the folding process.  It is the same process as the smaller folding process.  It really does fold better than you think even though it's so much bigger.  Don't worry about making the lines crease tightly.  You can watch the video from Improvised Life here or you can follow along below with a step-by-step tutorial: 

Step 1: Place newspaper at a diagonal, then fold in half. 
Step 2: Fold the newspaper in half 
Step 3: Take the right corner and fold it over to the left side.  Make sure the bottom has a flat edge. 
Step 4: Flip over the newspaper and repeat step 3, just fold over the other left side to the right side. 
Step 5: Then take the flap and fold it into the pocket. 
Step 6: Flip over and repeat on the other side. 

One extra step for the larger newspaper bag that I've learned is to staple the sides together.  Where the corner kind of sticks out a bit, on the larger bag it's a lot more and so I just staple it to the side.  


That's it! Remember you can check out the youtube video posted on the Improvised Life post for a visual.


So far, I've been happy with this as a trash bag in my girls' bathroom.  But, if you want to help the environment by switching from plastic and don't want to make a newspaper trash bag, check out the Amazon link at the bottom for another option.  I use these green bags for  my kitchen trash.  I'll be honest, I tried the larger newspaper bags for the kitchen trashcan and let me just say, they don't work well for large amounts of mess.  But, I really like these green bags for the kitchen, they work great!  If you can buy them in bulk, it makes the cost a lot less and closer to the plastic you already get! Plus, you can split the bigger bulk size with a friend & it helps the cost! 


I hope you were inspired to find a way to be a little more environmental.

~ Blessings 


Thursday, April 6, 2023

Indoor Garden Savings


    Starting your summer garden indoors can add up fast. But, did you know there are many ways to start it without having to buy a lot of extra supplies? There are so many items around your house or as you go out and about that you can use to start your indoor garden, without having to buy specific items.  

Let's talk the containers.  Instead of buying the seedling pod packs, there are so many things you can use instead: 

1.  Coffee Cups: 

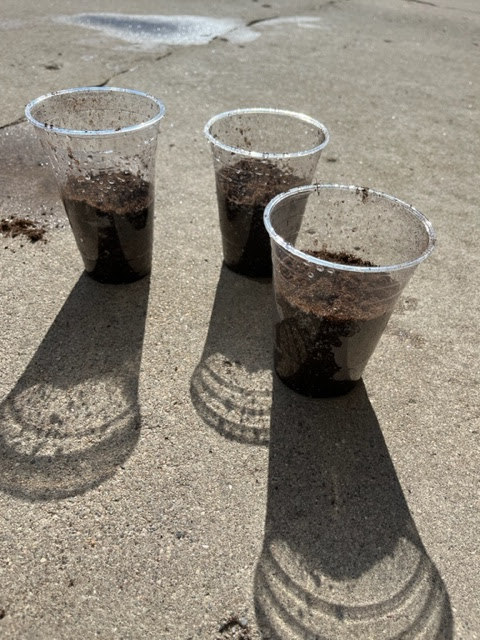
Start by saving those coffee cups.  You can use either plastic or the paper.  The paper will break-down so you can plant it right in the ground, the plastic ones you'd need to replant the plant in the ground.  


2. Egg cartons

Egg cartons make the perfect seed starter.  They also are able to break-down so all you have to do is just replant them into the ground.  One tip for these is, I would mist the cartons when you are ready to plant them in your garden, that way they tear apart easily. Also, depending on what you start in the egg cartons and how soon you start them; you may need to replant them into something bigger before you plant in your garden.  But, with the egg carton you can just place in larger container as it will break down.  


3. Milk jugs: 

Last year I used a couple milk jugs for lettuce.  I ended up starting them inside too soon, but it worked out as I had a big enough container for the lettuce to mature inside! 

4. Coffee Canisters: 

Coffee canisters make great pots for plants, but you can also use them for seed starting as well.  The plants would need to be re-potted when you place in your garden.  

5. Toilet paper rolls 

Did you know you can use toilet paper or paper towel rolls to start seeds?  Check out this post by Pam's Greenhouses for more of a how-to! 


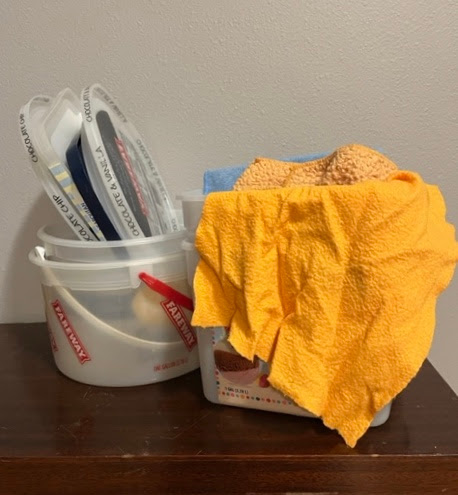
Finally, make sure to keep those seeds moist, a great way to do this is to place a container over them to help keep the moisture in.  Any of those plastic oven bake covers you get with the tin foil baskets work great! Or anything else in your recycling! 


There you have it! Rather than buying containers for your seeds you have a few ways to try and save instead.  Good luck! Please share your photos too! 

Have a great week! 

Inisha 

Thursday, March 30, 2023

Spring/Summer Clothes


    It's almost April 1st, and in our household that is about the time we start looking at our Spring and Summer clothes.  In the last couple of years I started having a note in my phone on April 1st as a reminder to start taking inventory of what we have for the Spring and Summer as well as make a list of the items we will need.  It's so easy to go and shop for a bunch of new items that we might only need a handful of.  On the flip side, it's also easy to assume I have what we need in our totes from previous years; that's what I kept doing and unfortunately it didn't end well.  At the time, my 2nd grader was starting to care more about what she was wearing; and not having what was needed or have items to match her sisters if she wanted to, caused some problems.  With that, I made sure to have time to go through our clothes before it got too warm.  For our area that's about April.  We always have one or two shorts on hand from the previous year that still fit just enough for if we need them in a crunch in March, but by April we'd need more.

With that, here's my tips for switching over the next season.  

First: Go through those storage totes 

Like I said, it's easy to just run out to a local store and buy what you'd want for the next season, but going through what you have is so helpful.  Don't have storage from the year before, make sure you check out my post on how I save from kid to kid so that you can start doing so after the Summer. You can check that out here: Clothing Switch

Second: Make a list 

So back to going through what you have.  After my girls have sorted through what we have and what fits I make a list. I list how many shorts, shirts, jackets, shoes; anything else my girls would need that still fit.  I like to use my phone notes for that, I just make a list for each kiddo.  

Third: What will we need 

This can change each year.  For example, one of my girls is just starting to like wearing jean shorts.  So we may talk about how many jean shorts she'd like vs. athletic shorts.  This also will depend on what she's active in for the summer.  Another one of my girls prefers capris, while my 3rd prefers dresses. So what they need may vary.  But, I like to make a estimated list of what we need so I know when we go shopping.  

And that's it!  It really does help to know what you already have and what you'd like to get, before you enter the store.  There are so many times before that I would blank on what they had, or get items I thought we needed and really we didn't. I hope this helps you as you might be transitioning to warmer weather in your area as well. 


Thursday, March 23, 2023

Easter Gift Ideas


Easter is almost here!! With that comes another holiday to get gifts for.  I love Easter, I love Easter because without Easter there would be no way for me to be redeemed.  However, Easter just like other holidays has become a time for lots of gifts, treats and spending money.  Why? Why do we let these special holidays get so wrapped up in the gifts and the spending? Well, I'm here to help you out with minimizing that spending this year.   Plus give you a way to bridge the gap between what Easter is about and gift giving, if you are looking for that. 

Think of the number 3. Yes 3.  3 simple gifts = the 3 days Jesus was in the tomb.  I love to tie my kiddos' gifts to the real meaning of Easter as well.  Any chance to talk and discuss about why we are celebrating Easter. Plus, three is a simple number. 

We have changed over the years what we give our girls, but one thing always stays the same, 3 items. Here are some of the items we've gotten over the years: 

1. Book (this one stays pretty consistent). As the girls get older this has turned into a devotional one year, or a special Bible another year. But, we always get them a book of some sort.  Christianbooks.com has great sales right before Easter, or Thriftbooks.com is another great one to go through as well.  


2. Treats: We always do treats.  We don't go over board with them, they are generally small. Some of our favorites include: 

Fruit snacks, a few pieces of candy in a egg or two, puff corn in a small bag or any other small snack. 


3. Small, simple gift: my husband and I are very into gifts that get used up, rather than another toy to take up space. Some ideas we've done: 

jump ropes, bubbles, gift card to a favorite store or for a coffee date with mom or dad, bath bombs, & coloring books.  These are just a few of what we've done in the past. 


One more thing we do that helps save money, we reuse our Easter decor each year.  From the girls Easter baskets, the plastic eggs, all the way to the green grass.  I save everything and re-use it for the next year.  I've only bought plastic eggs two times in the last eight years.  My girls also love being able to know who's basket is whose because we've been using the same baskets for the last few years. These are just small things that add up over time.  

I pray that these tips help you to stress less and enjoy this season, but also be able to share in the joy of giving as well. 

Blessings ~ 
Inisha  


Thursday, March 2, 2023

Homemade plant pots


It's getting time to start repotting those houseplants! Plant pots can add up and while I enjoy my houseplants, I don't want to spend a ton to have them either. I have two different ways that I save on my plant pots.  

First, did you know you can use almost anything as a planter?  Being a newbie to plants in the last few years, I've started to find some unique ways to save on pots.

Here are my 3 favorite homemade planters: 

1. Tin cans 

What I like about tin cans, is they are pretty stylish already.  Really all you need to do is drill some holes in the bottom for drainage and you're set! And drilling holes is not that hard, all you need is a nail and a hammer, it's pretty simple to do. 

2. Coffee cans 

Whether you buy the tin coffee canisters or the plastic, they both work great to use for planters.  The tin canisters look great on their own, just like the tin cans.  The plastic ones you may choose to paint.  

3. Ice cream buckets 

These work great for those big hanging plants.  One they need more room, two they will drape over the sides and cover the bucket themselves. But, if you still want you can paint the bucket as well. 

Some more options for homemade planters include the following; 

  • tea cups 
  • plastic to go coffee cups ~ these work great for starting plants too! 
Second, reusing the pots you already have for other plants in your house: 

I am always thinking which plant can go to which pot next.  Rotating my plants is a great way to save on buying pots.  This takes a little bit more thought, but it does help to not over buy pots when needed.  

1. I grab all the plants that need repotting. 


2. Then starting with the largest, I repot it into the newest largest pot.  
3. From there, I take the next largest plant to put in the empty pot.  Then I just continue down to the smallest. 


Sometimes it pays to have a few spare pots around the house.  I had a lot this time around that needed split up and so needed extra potters.  Luckily I had a couple in my basement.  Plus, I ended up with a few babies I was able to give away!  


With this system, instead of repotting every time a plant grows, I am able to wait and use the pots that I have.  Unless your plant is really busting through, usually you can have it wait a bit to be repotted.  

I hope this helps! 


Thursday, February 9, 2023

Snow for watering plants


    Did you know you can use snow to water your plants? Now, don't go out and grab some snow and put in your plant pot, because then your plant is not going to be happy.  But, if you use melted snow to water your plants you are not only saving on water, but you are benefitting your plant as well! 

As snow falls through the atmosphere, nitrogen attaches to the snowflakes.  This is turn becomes nitric oxide and is really good for plants because it's essentially a natural fertilizer. So if you are looking for a great way to add some nutrients to your indoor plants and save money in watering, use snow! Can I just say, how amazing God is that He created all nature to work together.  It is just little things like this that make me go, WOW! He really has it all worked out, even to the smallest details! 

Back to watering with snow: 

Watering your plants with snow is pretty easy. 

1. Find a container you want to use to hold the snow/melted water. 

2. Collect snow from outside. 

3. Keep container inside and the snow will slowly melt. 


    You will notice that you will have less water than you did snow, because snow takes up more room that the liquid it is made of.  This gives you room to add more snow as it melts. I like to keep adding snow until my container is full of water so I know I have plenty.  Plus the snow won't last forever, right?

4. Once the snow is all melted and the water is room temperature, you can use it to water your plants just as you would with your normal water. 

It's that easy! 


Thursday, January 19, 2023

Ice Cream bucket = free storage


Way back when I first started my blog, I did a post or two on re-using ice cream buckets as storage. You can check them out here: Ice Cream bucket storage or 3 ways to use that Ice Cream bucket but over the years I've added a few new ways to re-use that ice cream bucket and wanted to share. 

1. Freezer storage: 

This is my new favorite! We have a deep freezer and if you have one you know how hard it is to lose something at the bottom. Well, if you use ice cream buckets to store your items in it helps getting those items from the bottom better.  Things I use my buckets for in the freezer: 

  • meat
  • homemade cookies/treats
  • gluten free items 
  • homemade mini pizzas

2. Storage in your shed: 

I recently have been trying to organize our shed better.  Here are some ways I organize with the buckets in my shed: 
  • gardening gloves (mine + my girls) 
  • seed packets 
  • soil pods
  • gardening tools + markers 
  • summer toys for girls 

3. Pots for your plants:

In the last couple of years, I've become a plant lady. Well, I always have enjoyed plants, but in the last few years I've added a lot of plants to my house.  It started with a couple as gifts from my grandpa-in-law's funeral.  My husband and I were gifted two beautiful plants to take home, since then I have added many more! Ice cream buckets make great pots for plants; especially if you don't want to spend a lot. 

4. Outside toy storage: 

We have a big toy box we keep summer toys in.  After awhile the toys were just getting dumped.  So I took some of our ice cream buckets to use: 
  • jump ropes 
  • chalk 
  • bubbles

5. Around the house: 

  • Use for plastic bags: both ziplock or grocery bags  
  • Kids' toys 
  • cat/dog toys 
  • homemade baby wipes 

Thursday, January 5, 2023

One dress = 2 holidays!


Guys! My friend recently shared a genius idea of hers and gave me permission to share!  At Christmas she buys red dresses for her girls and then re-uses them for Valentines! 

She told me she uses black tights and shoes for Christmas, and then switches to white tights and shoes for Valentines! It's that simple! 


So this Valentines, as you are browsing dresses for your little girls, keep in mind the option of reusing it for the following Christmas! Or at Christmas when you are purchasing a dress keep it red, then you can use it again at Valentine's! Not only are you saving money, but you are also re-using and therefore helping our planet too! Instead of multiple dresses, you are just getting one.  One less and helping there be less! 


Hope you have a Great Valentine's! 


Thursday, September 22, 2022

Cereal Crumbs for Muffins

 Let's talk how to save on flour. Did you know you could save on flour by replacing it with cereal crumbs?  I've mentioned the Tightwad Gazette before on my blog.  In her book, she talks about making muffins with crumbs of any sort to help cut down on flour.  

*Check out her book linked at the bottom of this post for her muffin recipe.* 

Well, we eat cereal in our household and there's always the crumbs that no one wants in the bowl, but instead of throwing them out you can save them to use as flour! 


This post includes affiliate links, which means if you click on the link I get a portion of any sales at NO COST to you.  See my disclosure page for more details. 


After reading this idea in the Tightwad Gazette, I started attempting it. While I found it worked, I was needing to store the crumbs until I needed them.  So, I have a pint sized jar in my freezer.  Anytime we finish a box of cereal, or crackers I take the crumbs and pour them into the pint sized jar. As the jar gets filled I know I can start making muffins soon.  Before I make the muffins, I take out the crumbs from the jar and blend them up until they are smooth. This helps the flavors blend together better.  Sometimes, if my jar is full of chunks of crackers and cereal, I'll blend it up to see if I can get more in. 


You can use this to make all kinds of muffins.  

We like to add cocoa and make chocolate ones sometimes too!


Also, check out these awesome reusable canning lids! I use them anytime I use a mason jar, but don't need to water bath or pressure can it.  They are super easy to use and are freezer safe! 


Wednesday, November 24, 2021

Homemade & Upcycled ornaments


It's that time of year again! Homemade ornament making season!  This year, as I was contemplating what I wanted to make I decided I wanted to not only spend as little as possible, but also maybe use up some of my craft scrap items.  Ok, so I really didn't know what to call my craft scrap items, so let me explain what those are.  If you've been following my blog you know that not only do I try to spend little on a project, but I also like to up-cycle materials I can't recycle.  With that, my craft scrap items are things that I don't want to throw away to make more trash, but I can't recycle them so they get stored in my craft room to maybe serve a new purpose in the future.  

While I was looking through my craft scrap items, I found a bag full of lids.  Lids from spaghetti jars, jelly jars, pickle jars and more.  Yes, I saved the lids.  I can't get myself to throw them away and I can't recycle them, so I store them in a ziplock bag.  And guess what?! They were the perfect item for my ornament idea!  

This year, my husband and I started Civil War Re-Enactment.  It was something my husband did when he was in middle school and we thought it would be fun to do as a family.  When I was thinking about ornament ideas, my husband mentioned making something that tied into re-enactment. (Each year the girls' ornaments represent something from the year).  Knowing I wanted to do something with a photo of them from Re-Enactment and finding the lids, my idea started forming! 

Ok so that brings me to our project! Did you know you can make cute photo holders out of old lids?  Let me show you how! 

Materials: 

lids from jars (your choice on size)

circle cutter OR sharpie & scissors 

twine or ribbon of choice 

4x6 photo of choice 

hot glue gun & glue sticks 

1st: Cut out your photo based on the size of your jar lid.  

I used lids from spaghetti sauce.  The lids measured about 2 1/2 inches in diameter.  I first used my circle cutter to cut out the photo.  However, after my 2nd photo my blade didn't work, so I just ended up tracing the rest with a sharpie and cutting them out with scissors.  This works just as well, so if you don't have a circle cutter you can still make it work.  Place your lid on the photo you want to use covering the part you want to show case, then trace with a sharpie.  Note that the inside is a little smaller than the outside of the lid, so just cut along the inner part of the sharpie line.  


2nd: Pop the photo in! 

NO GLUING NEEDED! The photo will just pop right in and stay in since there's a rim around the edge of the jar!  Plus, if you ever want to swap out photos you can! 

3rd: Add the twine or ribbon to the back of the lid.

Hot glue the twine or ribbon to the back of the first lid. 


4th: Glue the two lids together. 

Take the 2nd lid (If you want to make it double sided) add hot glue to the edge and press the two lids together. Now you don't have to have the photo ornament be double sided, but you can cover up the hot glue spot if you do.  Plus as it spins you can see two different photos! 

All in all, once I had the photos printed this took me maybe 30 minutes and that was for all three! It's a really fast project!  You can make these photo holders as gifts for Christmas, or a special occasion too! I hope you enjoy!  


You can check out last year's ornament craft here


Pinterest