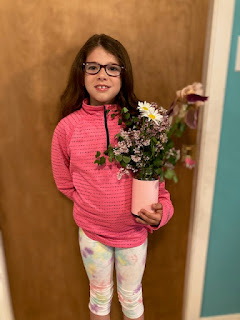
One thing I've been trying to do more this year is to help teach my girls how to serve our community. While I've wanted to serve our community, I wanted to also teach that we don't need to spend a ton to do so. Here are a few of our favorite items to do so far + one I'm hoping to attempt soon.
Thursday, April 27, 2023
How to serve your community for free!
Thursday, April 20, 2023
Teacher Appreciation gift ideas
Teacher Appreciation week is almost here! What a great time to show your kiddos' teachers that they are important. I've gathered our family's favorite gift ideas that also won't break the bank. Check them out:
1. Print-out paper
A couple years ago I found this print-out paper on Pinterest. It was really fun to do with my kiddos for their teacher. It helped to make the gift be more from my kiddo than from me. I wanted it to be more meaningful for my child as well. This was a great option from The Suburban Mom.
2. Bouquet of flowers
Have you heard of the old-fashioned gift of flowers on the last day of school? Well, the last day of school has changed quite a bit since then, so what better week than Teacher Appreciation week! These can be hand-picked from your local garden or you can purchase them. If you purchase them, you can always buy a medium bouquet and spilt it up between your kiddos; the bouquet doesn't have to be big.
3. A card
Similar to the first option, you can make a card and have your kiddo write a thank you in it as well.
4. Their favorite candy
What a simple gift, but a great way to say thank-you. This doesn't have to be huge, but a simple candy bar saying thanks. If you're good with puns you could include one as well.
5. A book for their classroom
In our school we have the option to purchase a book for our kids' teachers at conferences from the Book Fair. The teachers each pick a few books they'd like for their classroom and then parents can buy them in honor of their child. However, teachers can't have enough books; especially at the elementary level. Picking out a book from heir classroom is great end of the year gift.
Hope this helps inspire some ideas! Have a great week, until next time
Blessings,
Inisha
Thursday, April 13, 2023
Newspaper Trashbags
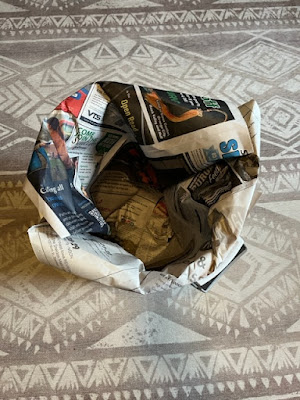
A couple weeks ago I posted some life hacks. One of the life hacks I talked about was making trash bags out of newspapers, from the blog Improvised Life. If you missed it you can check it out here. I wanted to take it a step further and try what Improvised Life does, only make it for my larger trash can in my girls' bathroom.
These trash can liners are easy to make and are a great way to help out the environment. Instead of buying more plastic, you are reusing what you have. So I figured if I can make it work for a small can, why not try a larger one?
In order to do this, you will need 4 sheets of newspaper instead of just the 1 sheet. After that the process is merely the same, you just need to connect the 4 pieces.
This post includes affiliate links, which means if you click on the link I get a portion of any sales at NO COST to you. See my disclosure page for more details.
Step 1:
First take 2 sheets and staple the edges together. To do this you need to first fold about an inch on each edge, then you can staple the edges together. Staples break down, which is why I chose to use them. Make sure to staple close together so you don't have gaps in your bag later.
Step 2:
Second, take the other two pieces of newspaper and do the same.
Step 3:
Then, you will do the same with your two larger pieces of newspaper and connect them together. This can get a bit tricky as the edges have staples, so just watch as you fold.
Step 4:
Step 5:
Start the folding process. It is the same process as the smaller folding process. It really does fold better than you think even though it's so much bigger. Don't worry about making the lines crease tightly. You can watch the video from Improvised Life here or you can follow along below with a step-by-step tutorial:
Step 1: Place newspaper at a diagonal, then fold in half.
Step 2: Fold the newspaper in half
Step 3: Take the right corner and fold it over to the left side. Make sure the bottom has a flat edge.
Step 4: Flip over the newspaper and repeat step 3, just fold over the other left side to the right side.
Step 5: Then take the flap and fold it into the pocket.
Step 6: Flip over and repeat on the other side.
That's it! Remember you can check out the youtube video posted on the Improvised Life post for a visual.

So far, I've been happy with this as a trash bag in my girls' bathroom. But, if you want to help the environment by switching from plastic and don't want to make a newspaper trash bag, check out the Amazon link at the bottom for another option. I use these green bags for my kitchen trash. I'll be honest, I tried the larger newspaper bags for the kitchen trashcan and let me just say, they don't work well for large amounts of mess. But, I really like these green bags for the kitchen, they work great! If you can buy them in bulk, it makes the cost a lot less and closer to the plastic you already get! Plus, you can split the bigger bulk size with a friend & it helps the cost!
I hope you were inspired to find a way to be a little more environmental.
~ Blessings
Thursday, April 6, 2023
Indoor Garden Savings
Starting your summer garden indoors can add up fast. But, did you know there are many ways to start it without having to buy a lot of extra supplies? There are so many items around your house or as you go out and about that you can use to start your indoor garden, without having to buy specific items.
Let's talk the containers. Instead of buying the seedling pod packs, there are so many things you can use instead:
1. Coffee Cups:
Start by saving those coffee cups. You can use either plastic or the paper. The paper will break-down so you can plant it right in the ground, the plastic ones you'd need to replant the plant in the ground.
2. Egg cartons
Egg cartons make the perfect seed starter. They also are able to break-down so all you have to do is just replant them into the ground. One tip for these is, I would mist the cartons when you are ready to plant them in your garden, that way they tear apart easily. Also, depending on what you start in the egg cartons and how soon you start them; you may need to replant them into something bigger before you plant in your garden. But, with the egg carton you can just place in larger container as it will break down.
3. Milk jugs:
Last year I used a couple milk jugs for lettuce. I ended up starting them inside too soon, but it worked out as I had a big enough container for the lettuce to mature inside!
4. Coffee Canisters:
Coffee canisters make great pots for plants, but you can also use them for seed starting as well. The plants would need to be re-potted when you place in your garden.
5. Toilet paper rolls
Did you know you can use toilet paper or paper towel rolls to start seeds? Check out this post by Pam's Greenhouses for more of a how-to!
Finally, make sure to keep those seeds moist, a great way to do this is to place a container over them to help keep the moisture in. Any of those plastic oven bake covers you get with the tin foil baskets work great! Or anything else in your recycling!
There you have it! Rather than buying containers for your seeds you have a few ways to try and save instead. Good luck! Please share your photos too!
Have a great week!
Inisha
5:00 PM Earth-Friendly, family, Garden, Health, natural, organic, Organization, Plants, Re-Purpose, Recycle, SAHM, Saving money, Spring, Summer Leave a Comment
Followers
Popular Posts
-
A couple weeks ago I posted some life hacks. One of the life hacks I talked about was making trash bags out of newspapers, from the blog Im...
-
Coffee is definately my favorite drink. Lately, I have been really craving lattes and so have started making one every night. Well, mostl...
-
Now, I like to tie saving money and helping the environment too. I like to buy my ground beef in bulk because it's cheaper and divide ...
-
Starting your summer garden indoors can add up fast. But, did you know there are many ways to start it without having to buy a lot...
-
School is almost here, what a great time to show those teachers we are so blessed to have them in our kiddos lives. Gifts don't have t...
-
I am all about organization and things looking cute. While I wouldn't call myself fashionable by any means, I do like my organization t...
-
My parents both saved money in ways that they didn't plan to, but rather they did these things because they wanted to. These are ways ...
-
This isn't a normal post, but I wanted to let you in on a passion of mine. I adore photography. I have loved it since I can remember....
-
This last year I chose to be a stay at home mom. While my first year is coming to an end, I feel it went well. One of the things I incorp...
-
My daughter LOVES to help me in the kitchen and I LOVE to have her help, really I do. What I have a hard time with is the money that I los...
Search This Blog
My Loves


