Wednesday, December 16, 2020

Homemade Breads


This post includes affiliate links, which means if you click on the link I get a portion of any sales at NO COST to you.  See my disclosure page for more details. 


Homemade; should have the definition: how to save money.  Almost anything can be made homemade for cheaper than store bought.  Now I say almost, because some things are more expensive due to ingredients and the fact that large quantities of items made lowers the cost, but I digress.  So, if you re looking to save money, start looking at what you buy and see if you can start making it homemade instead. 

Recently, I've started making our bread homemade.  I've made homemade pizza dough for the last 5 years or so, but haven't' been adventurous as to make homemade bread.  Not going to lie, making anything homemade that uses a dough has always been something I'm leery of doing.  For awhile I just thought I could never make it right.  But over the last 5 years of making pizza dough I've learned something and can apply that to bread making.

First of all, bread making really is simple.  Honestly.  If you've never made bread just know if I can make it, you can.  I've had my share of problems when it comes to dough.  One year I even threw away good dough because it kept tearing and I didn't know how to make it better.  Seriously.  But now I know better. Bread dough is way more forgivable than you think.  So, in this post I want to share some tips and tricks to making bread.  Along with some different bread recipes that I make to help save some money.  

Tips & Tricks: 

1. The dough is sticky

    If the dough is sticky you can add some more flour.  Honestly, even if the recipe only calls for 3 cups and you end up using 5.  Humidity has a huge effect.  This is the dough I threw away one day.  I was so frustrated, my hands were covered, it was sticking to everything!  I had no idea I could add more flour.  Super simple way to salvage that dough.  Just add a little more at a time, I use an 1/8  cup and continue to knead.  I continue this until it is no longer as sticky.  Unless it's really sticky, then I add more at a time...like the dough I threw away, that would have needed probably another cup or so!  

2. The dough is tearing or having holes as you spread it 

First, you can always pull all your dough up from where your rolling it out and re-knead it.  This was something else I didn't know.  But, if your dough is tearing you can recollect it and re-knead it a bit.  If it's not a lot, you can take dough from places that there's more and just stick it to itself.  Really, it's that simple.  

3. Humidity 

Humidity plays a huge factor.  If it's humid out you can guarantee you will be adding more flour than the recipe calls for.  Sometimes it's not obvious, there's been times I didn't really think it was that humid, and yet my dough just was sticky.  So I added more flour and it worked.  

4. Wheat/White flour 

Want to make your recipe a little more healthy? You can always substitute some of your white flour for wheat flour.  I usually stay with a ratio of 1-2 cups white to 1 cup wheat.  Wheat flour can make it tougher to stretch out and knead, so I try not to go too close to 50% of wheat flour for the recipe. 

5. Water temp & proofing your yeast. 

So when I first started making pizza dough, the recipe said proof the yeast.  I had no idea what that meant. I had to look it up and see what proofing the yeast means.  So in case you are like me and this is all new, let me first explain what proofing the yeast means.  To proof your yeast you need to soak it in hot water for about 5 min. Okay so that makes sense, that's not that difficult, but some recipes say hot water, others say warm.  I don't know about you, but hot for me is hot! So how do I know what temp is best?  A tip from my great-grandma Gladys was the water should be warm, but not too hot that you can't keep your pinky finger in it for 3 seconds.  Cold is pretty easy to tell it's too cold, but if you can comfortably keep your pinky finger in the water for 3 seconds then it's a good temp. 

Recipes: 

1. Pizza dough 

    Like I said, I've only been making our pizza dough for about 5 years.  But it is so simple and easy to make.  Plus, now that you have some tips and tricks up your sleeve it will be even easier.  I was given this recipe from a friend and I'm not sure where it came from prior to that.  

1 Cup wheat flour
1 1/2 Cups white flour 
LOTS of Oregano, Italian seasoning, or Basil   
1 tsp garlic salt 
2 Tbsp Oil* (olive, sunflower, whatever your preference) 
1 cup water 
2 tsps active dry yeast 

*You can make it without the oil, so if you don' have any or you'd rather not you can leave it out. 

Mix all the dry ingredients in a bowl. Add oil if you are planning to.  Make a whole in the middle of the bowl.  Add the yeast in the middle and pour warm water over the yeast.  Let it set for about 5 min.  Then knead and roll into a ball.  Let sit for about 5 min. and then you can spread the dough out onto a pizza pan.   Finally par bake it at 475 for 5 min.  Then it's ready to add your toppings.  Cook at 425 for 15 min. 

2. Bread 

    This is the recipe I use for my homemade bread.  A huge perk of this recipe is makes 2 loaves. One to eat right away and one to freeze, which means you don't have to make it all the time!  Homemade bread recipe from The Recipe Critic

3. Buns 

    For homemade buns, I just use the same bread recipe as above.  But, after it's risen the first time divide the dough in half.  Then using a sharp knife cut each half into 12 sections.  You can cut the half into thirds and then each third cut into four pieces, then you have 12.  Grease the cookie sheets or use silicone baking sheets. Shape each dough into a ball. Place the dough balls on the cookie sheets.  Cover and let them rise again for about 30-45 min. Bake at 375 for 18-20 min. While warm rub the tops with butter. 


Be sure to watch out for my next post about how I make cinnamon rolls with this same basic bread recipe!  Plus, a more how-to with photos on how to make those buns! 


Tuesday, December 8, 2020

Last minute quick Christmas gifts


This post includes affiliate links, which means if you click on the link I get a portion of any sales at NO COST to you.  See my disclosure page for more details.  


AHHH! It's officially December and you have a few more gifts you need.  Want to save some money, give some awesome gifts and not have to spend lot of time on them? Well, you came to the right blog post! I have 3 awesome gifts that almost anyone would enjoy and they take hardly any time and money to make as well!  Plus, they are gifts that can be used so great for those teachers or co-workers who may get lost of stuff that they need to find a place for.  Instead these are gifts that can be used up after a period of time. 

First: Bath salt mix 

What a great relaxing gift to give to someone.  This is my favorite way to unwind at the end of the week, taking a salt bath.  What better than to give someone a way to help them make time for their own self-care. 


1/2 Cup of Epson salt 
1/4 Cup of Baking soda 
1/4 Cup of Sea salt or course salt 

This will make about 1 jelly sized jar.   I usually make 4 batches and get 4 jelly jars.  Super easy to make and doesn't take much time either! Plus, if you put it in a jelly jar the jar is decorative enough in itself!  So, double points! 

Second: Hot coco-mix: 

Who doesn't like hot-coco?  Okay, I know some people don't...BUT, most do.  And what a fun gift to get at Christmas! Plus it's a gift that can be used up!  This is great for teachers, co-workers, family, really anyone who enjoys hot-coco! 


I've been using this recipe from Eating on a Dime.  We have liked it and it's really easy to make.  Now the only thing I do different is I don't add the salt, but that's just a preference thing.  But this recipe is super easy and all you need is a mason jar to add it to!
We like to use mason jars for our gifts, but if you are wanting to send this to school as teacher gift they make plastic jars now too!  These are a perfect option for sending your little to school with a gift for teacher.  


Or we recently made these gifts for our mail carriers. Just use a party bag; add some marshmallows, a cute wooden spoon and a fun tag!  This would also be a great way to give this git to your student's teacher!  


Third: Lotion bars 

Lotion bars are a fun gift that can be used for almost anyone.  You can use a mini muffin tin for the molds.  We also bought these for crayon melting and they can work for lotion bars too!  I liked these ones because the pack came with different shaped molds so you can use them for different events.  But, back to lotion bars.  They are easy and quick to make.  


Equal parts beeswax pellets & Organic coconut oil
double boiler or a smaller pot and larger pot
essential ils (optional) 

Melt both in a double boiler, or if you don't have a double boiler you can use a smaller pot inside a larger pot of water. If you want you can add essential oils as well.  Once the coconut oil and beeswax has melted remove from heat and add the essential oils you'd like.  Pour the mixture into the molds.  Put in the fridge to Harden.  After about 20-30 min you can pop them out and they re ready to gift! 

Pair both the lotion bars and the salt mix for an extra special gift!! 


Thursday, November 19, 2020

Homemade ornaments


Homemade Ornaments 


We give our girls ornaments each year to represent something they did from that year.  In the past we've just bought them.  I've wanted to make them, but always ran out of time.  This year, I was talking about them with some friends and we joked about the different things I could tie in from our crazy 2020 year.  Two big things that I wanted to incorporate was toilet paper and perler beads.  Toilet paper for obvious reasons, and perler beads because we did A LOT or perler beads during quarantine and afterwards. 


If you are interested in the how-to on making toilet paper roll flowers.  You can follow the steps on an earlier post of mine here.  

I made mine into a flower shape this time. 


Then, I made my perler bead designs.  I made each perler bead design individual to each girl.  Arya played soccer for the first time this summer, plus she really enjoys her sports. Jensen, started Kindergarten, and Sadie can't get enough ice cream...one time she even ended up with an adult cone by accident.  Plus, we did a lot of DQ drive-thru and had ice cream in the van during quarantine.  

Sadie with her adult sized ice cream

Once they were melted, I just hot glued the perler bead design to the toilet paper flower.  


Finally I punched a hole through the top of the flower and thread some yarn through.  

That's it! It was really easy and a great way to tie in what we did this year. 


This post includes affliate links, which means if you click on the link I get a portion of any sales at NO COST to you.  See my disclosure page for more details. 


Friday, November 6, 2020

10 ways to reuse that egg carton


There are SO many ways out there to re-use that egg carton.  Maybe you're familiar with all the ways you can re-use it, or maybe it's totally a new thing for you.  Well I wanted to share with you 10 of our favorite ways to re-use our egg cartons. 

1. Jewelry holder

    It's perfect to hold all those small rings.  Plus, putting bracelets in them is pretty easy for little girls and it helps keep them from getting tangled. 


2. Christmas bulb holder

    We use this every year for our Christmas bulbs.  We've had these egg cartons for our Christmas bulbs for years and they hold up so well.  Plus, if they do break apart you can easily get another one.  

3. Card holder for little hands

    Ok have you seen this before?  I was so amazed when this one was told to me.  Have kids who have trouble holding all those cards during a game?  Take an egg carton turn it upside down and there you go an easy way for them to place their cards in.  

4. Paint holder

 https://www.momdot.com/mess-free-painting-egg-carton/
How cool is this, it even has a way to hold the paint brushes! I think this is one of my favorite ways to re-use the egg carton.  We just recently tried this and it works great!  

5. Easter gift: 

Add some eggs and use as an Easter gift.  We were given some egg cartons with fake eggs in them for Easter one year.  This is something you can easily reciprocate by just cutting up your egg carton in half.  

6.  Seed starters

    What a great way to start seeds. Egg cartons (cardboard ones) are compostable. They are a great way to start a seed and transfer it to a garden or bigger garden. 

7. Color sorting 

    Use your paints or some color circles to place in the bottom of each space. Then using some beads or small pom poms, have your preschooler sort the colors into each space. 

8. Counting 

    Write a 1-12 in the spaces. Then practice counting with your preschooler.  Also, if can use your beads or small pom poms again and count how many for each number.  I.e. 7 beads in the 7 space. 

9. Make a craft with it! 

There are so many crafts you can make out of egg cartons.  Here is just one site that has some fun egg carton crafts! 
 The Spruce Crafts, has over 20 different crafts for littles to make with egg cartons.  

10. Finally, re-use it for eggs

A while back I did an IG post on buying our eggs in bulk.  You can check out the post here. Our local Walmart carries them in huge box of about 6 dozen.  I save our egg cartons and use them to redistribute all those eggs from the box and it helps save room in my fridge.  Not to mention, the money it saves on eggs too.   Or, if you are lucky and have someone you know who has fresh eggs, you can always use those cartons then too. 


Tuesday, September 15, 2020

10 ways to re-purpose that tin can


 Recycling is huge!  I'm all about recycling anything we can; however, if I can re-purpose something instead I will.  First of all, not only is that one less thing being broken down to recycle, but it's also one less thing I'm purchasing.  Here are 10 ways that I've re-purposed tin cans in our household, of all sizes. 

Cat food cans: 

1.  Office/Junk drawer organization:


    Tuna cans are great for organizing those small things in your office or junk drawer.  We have 4 that we use to hold paper clips, rubber bands, our menu cards and other little odds and ends. 


2. Bathroom storage: 

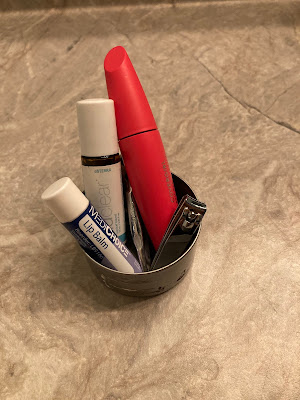
      Cat food cans do a great job holding those small things in the bathroom; your lip gloss, chapstick, tweezers.  I have one tuna can in my cabinet that holds all those in one.  It's great to hold those small items together so they don't get lost amongst all the other bathroom items.  


Tuna cans: 

3. Earring holder: 

    Tuna cans are the perfect size to hold a few pairs of earrings.  Plus then they don't get tangled together if you have any of those dangly ones.  They also aren't very tall so they fit in a drawer really easily. 


General tin cans: 

4.  Organizing craft supplies:   

    We use these for holding markers, colored pencils, crayons and more. They are a great size for kids to be able to grab easily.  Or you can put them in a little bin and have your bin more organized as well. 


5.  Make a craft with them:

    Tin can style is in.  Wrap some yarn or twine around them a few times or a lot.  Add some decor inside and it can make a great centerpiece.  


6.  Organizing bathroom essentials:   

    Another great way to organize the bathroom.  Works well for holding q-tips, cotton balls, hair ties etc.  They are also small and can fit together in a small space, but keep order to your bathroom cabinet. 


Large cans (baked beans) 

7. Garden tool storage: 

    The large tin cans are a great way to store those gardening tools.  The girls and I all have our own little tin can.  It has our own gloves, a little rake and 2 shovels.  Eventually, I plan to put labels on them so we each have one with our name on it. 


8. Kitchen utensils: 


    A great way to keep those utensils from falling all over in their storage container.  Take a large tin can and place it inside your utensil holder.  It's perfect to keep the utensils more together.  If you have an oval or larger container, you can divide your utensils up into a few different large tin cans.  


9. Pet organization: 

    Organizing all that pet stuff.  We keep our cats' collars, tags, brushes and their treats in a large tin can.  It's perfect to just grab when we need something.  


All can sizes

10. Planters: 

    Have you seen the fun ways people are using their tin cans as planters?  It can be for herbs, or small plants.  You can use any of the different sizes.  While I haven't tried this yet, it is on my list of things to try.  Check out a simple how to on the blog, Handmade Charlotte .  She does a great job of showing step by step photos.  Plus, if you want to hang them, she shows you how to do that too! 


Saturday, August 1, 2020

Milk freezing


No milk was wasted during this photoshoot...but reused to make a delicious latte! 


So I posted on my IG account about freezing milk.  However, when I froze milk the first time I just split one gallon into two gallons.  Milk does expand, so you want to make sure you have room for it to do so.  After wanting to use the milk that I froze, to get it out of my freezer,  I realized how much that was to try and use up all at once.  I ended up making 4 batches of muffins and used it for my homemade gravy for supper of biscuits and gravy.  And then I STILL had a cup or so left.

So I decided there has to be a better way to freeze milk in smaller batches.  Then one day, I was looking at my cupcake pan and realized that would be perfect!  So I froze milk in my cupcake pans.   Now you can also freeze it in ice cube trays.  I did that before when I was nursing, but if you want a little bit more at once then the cupcake pans hold a little more.  I measured to see what the difference was, and ice cube trays hold about 1/8 cup, whereas the cupcake pans could hold between 1/4 cup to 1/3 cup of milk, depending on how much space you want left in the rim.


1/3 cup of milk 


1/4 cup of milk 

Ok so I also said I' share some recipes that I found to use up that milk. One of our favorites was making muffins. 

This is our go to recipe for making muffins.  If you are familiar with Malt o Meal, they have a muffin recipe printed on the side of their box.  It really does make good muffins plus it calls for 3/4 cup of milk.  So if you froze your milk as 1/4 cups in the muffin pans, it'd be easy to use. 

When I was looking up muffin recipes I found this one on Pinterest and we really liked it.  We did just make 12 regular sized muffins instead of the 6 jumbo ones, but I didn't have to do anything different, the recipe worked as is I just divided the batter into 12 muffins.  This recipe calls for 1/2 cup of milk.  So again if you go with the 1/4 cup it's really easy to just take out 2 frozen milk muffins.

3. Biscuits and gravy. 
So I LOVE biscuits and gravy.  My mom is from the south and whenever we visited Grandma, she would make homemade biscuits and gravy.  It is something that we have continued to do, although I don't make homemade biscuits.  (It's something I want to learn though).  But, we have biscuits and gravy at least once a month!  Making homemade gravy is a perfect way to use up frozen milk, especially when you freeze it in larger quantities. 

Ok before I give you our recipe I want to say I'm not going to be able to give you accurate measurements as I don't measure (just like my grandma & mom).  BUT, I DO measure the milk and I can give you guidelines for the rest. 

Our recipe: 
grease from meat you are using (bacon, sausage) (about 1 Tbsp)
flour (about 2 Tbsp) 
milk 2 cups

This is what I do for my family of 5, who includes my husband, myself, our 3 girls 7, 5 & 2 1/2.   

Now, if you want to make more, you can.  When we have other family members over, like aunts and uncles, grandparents etc. I add 1 cup of milk.  Then you'd need to add a little more flour and grease as well.  More flour the thicker it will get as you let it cook, more milk the thinner it will be.  It's totally a preference kind of thing. 

Put your measured out milk on the stove before you start.  This helps the milk to warm up and not clump.  Take the grease that you are using and put in a skillet.  Heat to medium and start adding your flour. Mix the grease and the flour together until it's mixed well.  Turn the heat down to low.  Slowly add the milk to the mixture.  Turn the heat up a little and stir.  The longer you let it cook the more it will thicken; however, if it doesn't thicken enough, just add a little more flour.  Remember more flour = thicker gravy, more milk = thinner gravy.  Add the meat you wanted at the end and enjoy! Or go meatless!  I don't add any seasonings as I feel the grease is enough seasoning, but you can add some pepper and salt if you so please. 

You may also be interested in: 


Saturday, May 30, 2020

Bubbles


Did you know???  You can make your own bubbles!!  Ok, so before you say, yes I know this.  Did you really know...how EASY it is?  Anyone out there have pins on homemade bubbles;  but then realize wait, I don't have...glycerine and so then your pin sits there pinned and you continue to buy bubbles. 

Well, what if I were to tell you, you can make homemade bubbles that work great without anything extra you don't have?! 


So here's the crazy super easy way to make homemade bubbles. 


What you'll need: 

1. Container of some sort (we've been using old ketchup bottles, it makes it really easy for the kids to pour it out.) 


2. Soap: I put in a few tablespoons 


3. Water: Fill the rest of the bottle with water. 


THAT'S IT!! 


Little bit of soap, some water and you are ready to blow some bubbles!  If it seems it isn't bubbly enough, just add a little more soap. 

What I really like about this is that after the bubbles are gone, you can just add more water and it still works!  After about the 3rd time, I usually need to add more soap again.  


Monday, April 20, 2020

Spring Break @ home


So I was thinking about Spring Break the other week.  As most of you, we didn't have one either.  Ours is usually in early April, but it wasn't until recently that things were starting to hit more and I was thinking about Spring Break.  Spring Break also usually falls around Easter for us as well and so we were preoccupied with trying to keep Easter as real as possible.  But, here we are a month into staying at home other than some essentials and I thought why can't we have a Spring break? 

My girls love to play traveling, anytime they play together they end up going somewhere; the library, the grocery store, to visit family.  They play what we've done as a family or what my husband and I have done.  This last summer my husband and I went to Paris and London, well guess what my girls played after we came back?  They wanted to pretend it all!  To be on a plane, with seatbelt bells, the captain speaking in a muffled speaker and even the snacks!  

So, what if you took next week as a Spring Break trip!  Plan a different place everyday.  This doesn't have to be a long trip, I understand trying to balance life and school.  I have 3 girls, one doing 1st grade school work, one doing some preschool school work and one doing preschool play as she's only 2 1/2, but wants to be like her sisters.  So, I get the trying to find time for all these things people are posting about.  The fun thing about this is it can last the whole week, it can be just a day or two, but really it doesn't have be more than what you need for the day. Really 1 hour playtime at most, or more if you want, just some time set aside for a trip together.  Below I have lots of different ideas, once I started thinking they just kept coming, I think I'm ready to do some traveling myself!  


Pre-trip: 

First: Decide, where are you going? Is it close?  Will you need to fly instead of drive?
Second:  Make a list of places you may stop at while you're there. (itinerary for older kids) 
Third: If you travel to another country, find it on a map or globe. 

Transportation: 

Go through the steps as your kids can. These are just guidelines, you may only get on the plane and get back off!  

Car:

fasten your seatbelts
Drive for a bit and then arrive 

Plane:

turn in ticket*
find seat
Captain welcomes passengers 
take-off 
seatbelt bell ~ fasten your seatbelts
seatbelt bell ~ you are free to move around the cabin. (this was my girls favorite part) 
snack cart! 
turbulence 
seatbelt bell ~ fasten your seat belts 
landing 

*you could have a ticket for the plane or car.  You could have a punch card that gets a punch every time you visit a place!  So many options for what you could add, or keep it simple! 


Spring Break Stops: 

1. Visit the Library 

Grab some books and put on a book self or a place that they can set on.  Grab some old gift cards as your library card, or use your real one if you have one.  Go to the library, check out some books and even take some time to read them.  Or, take them back to your car, train or plane and read them as you go to your next destination.  Take turns playing the librarian even! 


2. Go to a Movie 

Make some popcorn, grab some treats and a special drink. Set it all out on a counter or tray.  Arrive at the movie, get your ticket punched (if you chose to do tickets), grab some goodies and watch a movie together!  


3. Go to an Ice Cream Parlor 

So when my husband was a kid, his mom made an Ice Cream Shop.  They could come and ask for a malt, or ice cream or frozen treat during the time the Ice Cream Parlor was open.  What if you set up an Ice Cream shop to stop at?  Keep it simple, ice cream on cones or in bowls.  The fun is in the trip and the treat! 

4. Go to a Bakery 

Can't do ice cream, or want to do something different.  Pretend you are stopping at a bakery, grab a cookie and special drink! 

5. Visit Family

Have family you haven't seen for awhile, pretend to go to where they live to visit.  Maybe even use this time to zoom call them or FaceTime with them!  

6. Visit the Zoo 

Take a trip to the zoo via your computer by watching some zoos live! OR, set up a zoo in your room using stuffed animals. Take time to walk through and see each one's favorite animal!  For older kids, have them make a map of the zoo too! 


7. Visit the Science Center 

So I was sent this fun idea to do space camp from a close family member.  She found this blog post on space camp for toddlers.  It's such a great idea, it's what sparked the Spring break theme!!  If you have a space enthusiast how fun would Space camp be for Spring Break!! 

8. Go to the Pool 

If it's warm enough, set up your kiddie pool outside and take a trip to the pool!  Use your Ice Cream Parlor again, but make some fun popsicles too to choose from!  


9. Go to a Restaurant 

Plan a special trip to a fun restaurant that you enjoy.  Like a local hamburger joint, make some hamburgers and fries.  Put a fun table cloth on the table, maybe even some coloring pages with crayons like the kids' menus.  Order like you would at a restaurant and enjoy your "eating out" in your own home! 


10. Go to a Carnival 

Visit a carnival, have some indoor carnival games.  Grab some pop bottles and playing bowling.  Grab some empty plastic containers and a bouncy ball and try to make the ball bounce in the containers.  Blow up balloons and try to keep them up for a minute.  Go outside and have make a obstacle course to follow. Have prizes, have popcorn, have fun!

11. Go to a show/ball

My girls like to put on dance performances, or shows.  They dress-up in their princess costumes and dance.  Could you go to a ball?  Or have one family member perform a show? Magic? Dance? 


12.  Plan to visit another Country. 

Use the above places to learn about from that country! For example, go to Paris for the week and visit a bakery, and then a restaurant, and a museum.  Did you know you could do a virtual tour of most museums?  Pick a country and take some time to learn about it as you go through your week!  Or visit a couple different countries.  Hop on the plane and then the train to travel between countries.  


So here are some options for days if you wanted to follow a more detailed plan.  But, remember the fun part is coming up with what you want to do as a family so pick what works for your crew! 

Monday: Head to the library to grab some books & then visit family, then check out the science center. 
Tuesday: Stop at the local bakery for some tasty treats & then visit the zoo 
Wednesday: Hop on a plane to visit another country, while there check out their local museum and eat lunch at a local pizzeria. 
Thursday: Hop back on the plane to come home and visit a carnival. 
Friday: Go to the pool and then head to the movie theatre! 
Saturday: Don't forget to take those books back that you checked out! 


Thursday, April 9, 2020

Homemade Pizza


***Photo: Taken in Paris at a cute pizzaria we ate at, so no not homemade, but it was delicious and this is what I strive for with my homemade pizzas***

Recently I did a post on my IG account about homemade pizza.  I wanted to share a little more about how we make our homemade pizzas and what we are doing with Friday pizza nights currently.

First of all, with all the COVID-19 going on and trying to support our local businesses we really wanted to make sure we were being involved in that.  We wanted to model wise spending to our kids, but also modeling how to help out as well.  We switched gears on our weekly Friday night pizza nights.  Instead of making our homemade pizzas we added ordering pizza from our local pizza place. However, instead of spending money each week on eating out, which is not something we could afford prior to COVID-19, we adopted a combo.

We make a couple of homemade pizzas AND we order a pizza.  We might not be spending a lot, but we are contributing what we can to help support our local businesses.  We also try to support another food chain once a week or once every other week as well.

SO, how do we make our homemade pizzas?  Well I've used a couple different recipes throughout the years.  The most current one is pretty simple, although it does call for yeast and I know that is pretty low or scare at the moment.  But, if you have some in your cabinet, you can use the following recipes.  

If you don't have any yeast, you can check out this yeast-free pizza crust recipe from
A Beautiful Mess. 

This first one was given to me by a friend a few years ago.  It's the one I have been using most currently and I like it because it's so simple.  It's great for needing make a quick pizza crust. 

1 C whole wheat flour 
1 1/2 C white flour 
1 tsp garlic salt 
Lots of oregano/italian seasoning/basil 
1 C warm water 
2 tsp yeast 
2 Tbsp Olive oil

Mix and knead all ingredients together let it sit for 5 min. 
Roll dough out into pizza shape
brush with garlic salt/oil 
stab holes in dough
par bake @ 425-450 for 5 min. 

Add sauce, cheese, toppings and bake @ 425 for 15 min. 
ENJOY!! 


This second one, I found on Pinterest years ago.  I am sharing this one because not only does the author of this blog share the recipe, but they also show how to make your pizzas a head of time and freeze them, so you have your own homemade frozen pizzas on hand.  This was such a huge time and money saver for me.  I would take a day and make a bunch of pizzas and freeze them for the month.  I was so appreciative of this post, I hope it can help you too. 

Homemade pizza Storage by The Good Ship Lollipop 

Pizza dough recipe by: The Good Ship Lollipop 


Pinterest