Thursday, August 24, 2017

Preschool: Letter Art

Last year I started working with my 4 year old on letter crafts.  Before that we just were learning letters, with a few crafts here and there.  However, last year I did more crafts and came up with a list of my favorite letter crafts all the way from A-Z.  I like to try and do crafts that take limited supplies, or that I can substitute what I have so I hope these help you with your letter crafts too.


Supplies: 

Construction paper 
Glue sticks 
Scissors
Ribbon 
Googly eyes (optional, see substitute option at the end of the post) 


Letter A is for Alligator: (No Time for Flashcards)

Letter B is for Bee: (No Time for Flashcards)
Here is how my 3 year old's B turned out:


Letter C is for Caterpillar: (Pinterest)
                   (Tie in with the very hungry caterpillar book)
Here is my 3 year old's C:


Letter D is for Duck: (From ABCs to ACTs)
Letter E is for Elmo: (School Time Snippets)

Letter F is for Frog: (Crystal and Co)
Here is my 3 year old's F:


Letter G is for Grapes: (From ABC to ACTs) / Giraffe (From ABCs to ACTs)
Letter H is for Horse: (Miss Maren's Monkeys)

Letter I is for Ice Cream: (Life as Mama)
Here is my 3 year old's I:


Letter J is for Jelly Fish (A Happily Ever Crafter)
Here's her J:


Letter K is for Kite (A Happily Ever Crafter)
Letter L is for Ladybug (The Iowa Farmer's Wife)
Letter M is for Mouse (The Measured Mom) 
Letter N is for Nest: (The Measured Mom)
Letter O is for Octopus: (No Time for Flashcards)

Letter P is for Penguin: (Rockabye Butterfly)
Here's her P:


Letter Q is for Quail (Rockabye Butterfly)
Letter R is for Rainbow (The measured Mom)

Letter S is for Snake: (I can teach my child)
Here's her S:


Letter T is for Tiger (Preschool Crafts) 

Letter U is for Umbrella (No Time for Flash Cards) 
Here's her U:


Letter V is for Vase (The Princess and the Tot) 
Letter W is for Watermelon The Princess and the Tot) 
Letter X is for Xylophone (Pinterest)
Letter Y is for Yarn: (East Coast Mommy Blog)
Letter Z is for Zebra: (Crystal & Co)


Some of them I follow exactly, while others I have to substitute things for items I don't have or want to buy.  Here are some of my substitute options.

Substitutes:
Eyes --- construction paper circles
Stickers --- construction paper cut outs 


This post includes affiliate links, which means if you click on the link I get a portion of any sales at NO COST to you.  See my disclosure page for more details. 


Thursday, August 10, 2017

Smoothie 2.0

How to Stock-Up & Save on Spinach


Awhile back I posted about how to save on making smoothies, you can check out that post here. Well I also wanted to make them more healthy.  I started adding spinach to each one; however, even when having a smoothie every morning, I couldn't get through a bag before it'd go bad, I don't like spinach.  Then one day I was talking to my mother-in-love and she told me my sister-in-love had a great idea.  She blends up as much spinach as she can with some water and adds it to an ice cube tray.  Then she freezes it.  That way she has the spinach already to pop in the blender with the frozen fruit and other ingredients.

I took it a step further and started stocking up on spinach when it's on sale, and taking some time to blend it all up, pour in ice cube trays, freeze and pop in freezer bags so they're ready to go for my smoothies.  Plus I got the spinach on sale and was able to take advantage of that for my smoothies.

Supplies: 
1. Blender 
2. Ice cube trays
3. Spinach 
4. Water 

Here's my step by step: 

1.  Add spinach leaves to the blender or food processor, I don't start with the whole bag, maybe about 1/3. Then add a little of the water.  I use about 1 1/2 cups/ bag of spinach but only add a little at a time.  You don't want to use too much, but you need enough to help the spinach blend up. 


2. Blend, I use the chop button in the beginning. 


3. It can take many times to get it started to blend, but once it does then it goes pretty fast.  I keep adding a little water and stirring it as I go. 


4.  Once it is pretty chopped up I start using the puree button as well and that helps it to blend more.


5.  Then I start adding more of the spinach.  At this point I've pretty much added all my 1 1/2 cups of water, so it's just adding the rest of the spinach a little at a time.  Like I said, once it's been blended the rest blends in pretty easily. 


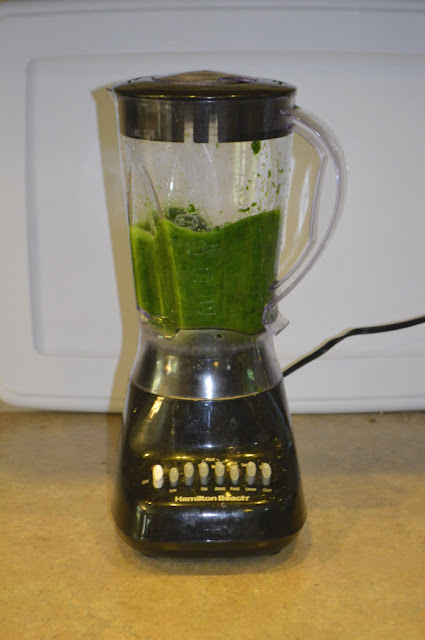
6.  This is what 1 bag of spinach looks like after it's been blended. 


7.  Finally pour into ice cubes trays and then once frozen, pop into freezer bags and you're ready to go.  You can have spinach for smoothies and not have to break the bank.  


This can also be done with kale or any other leafy veggie that you have in your fridge that's going to go bad before you use it.  Any extra leafy veggie to add to your smoothie is helpful and you save because you don't throw it out.

How are ways you save on making smoothies?


I had some cute little helpers, who also wanted to try the blended spinach.  I know, I could only think "Gross, really?" in my head.  But I let them.  It actually took 2 taste tests to be sure they didn't like it. :) But they are pretty cute! 


This post includes affiliate links, which means if you click on the link I get a portion of any sales at NO COST to you.  See my disclosure page for more details. 


Pinterest