Thursday, April 13, 2023

Newspaper Trashbags


A couple weeks ago I posted some life hacks.  One of the life hacks I talked about was making trash bags out of newspapers, from the blog Improvised Life.  If you missed it you can check it out here.  I wanted to take it a step further and try what Improvised Life does, only make it for my larger trash can in my girls' bathroom.   

These trash can liners are easy to make and are a great way to help out the environment. Instead of buying more plastic, you are reusing what you have.  So I figured if I can make it work for a small can, why not try a larger one?  

In order to do this, you will need 4 sheets of newspaper instead of just the 1 sheet. After that the process is merely the same, you just need to connect the 4 pieces.  

This post includes affiliate links, which means if you click on the link I get a portion of any sales at NO COST to you.  See my disclosure page for more details. 


Step 1: 

First take 2 sheets and staple the edges together.  To do this you need to first fold about an inch on each edge, then you can staple the edges together.  Staples break down, which is why I chose to use them.  Make sure to staple close together so you don't have gaps in your bag later. 


Step 2: 

Second, take the other two pieces of newspaper and do the same. 

Step 3:

Then, you will do the same with your two larger pieces of newspaper and connect them together. This can get a bit tricky as the edges have staples, so just watch as you fold. 


Step 4: 


Flip it all over.  Before you start the fold, you want to have the folded staple parts on the bottom.  


Step 5:

Start the folding process.  It is the same process as the smaller folding process.  It really does fold better than you think even though it's so much bigger.  Don't worry about making the lines crease tightly.  You can watch the video from Improvised Life here or you can follow along below with a step-by-step tutorial: 

Step 1: Place newspaper at a diagonal, then fold in half. 
Step 2: Fold the newspaper in half 
Step 3: Take the right corner and fold it over to the left side.  Make sure the bottom has a flat edge. 
Step 4: Flip over the newspaper and repeat step 3, just fold over the other left side to the right side. 
Step 5: Then take the flap and fold it into the pocket. 
Step 6: Flip over and repeat on the other side. 

One extra step for the larger newspaper bag that I've learned is to staple the sides together.  Where the corner kind of sticks out a bit, on the larger bag it's a lot more and so I just staple it to the side.  


That's it! Remember you can check out the youtube video posted on the Improvised Life post for a visual.


So far, I've been happy with this as a trash bag in my girls' bathroom.  But, if you want to help the environment by switching from plastic and don't want to make a newspaper trash bag, check out the Amazon link at the bottom for another option.  I use these green bags for  my kitchen trash.  I'll be honest, I tried the larger newspaper bags for the kitchen trashcan and let me just say, they don't work well for large amounts of mess.  But, I really like these green bags for the kitchen, they work great!  If you can buy them in bulk, it makes the cost a lot less and closer to the plastic you already get! Plus, you can split the bigger bulk size with a friend & it helps the cost! 


I hope you were inspired to find a way to be a little more environmental.

~ Blessings 


Thursday, April 6, 2023

Indoor Garden Savings


    Starting your summer garden indoors can add up fast. But, did you know there are many ways to start it without having to buy a lot of extra supplies? There are so many items around your house or as you go out and about that you can use to start your indoor garden, without having to buy specific items.  

Let's talk the containers.  Instead of buying the seedling pod packs, there are so many things you can use instead: 

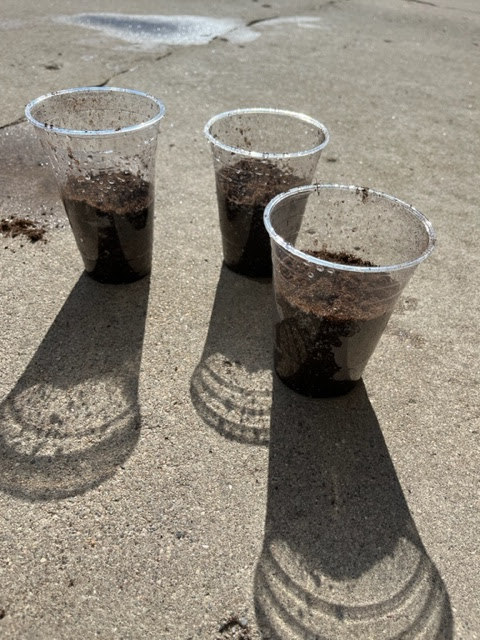
1.  Coffee Cups: 

Start by saving those coffee cups.  You can use either plastic or the paper.  The paper will break-down so you can plant it right in the ground, the plastic ones you'd need to replant the plant in the ground.  


2. Egg cartons

Egg cartons make the perfect seed starter.  They also are able to break-down so all you have to do is just replant them into the ground.  One tip for these is, I would mist the cartons when you are ready to plant them in your garden, that way they tear apart easily. Also, depending on what you start in the egg cartons and how soon you start them; you may need to replant them into something bigger before you plant in your garden.  But, with the egg carton you can just place in larger container as it will break down.  


3. Milk jugs: 

Last year I used a couple milk jugs for lettuce.  I ended up starting them inside too soon, but it worked out as I had a big enough container for the lettuce to mature inside! 

4. Coffee Canisters: 

Coffee canisters make great pots for plants, but you can also use them for seed starting as well.  The plants would need to be re-potted when you place in your garden.  

5. Toilet paper rolls 

Did you know you can use toilet paper or paper towel rolls to start seeds?  Check out this post by Pam's Greenhouses for more of a how-to! 


Finally, make sure to keep those seeds moist, a great way to do this is to place a container over them to help keep the moisture in.  Any of those plastic oven bake covers you get with the tin foil baskets work great! Or anything else in your recycling! 


There you have it! Rather than buying containers for your seeds you have a few ways to try and save instead.  Good luck! Please share your photos too! 

Have a great week! 

Inisha 

Thursday, March 30, 2023

Spring/Summer Clothes


    It's almost April 1st, and in our household that is about the time we start looking at our Spring and Summer clothes.  In the last couple of years I started having a note in my phone on April 1st as a reminder to start taking inventory of what we have for the Spring and Summer as well as make a list of the items we will need.  It's so easy to go and shop for a bunch of new items that we might only need a handful of.  On the flip side, it's also easy to assume I have what we need in our totes from previous years; that's what I kept doing and unfortunately it didn't end well.  At the time, my 2nd grader was starting to care more about what she was wearing; and not having what was needed or have items to match her sisters if she wanted to, caused some problems.  With that, I made sure to have time to go through our clothes before it got too warm.  For our area that's about April.  We always have one or two shorts on hand from the previous year that still fit just enough for if we need them in a crunch in March, but by April we'd need more.

With that, here's my tips for switching over the next season.  

First: Go through those storage totes 

Like I said, it's easy to just run out to a local store and buy what you'd want for the next season, but going through what you have is so helpful.  Don't have storage from the year before, make sure you check out my post on how I save from kid to kid so that you can start doing so after the Summer. You can check that out here: Clothing Switch

Second: Make a list 

So back to going through what you have.  After my girls have sorted through what we have and what fits I make a list. I list how many shorts, shirts, jackets, shoes; anything else my girls would need that still fit.  I like to use my phone notes for that, I just make a list for each kiddo.  

Third: What will we need 

This can change each year.  For example, one of my girls is just starting to like wearing jean shorts.  So we may talk about how many jean shorts she'd like vs. athletic shorts.  This also will depend on what she's active in for the summer.  Another one of my girls prefers capris, while my 3rd prefers dresses. So what they need may vary.  But, I like to make a estimated list of what we need so I know when we go shopping.  

And that's it!  It really does help to know what you already have and what you'd like to get, before you enter the store.  There are so many times before that I would blank on what they had, or get items I thought we needed and really we didn't. I hope this helps you as you might be transitioning to warmer weather in your area as well. 


Thursday, March 23, 2023

Easter Gift Ideas


Easter is almost here!! With that comes another holiday to get gifts for.  I love Easter, I love Easter because without Easter there would be no way for me to be redeemed.  However, Easter just like other holidays has become a time for lots of gifts, treats and spending money.  Why? Why do we let these special holidays get so wrapped up in the gifts and the spending? Well, I'm here to help you out with minimizing that spending this year.   Plus give you a way to bridge the gap between what Easter is about and gift giving, if you are looking for that. 

Think of the number 3. Yes 3.  3 simple gifts = the 3 days Jesus was in the tomb.  I love to tie my kiddos' gifts to the real meaning of Easter as well.  Any chance to talk and discuss about why we are celebrating Easter. Plus, three is a simple number. 

We have changed over the years what we give our girls, but one thing always stays the same, 3 items. Here are some of the items we've gotten over the years: 

1. Book (this one stays pretty consistent). As the girls get older this has turned into a devotional one year, or a special Bible another year. But, we always get them a book of some sort.  Christianbooks.com has great sales right before Easter, or Thriftbooks.com is another great one to go through as well.  


2. Treats: We always do treats.  We don't go over board with them, they are generally small. Some of our favorites include: 

Fruit snacks, a few pieces of candy in a egg or two, puff corn in a small bag or any other small snack. 


3. Small, simple gift: my husband and I are very into gifts that get used up, rather than another toy to take up space. Some ideas we've done: 

jump ropes, bubbles, gift card to a favorite store or for a coffee date with mom or dad, bath bombs, & coloring books.  These are just a few of what we've done in the past. 


One more thing we do that helps save money, we reuse our Easter decor each year.  From the girls Easter baskets, the plastic eggs, all the way to the green grass.  I save everything and re-use it for the next year.  I've only bought plastic eggs two times in the last eight years.  My girls also love being able to know who's basket is whose because we've been using the same baskets for the last few years. These are just small things that add up over time.  

I pray that these tips help you to stress less and enjoy this season, but also be able to share in the joy of giving as well. 

Blessings ~ 
Inisha  


Pinterest